42 D-303222 PowerMaster-10 / PowerMaster-30 Installer's Guide
3.4.5 Replacing a Device
Use this option to replace a faulty device that is enrolled in the system with another device of the same Type
number (i.e. same first 3 digit of the ID number – see section 3.4.2.A) while keeping the same configuration of
the original device. There is no need to delete the faulty device or to reconfigure the new device. Once enrolled,
the new device will be configured automatically to the same configuration of the faulty (replaced) device.
To Replace a device proceed as follows:
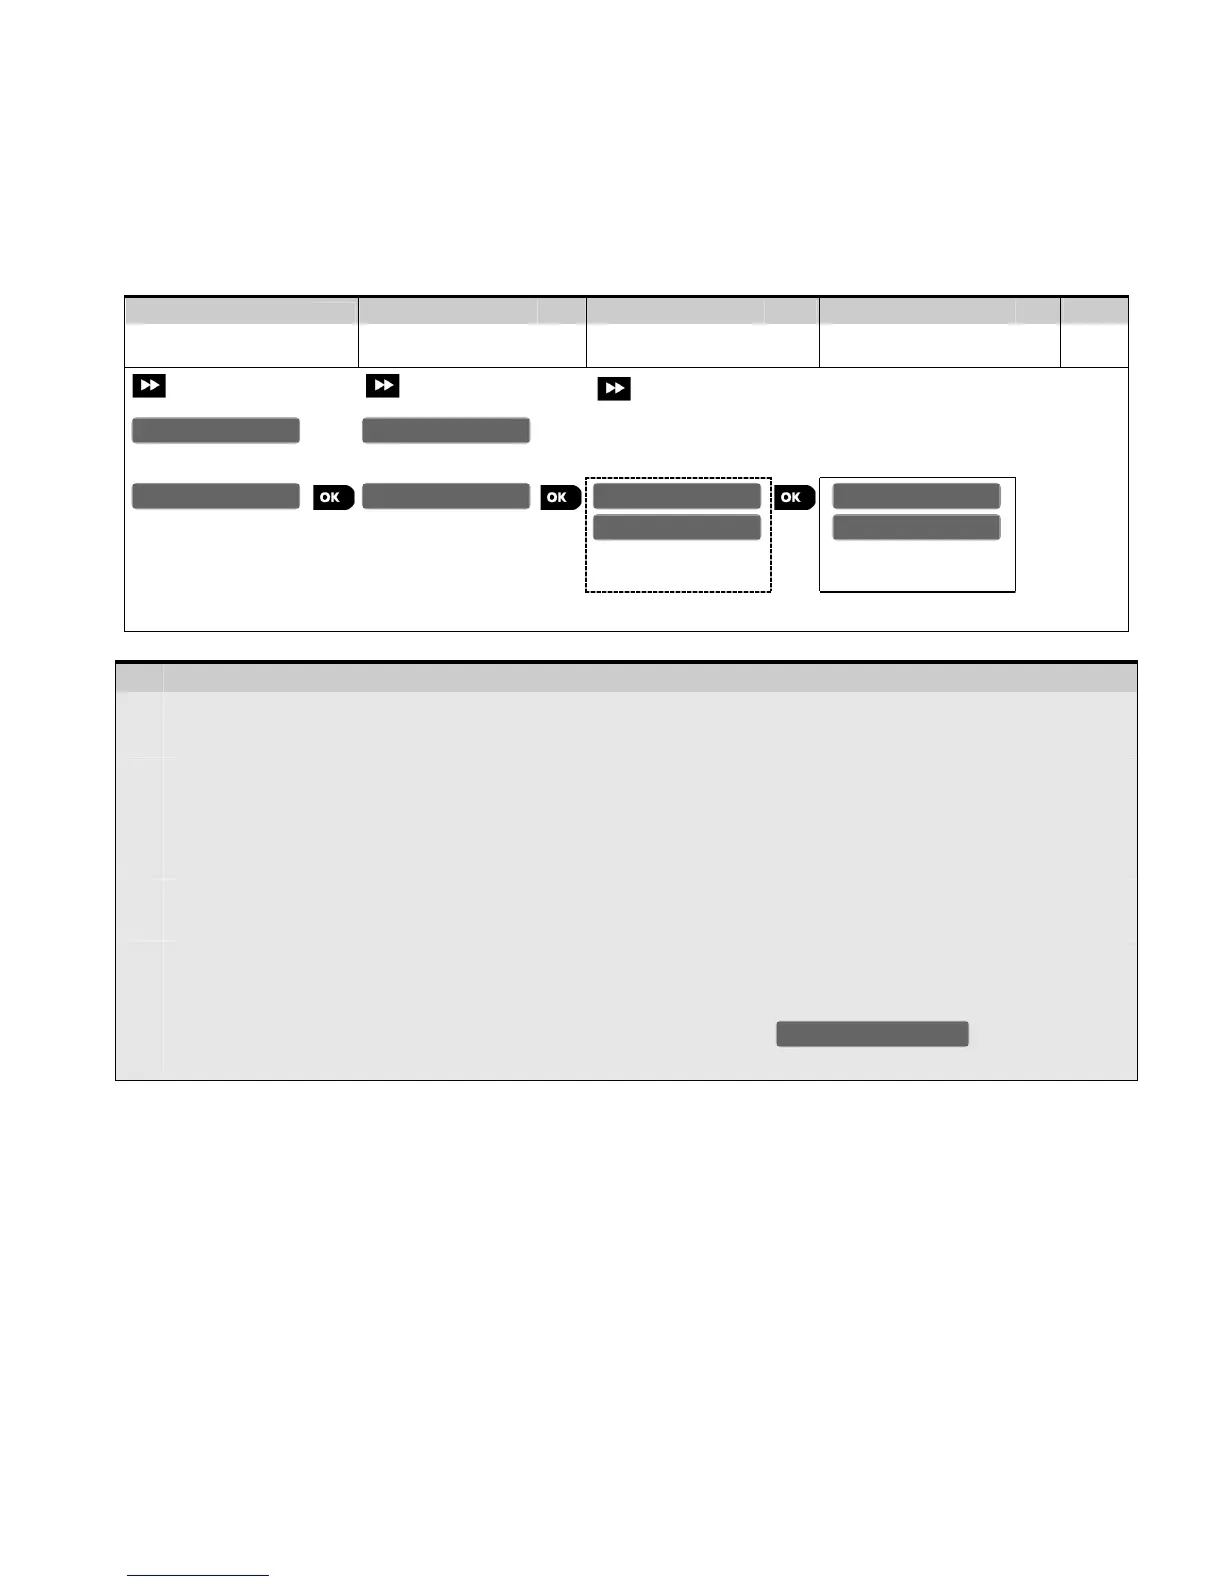
Step 1
– Replacing a Device
[1]
Enter the Installer Menu, select the "02.ZONES/DEVICES" option (see section 3.2) and then select the
"REPLACE DEVICES" option.
[2]
Select the respective Group of the device you wish to replace i.e. "CONTACT SENSORS", "MOTION SENSORS",
"GLASSBREAK SENS.", "SMOKE SENSORS", "CO SENSORS", "GAS SENSORS", "FLOOD SENSORS",
"TEMPERATURE SENS", "TAGS(Proximity)", "KEYFOBS", "KEYPADS", "SIRENS" and "REPEATERS" etc. For
example, "KEYFOBS".
[3] Scroll the Device Group , identify (by zone and/or ID number) of the exact device you wish to replace, for
example: "K03: Keyfob > ID No. 300-0307".
[4] From here on the process is the same as the enrollment process of a new device. To continue, refer to
Section 3.4.2 "Adding a Wireless Device" Part A Step 2.
If you try enrolling a new device of a different type than the replaced device, the PowerMaster-10 /
PowerMaster-30 will reject the new device and the display will read . When done, the
display will show the next device of the same type (i.e. "Keyfob").
3.4.6 Defining Configuration Defaults for "Device Settings"
During the enrollment procedure each new device is configured with Default Parameters that define its
functionality behavior such as "alarm LED (on or off), sensitivity (High or Low) etc. As shown in section 3.4.2,
these parameters can be modified (customized) during the enrollment process, or later on as explained in
section 3.4.4.
For maximum convenience and time saving the PowerMaster-10 / PowerMaster-30 enables you to define the
Default Parameters used during enrollment and to change them whenever you wish so that new devices
enrolled into the system will be configured automatically with the default parameters you want without the need
to modify the configuration of each new enrolled device. You can use a certain set of defaults for certain group
of devices and then change the defaults for another group.
IMPORTANT! Devices that were already enrolled in the PowerMaster-10 / PowerMaster-30 system before the
defaults have been changed will not be affected by the new default settings.
ENTR ID:300-XXXX
ENROLL NOW or
ID No. 300-0307
K03:Keyfob KEYFOBS
CONTACT SENSORS
REPLACE DEVICES
02.ZONES/DEVICES