– Changing Defaults
[1]
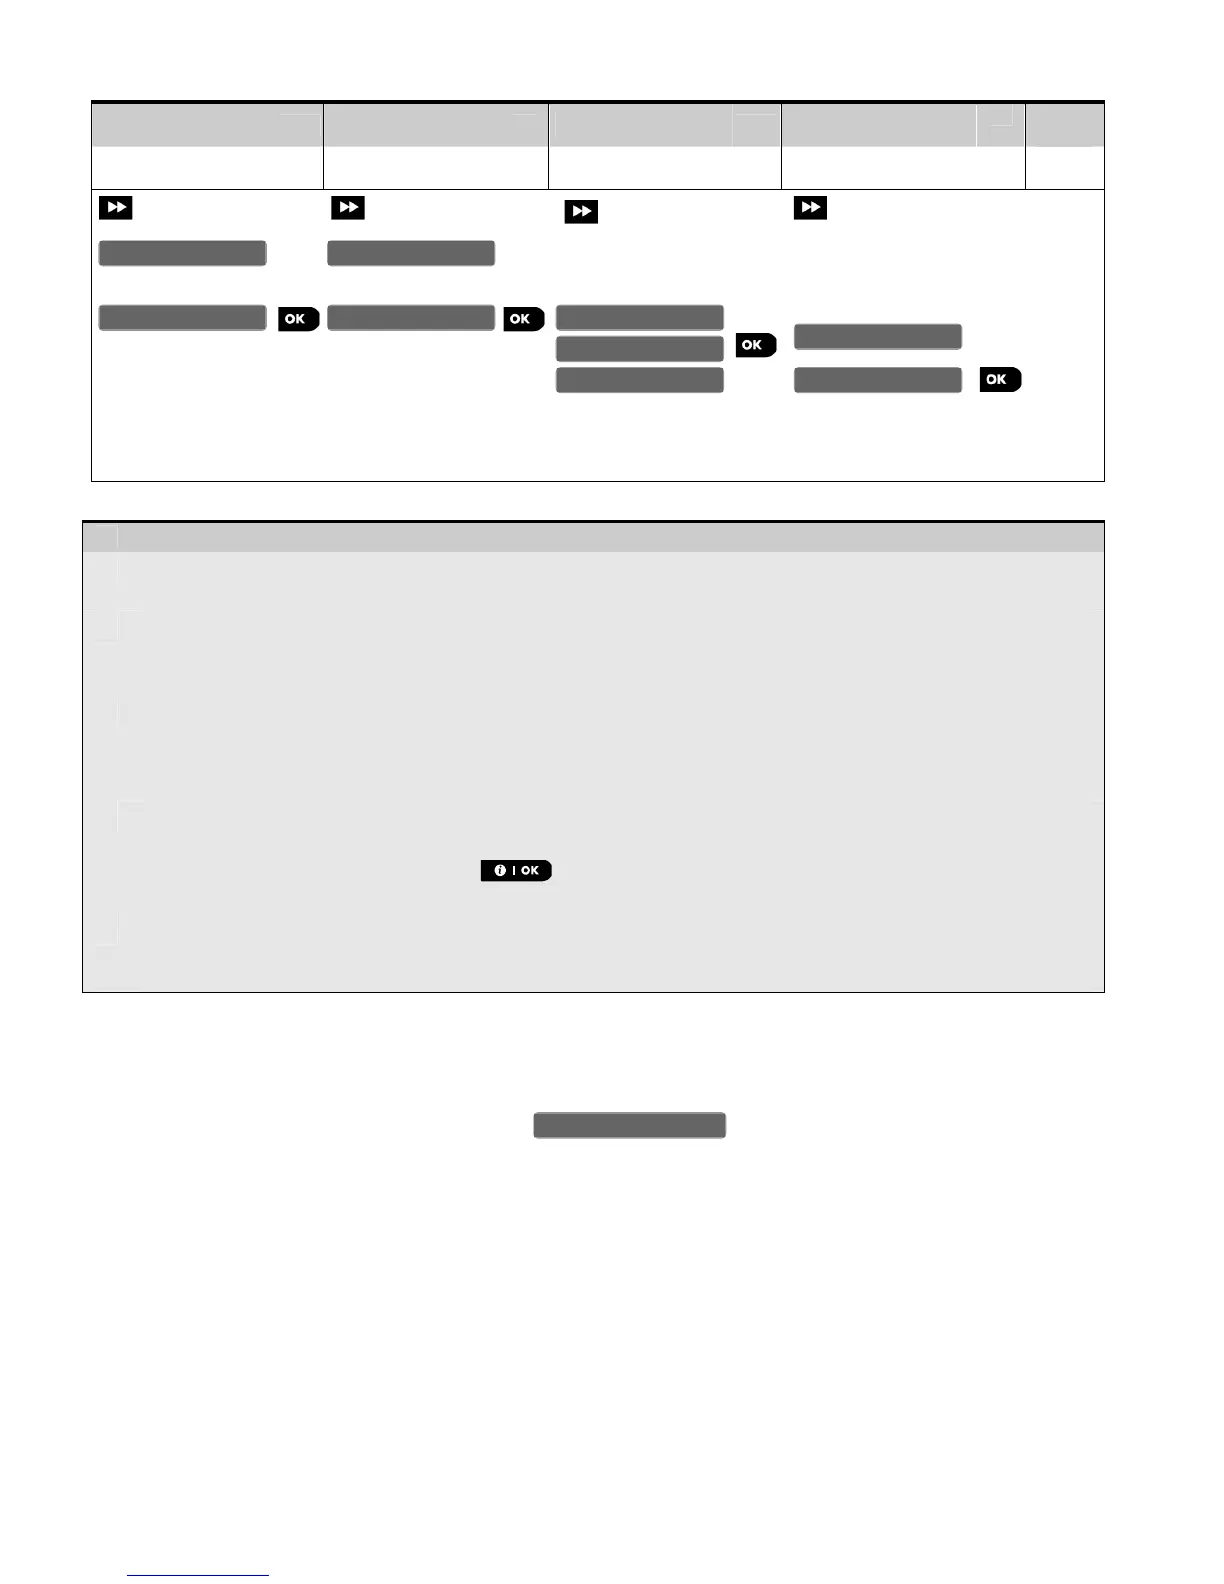
Enter the Installer Menu, select the "02.ZONES/DEVICES"option (see section 3.2) and then select the
"DEFINE DEFAULTS" option.
[2]
Select the respective Group of the device you wish to define its defaults i.e. "CONTACT SENSORS", "MOTION
SENSORS", "SMOKE SENSORS", "TEMPERATURE SENS", "KEYFOBS", "KEYPADS" and "SIRENS". For example,
"MOTION SENSORS".
[3] Scroll the parameter list of the Device Group and select the Default Parameter you wish to change, for
example: "Event Counter".
The list combines the parameters of all devices in the group, for example, the parameters of all types of
Motion sensors.
[4]
In the example, the existing default setting of the "Event Counter" for enrolled motion sensors was "Low
Sensitivity" (marked with
) . To change to it "High Sensitivity", scroll the menu until the display shows
"High Sensitivity" and press the button. The new default for the Event Counter parameter
setting of Motion Sensors enrolled from now on will be "High Sensitivity".
[5] The new default does not affect motions sensors that were already enrolled before the change was made but
only new motion sensors that will be enrolled in the PowerMaster-10 / PowerMaster-30 after the change is
performed.
3.4.7 Downloading Configuration Settings into Devices via Radio
When exiting the "Installer mode" the PowerMaster-10 / PowerMaster-30 panel communicates with all devices in
the system and updates them with the changes that have been performed in their "Device Settings" configuration.
During the updating period the displays indicates wherein the number (for example, 018)
is a countdown of the remaining number of devices yet to be updated (for example, 18 devices in the displayed
screen).
3.5 Control Panel
3.5.1 General Guidance – "Control Panel" Flow-Chart & Menu Options
The CONTROL PANEL menu enables you to configure and customize the operation of the control panel
according to your personal preferences. The CONTROL PANEL menu provides you with variety of configurable
features and parameters divided into several Groups, each dealing with certain aspects of the system
operations as follows (see detailed list in Step-2 of the chart below):