wallPen E2 | User Manual
56
Software
We provide standard profiles for the processor but you are certainly free to generate
and share your own profiles. More background information about ICC profiles can be
found in the Chapter "Color Management | ICC Profiles" and also in Wikipedia
(https://en.wikipedia.org/wiki/ICC_profile).
b - CMYK Input Profile - Use the ICC profile here that defines the color space of the
imported images in CMYK color space. The definition is optional, since TIF files in
CMYK color space can also be printed native, but recommended for best matching
color outcome.
c - RGB(A) Input Profile - Use the ICC profile here that defines the color space of
imported images in RGB and RGB(A) color space. If a graphics file is defined as an RGB
image, it must be converted to CMYK within the processor. For this reason it is
necessary to always define a suitable RGB ICC input profile and a suitable CMYK ICC
output profile for all images in RGB color space format. TIF files may be defined in
CMYK or RGB color space, PNG files are always in RGB color space.
d - Output profile - Defines the profile to best match any input color to the available
printer color space. You may download standard ICC output profiles from the
"Knowledge Base / Download"-Section on https://service.wallpen.com but you are also
very welcome to share own profiles you may have measured in and created on
different substrates and environments for the public use of other wallPen users.
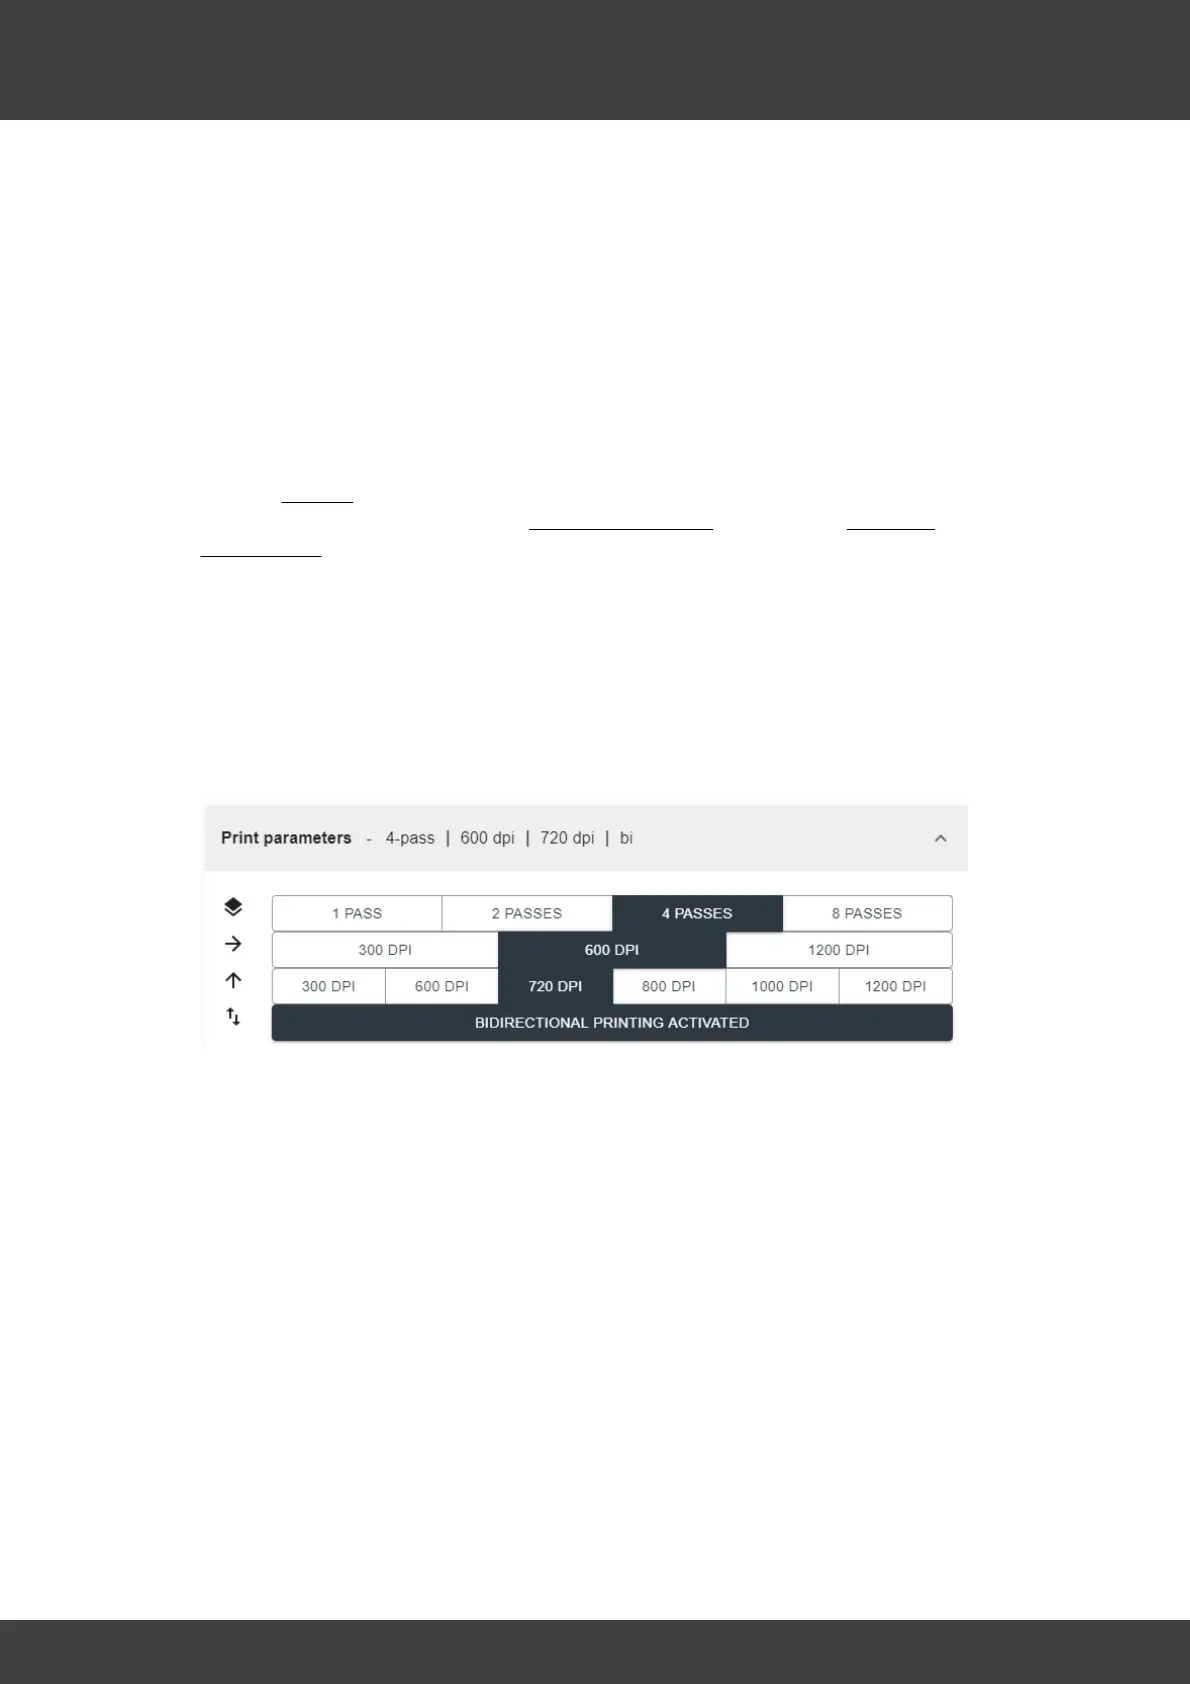
G - Print Settings
a - Multi Pass Printing - Select whether the design is to be printed in one, two, four or
eight pass mode. This setting has a significant effect on the quality and speed of the
print. The fewer passes, the faster, but also "coarser" the print result. The more passes,
the slower and more "homogeneous" the print result will be. Many motifs are printed in
the 4-pass, but often also in the 2-pass. Often texts and graphics printed with less
passes look sharper and cleaner than with many passes. Gradients, images and larger
color areas often require more passes to achieve a more "homogeneous" look. Test
the effect of this setting on different motifs over time. This will give you a very good
feeling of which motifs have the best effect with which setting.
b - Horizontal Resolution - Specify whether to print sideways with the 300 DPI (native
resolution of the printheads), or whether to print in an intermediate step at another 300
DPI to double the resolution to 600 DPI. The 600 DPI setting is mainly used here, but
you are free to work with the lower or even higher resolution (1200 DPI) if your project
requires it. Test the effect of this setting on different motifs over time. This will give you
a very good feeling of which motifs have the best effect with which setting. Note that
different settings also require different color intensities and ICC profiles because the ink
application is different.