October 2012
4-26
ColorQube 8570/8870 Service Manual
REP 2.3
Revised, 3rd Revision - Xerox Internal Use Only
Repairs and Adjustments
Replacement
Follow these steps to install the replacement Printhead.
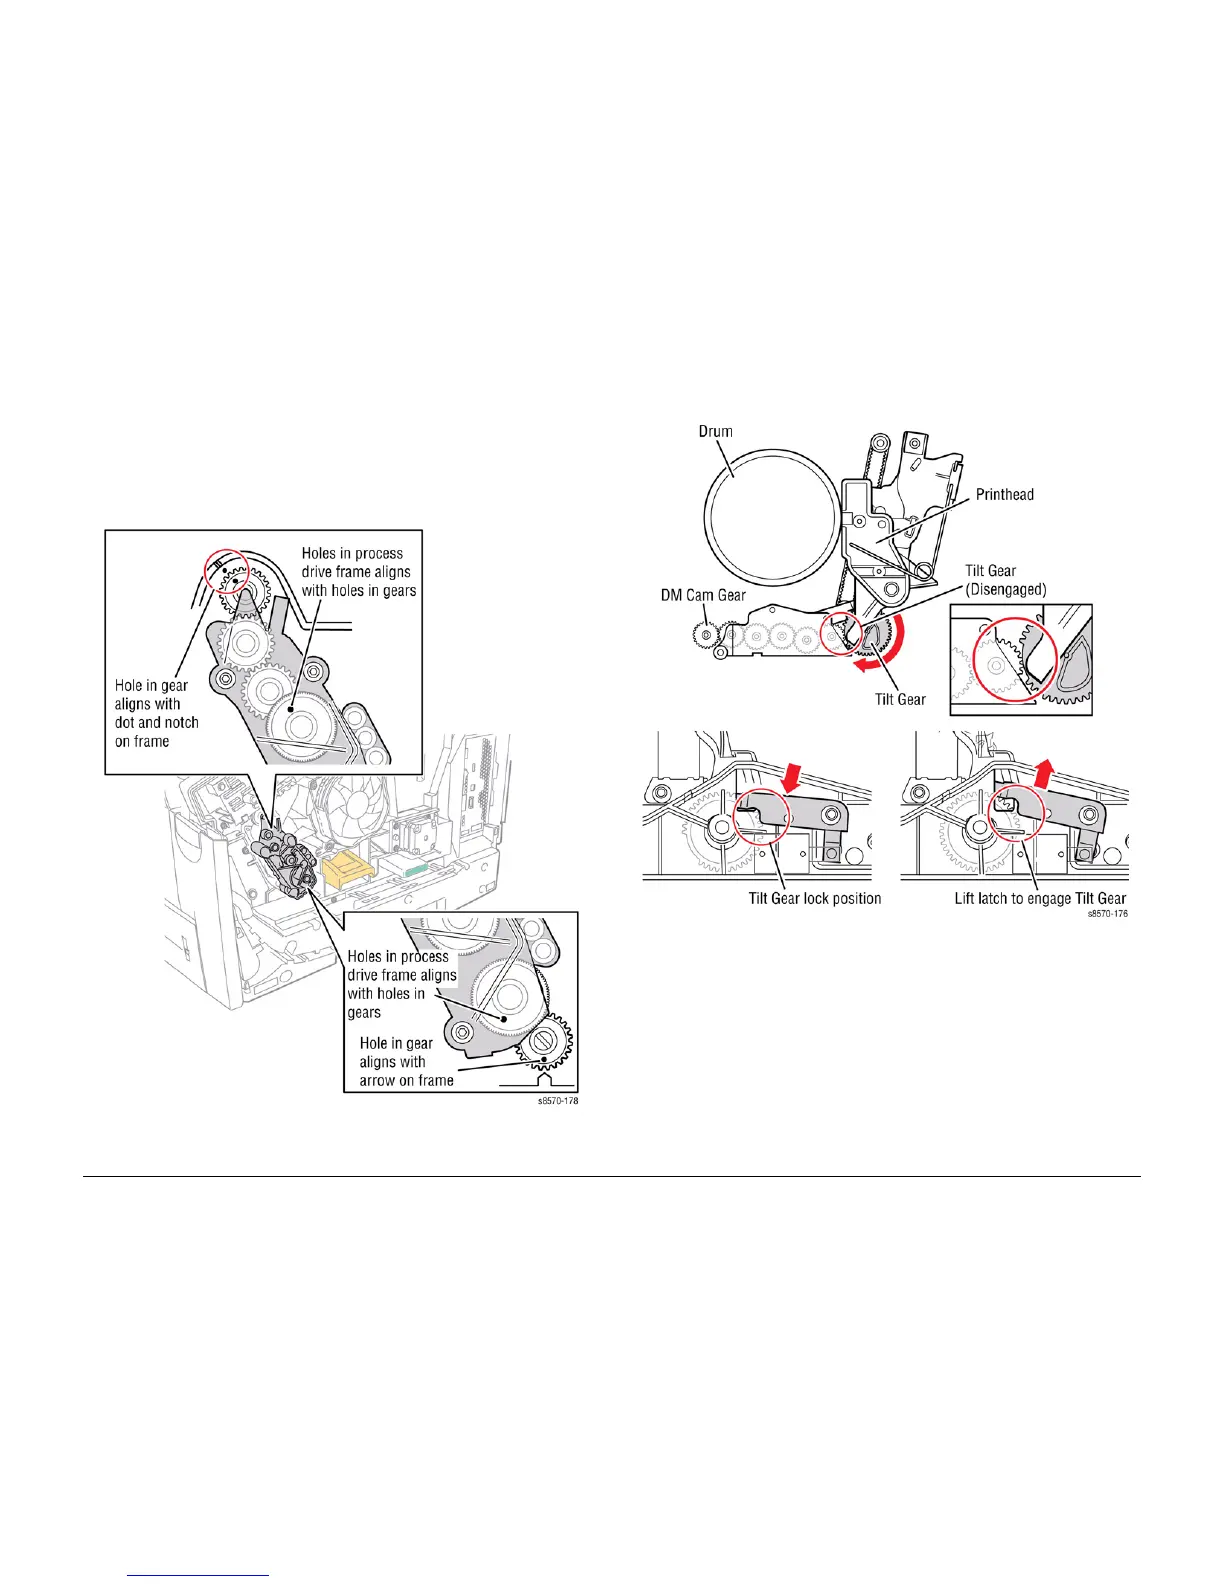
1. Set the Head Tilt Gear to its home position by performing the Homing the Printhead For-
ward to Print Position procedure (ADJ 1.2).
NOTE: Be sure the gear (under the Process Drive) is at 6 o’clock position. Pressing down
on the DMU handle will force the DM cam gear to its 6:00 position. Hold it in this position
while you install the Process Drive Assembly.
Figure 19 Gear Alignment
NOTE: Be sure the Head Tilt Gear aligns with the Head Tilt Drive Gear (missing tooth fac-
ing forward).
Figure 20 Head Tilt Gear Indicator
2. If the Wiper Blade is not at its lowest position, rotate the Wiper Drive Gears to lower the
Wiper Blade to the bottom of its travel.
3. Rest the Printhead in the Cradle Notches and attach the 2 ribbon cables. Be sure to fully
insert and then lock the ZIF cable.

 Loading...


