October 2012
6-35
ColorQube 8570/8870 Service Manual
Electrical Troubleshooting
General Troubleshooting
Xerox Internal Use Only - Revised, 3rd Revision
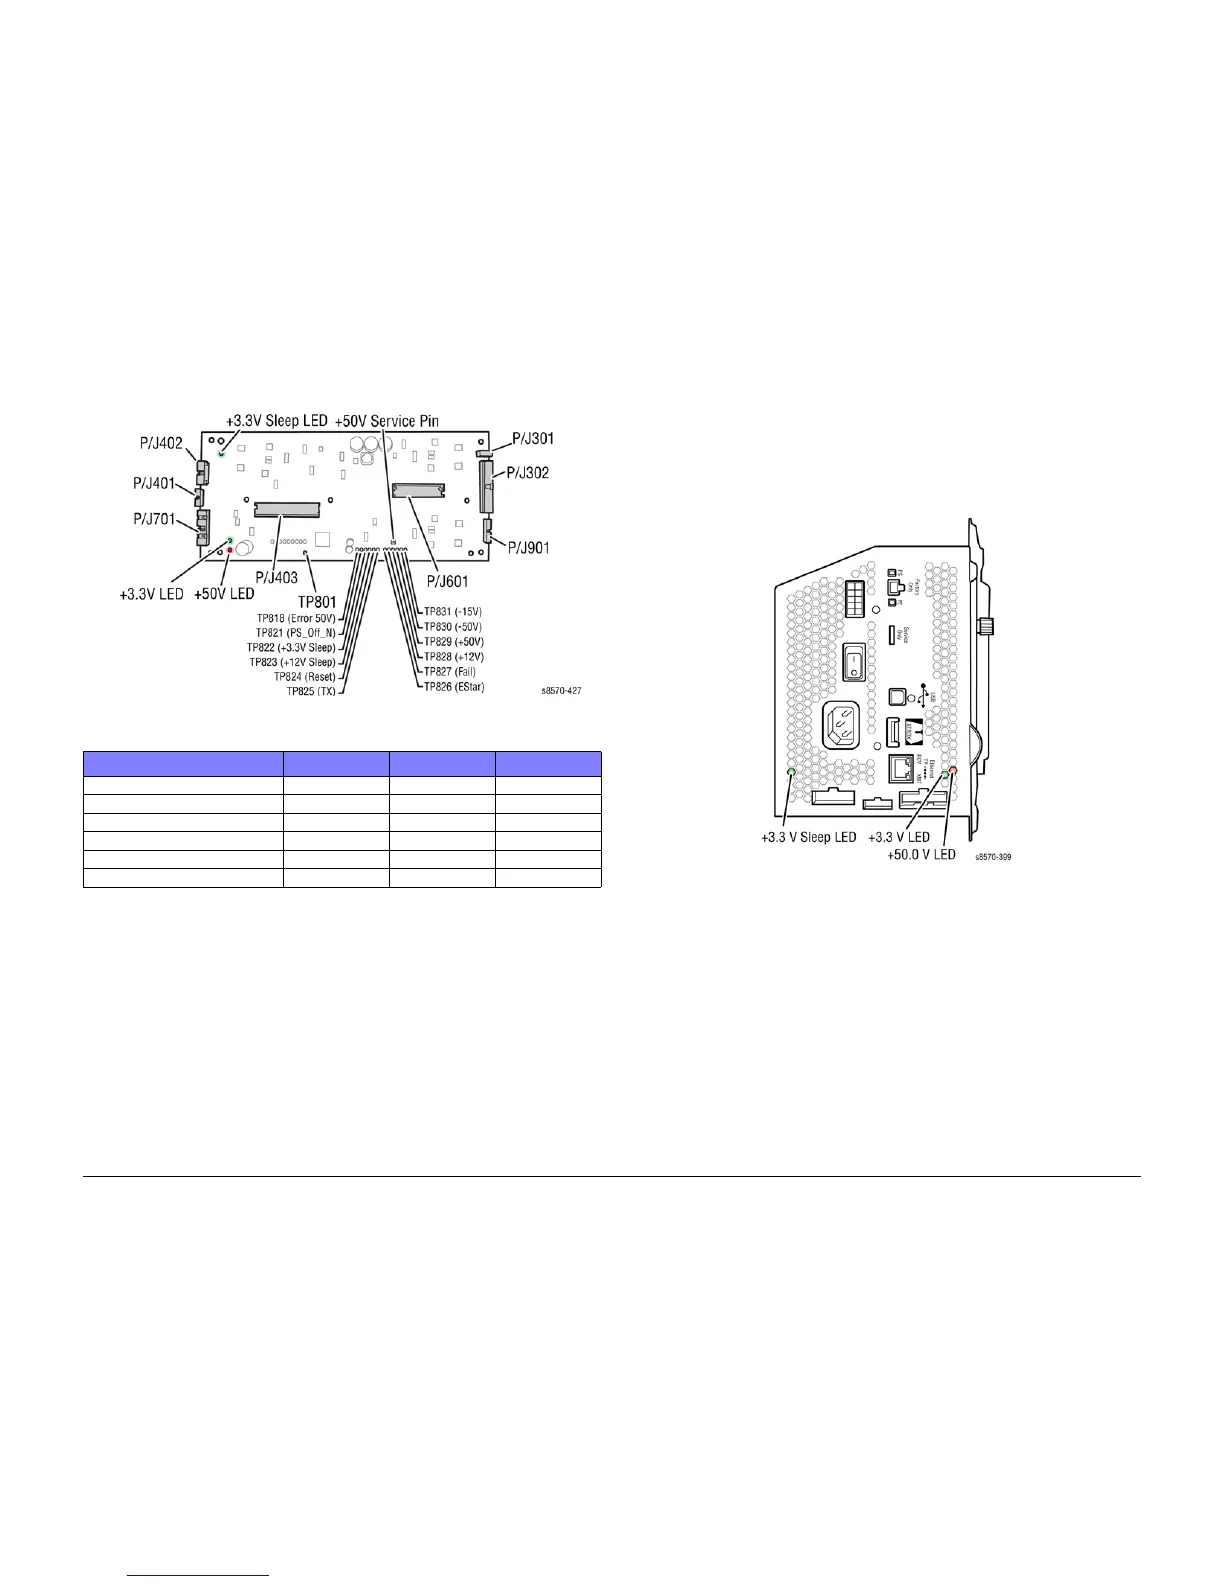
2. Open the rear door of the Electronics Module and test for voltage at the test points on the
bottom Board (Figure 14). Table 4 lists the test points and voltage ranges to be expected:
Figure 14 50V Test Point
Fault Message Displayed on the Control Panel
The printer has detected a fault condition. See Fault Messages and Codes Troubleshooting in
Chapter 2 (Fault Messages and Codes) for definitions and solutions.
Blank Display and the PS and PE LEDs are Flashing a Fault Code
Printer has detected a fault condition but cannot display a message on the LCD. Some portion
of the chain of devices used to drive the LCD may be defective since an fault message is not
displayed. See Fault Messages and Codes Troubleshooting in Chapter 2 (Fault Messages and
Codes) for definitions and solutions.
Printer Fails Power-Up: 3.3 V Sleep LED Does Not Illuminate
The printer is not receiving proper AC or a short circuit is present on the +3.3V, +3.3V_SLEEP,
or +12V_SLEEP supply.
CAUTION
Use caution with hazardous voltages when diagnosing AC problems. The 3.3 V LED is located
inside the Electronics Module and must be observed through the vent holes close to the AC
power switch, see Figure 15.
Figure 15 Electronics Module Power LEDs
1. Inspect the power cord.
a. Verify AC outlet voltage and current capacities are within specifications.
b. If necessary, move the printer to a different outlet and retest.
2. Transient on AC line tripped protective circuitry in printer power supply. Cycle power
switch to the printer to reset protective circuits in the Power Supply.
3. An open F2 can result in a dead Power Supply if it is restarted. Verify that F2 is good.
Refer to Testing F2 and F3 in the Electrical Troubleshooting. If F2 is open, verify there are
no short circuits in the Inkloader, Reservoir, or Jetstack Heaters (line to neutral or line to
Earth).
4. Short Circuit on 3.3V or +12V_SLEEP Supply. ESD damage to the printer may occur if
static electricity is discharged to printer electronics.
a. With the power cord connected, touch the metal Electronics Module to discharge
any static electricity.
b. Turn off the printer.
Table 4 Test Points and Voltage Ranges
Test Point/ Description Min Nom Max
J802: +50V Service Pin 47 49 52
TP830: -50V -47 -49 -52
TP828: +12V 11 12 13
TP831: -15V -13 -15 -17
TP823: +12V_SLEEP 11 12 13
TP820: +3.3V 3.0 3.3 3.6

 Loading...


