PREMIUM E-MOBILITY
YD-EM279
30
1
A
3.2.9 Disassembly and installation of horn
3.2.9.1 Service tools
●
Cross screwdriver
●
Hex wrench M10
3.2.9.2 Disassembly and installation
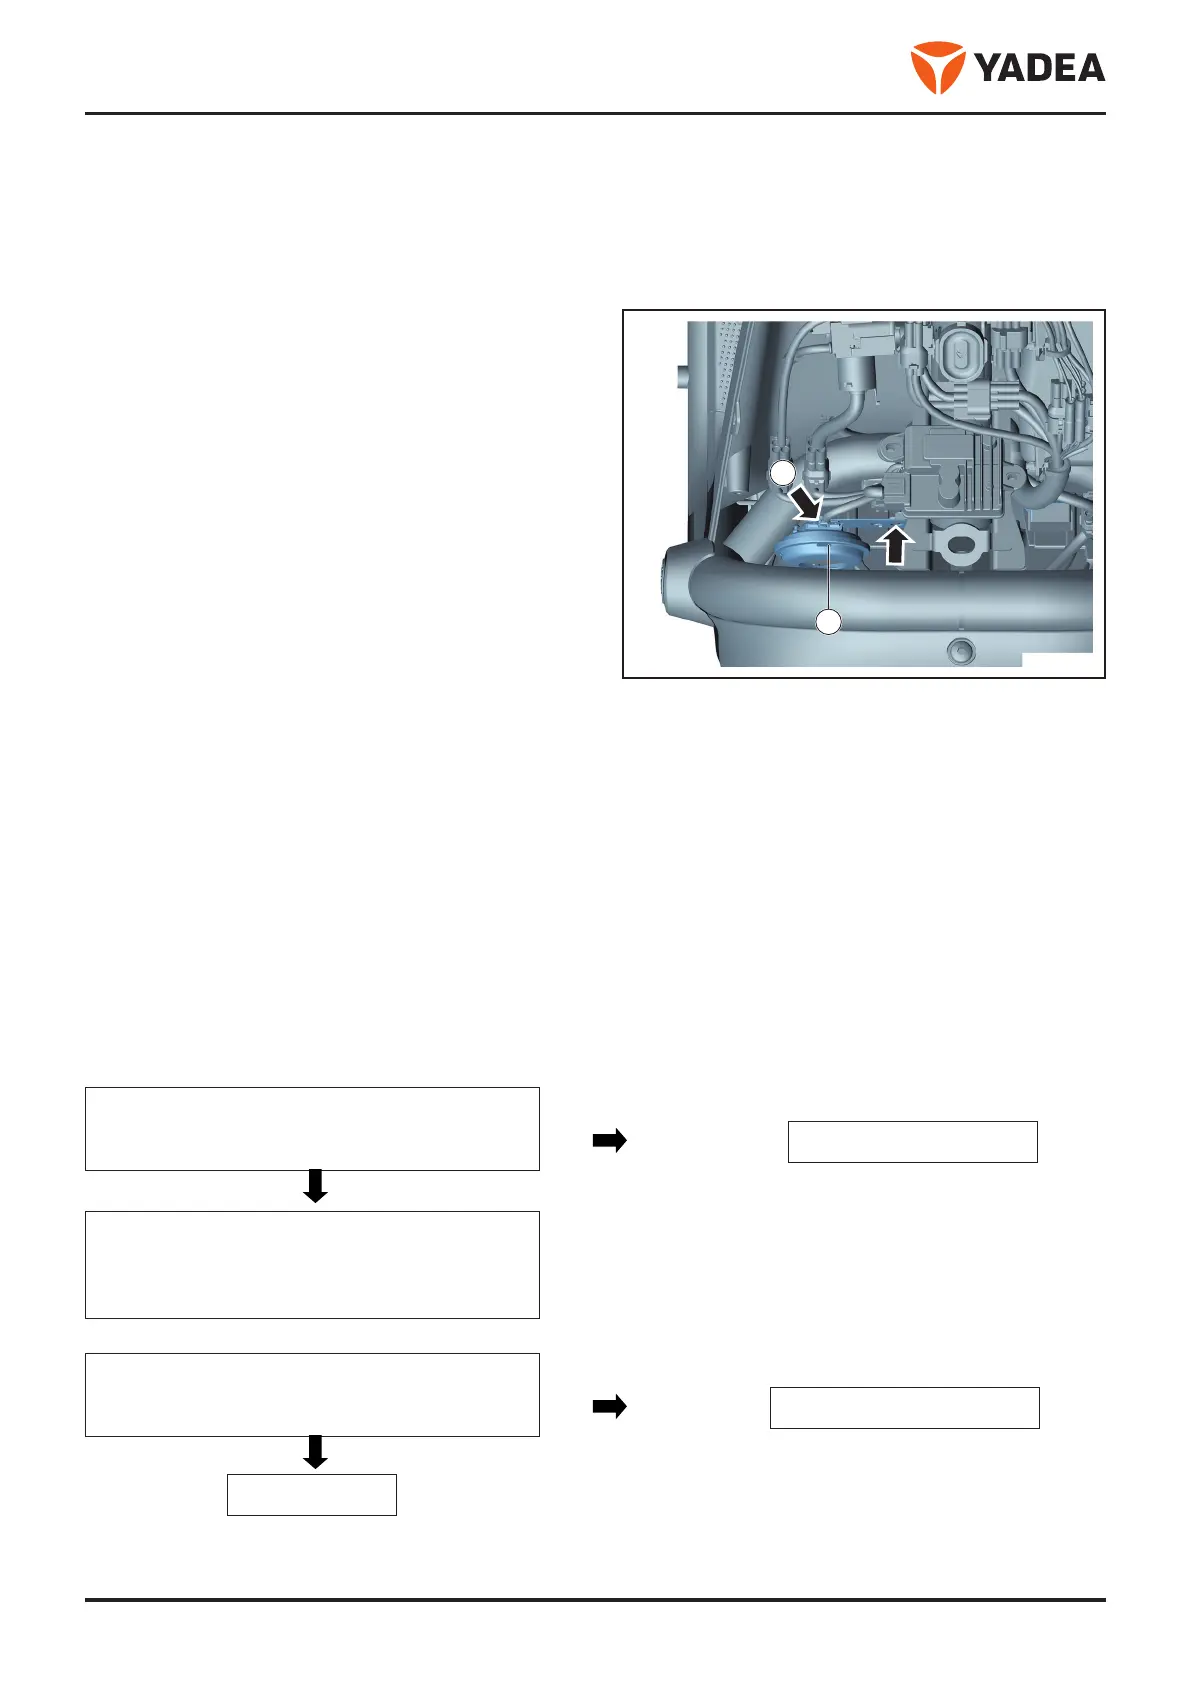
Disassembly
●
Park the vehicle on a horizontal road surface to
support the main bracket.
●
Close the key and pull it out.
●
Open the seat cushion and turn off the air switch.
●
Disassembly the front wall. → page 51
●
Disconnect connector - arrow A -.
●
Disassembly Bolt - Arrow - .
●
Disassembly the horn - 1 -.
Installation
Installation is carried out in reverse order of disassembly.
3.2.9.3 Connector interface definition
The horn terminal may be wired without regard to the positive and negative polarity
3.2.9.4 Horn fault maintenance determination method
Function definition: convert the 12V electrical signal into sound to warn pedestrians and other vehicles to
attract attention and ensure driving safety.
Common faults: hoarse voice and no ringing
3.2.9.5 Fault diagnosis and troubleshooting steps:
Hoarse voice: Press the horn button, the horn can beep, but the sound is not loud
(1) Installation site check:
After disassembling the peripheral plastic parts of
the vehicle, check the installation site of the horn,
which shall not touch the surrounding objects
No
Check the horn separately
Yes
Exclude the contact point and repeat the buzzing
check. If recovered, the fault is caused by trigger;
otherwise, it is judged as the horn fault. Replace
the horn
(2) Horn performance check:
Switch on 5~10 times intermittently using
10~14.5V DC voltage. The horn shall be able to
emit a steady and even sound
Normal sound
Judge horn performance OK
Hoarse voice
Replace the horn
 Loading...