YD-EM279
33
PREMIUM E-MOBILITY
3.2.12 Disassembly and installation of instrument
3.2.12.1 Overview
The LCD screen of the instrument adopts two backlight modes, day and night. Under strong light background, the
display content of the instrument can be clearly seen. Under dark environment, the display screen enters the eye -
protection safety mode. The instrument is connected with the central controller to serve as a window for information
exchange between the vehicle and the driver, making the operating state of the vehicle's electrical system clear at a
glance. The built - in tire pressure monitoring system of the instrument automatically monitors the tire pressure in real
time during riding and alarms the tire flat and low pressure to ensure driving safety.
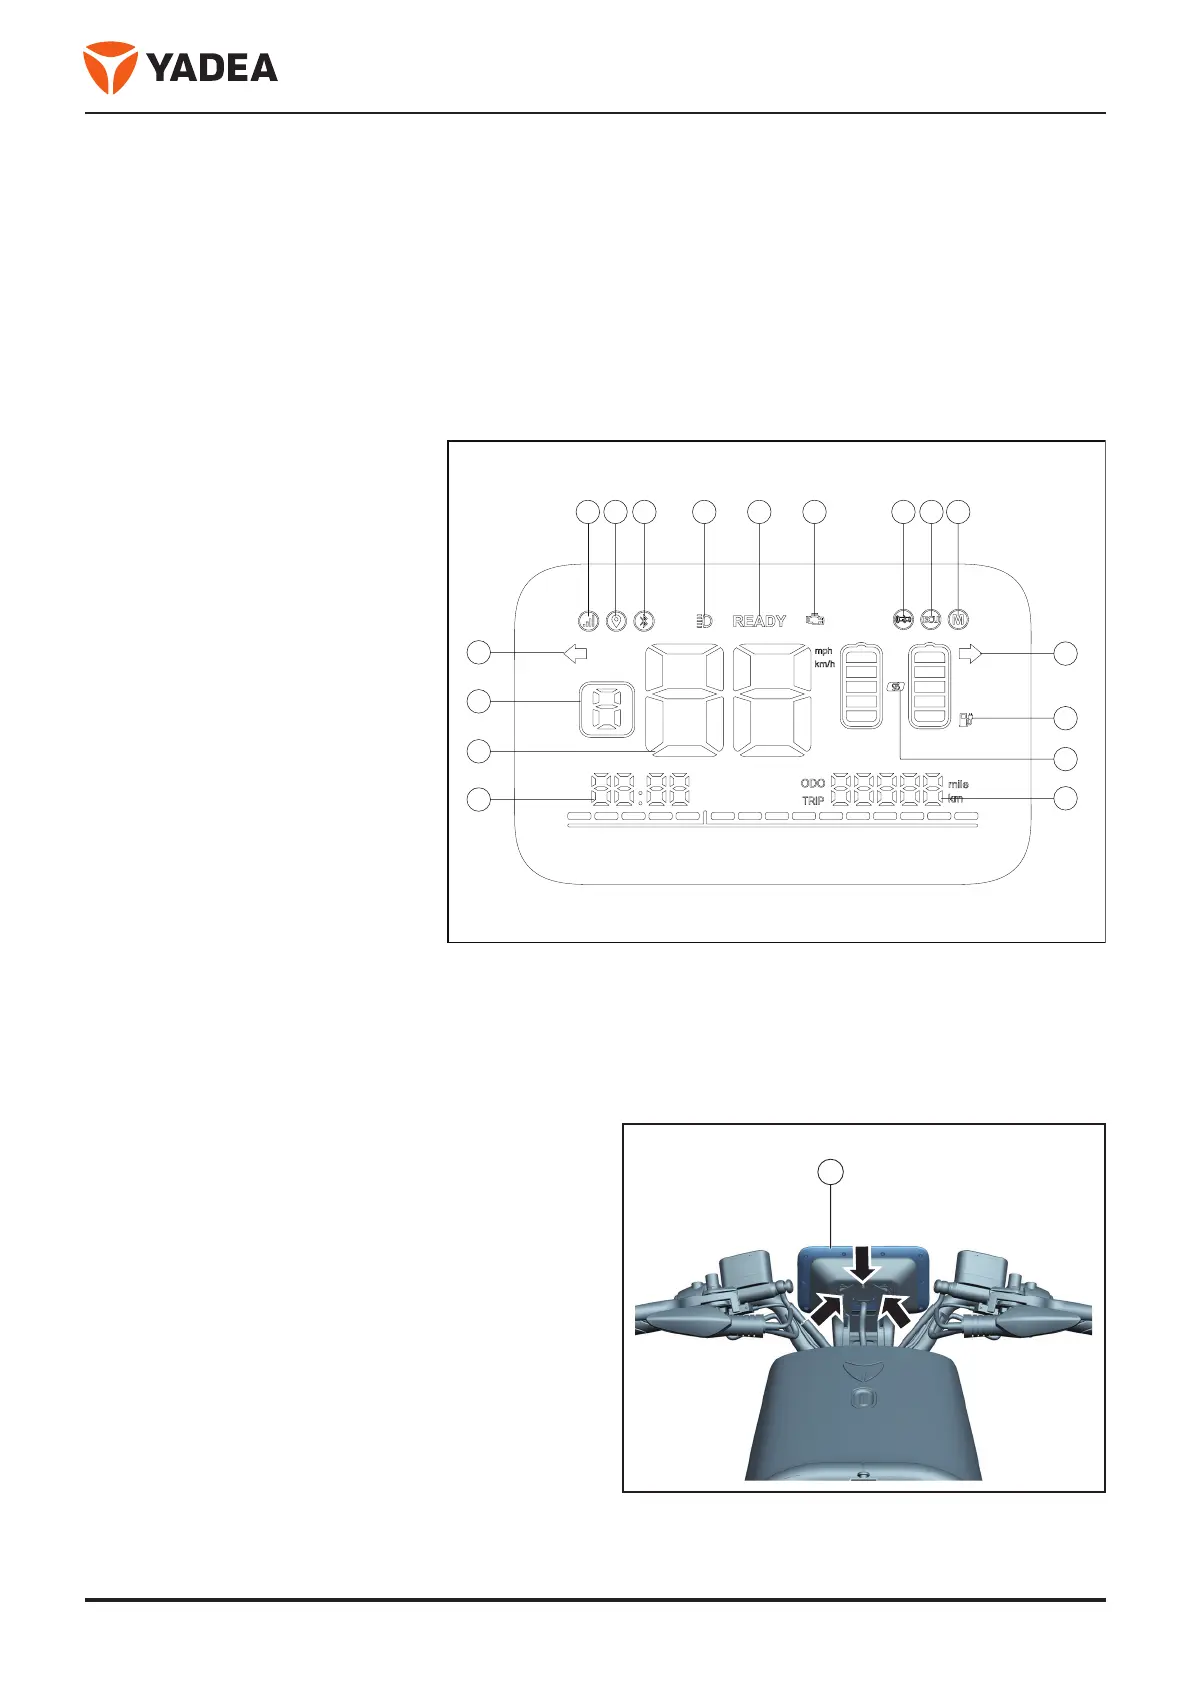
3.2.12.2 Instrument indicator lamps
1. Network symbols
2. GNSS symbol
3. Bluetooth symbol
4. High beam
5. Ready to run
6. Fault indication
7. Throttle failure
8. Controller failure
9. Motor failure
10. Right turn indicator
11. Power battery
charge state
12. Battery parallel
13. Odometer (ODO:
Total Mile
Trip: Subtotal Mileage)
14. Time (applicable to
IOT paragraph)
15. Speed display
16. Gear display
17. Left turn indicator
3.2.12.3 Service tools
●
Cross screwdriver
●
Hexagonal socket 6mm
3.2.12.4 Disassembly and installation
Disassembly
●
Park the vehicle on a horizontal road surface to
support the main bracket.
●
Close the key and pull it out.
●
Open the seat cushion and turn off the air switch.
●
Disassembly the instrument cover.
●
Disassembly Bolt - Arrow - .
●
Disassembly the gauge - 1 -.
Installation
Installation is carried out in reverse order of disassembly.
1 2 3 4 5 6 7 8 9
10
14
15
16
17
11
12
13
1

 Loading...