4. Disassembly and reassembly
161
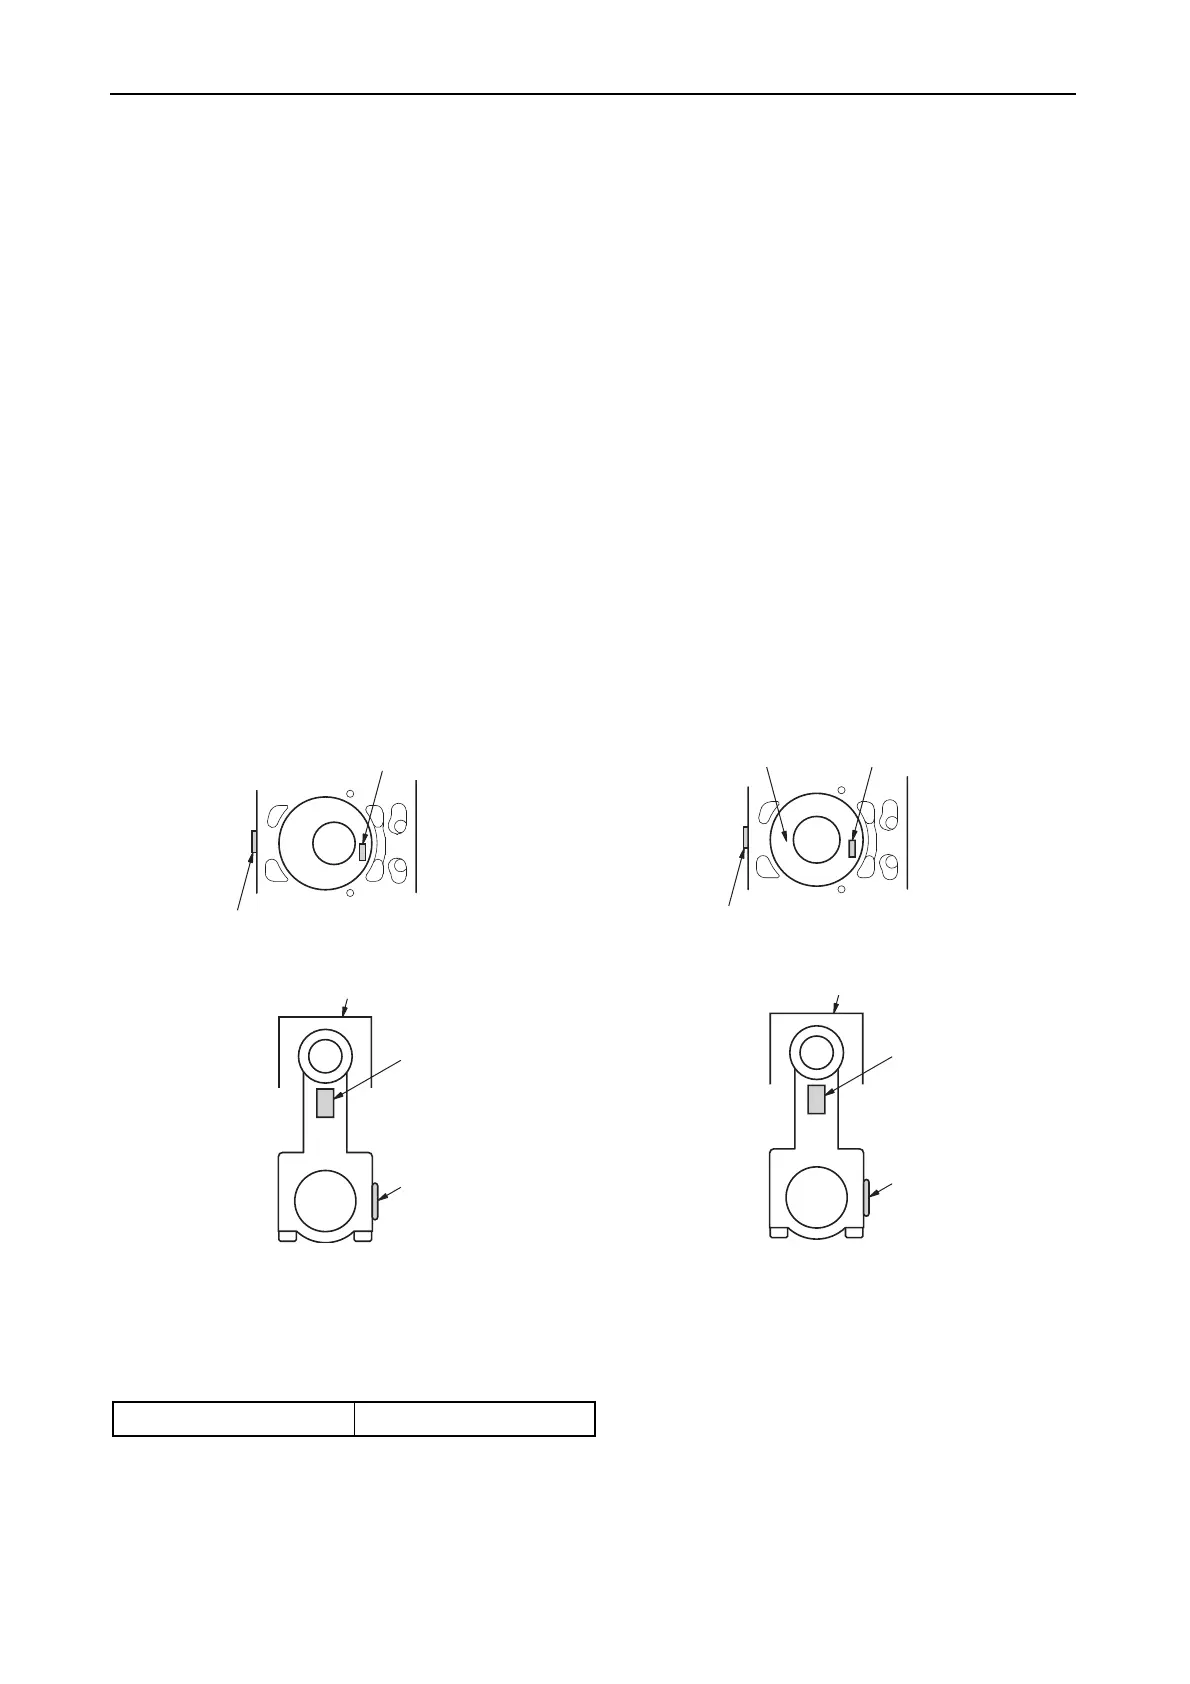
2) Coat the outside of the piston and the inside
of the crank pin metal with engine oil and
insert the piston by using the piston insertion
tool.
Note:
1) Insert the piston so that the match mark on
the large end of the connecting rod faces
the fuel nozzle, and the manufacture’s
embossed mark on the stem faces toward
the flywheel.
2) After inserting the piston, make sure the ID
marks (size mark and model mark) on the
piston top is correct, looking from the top of
the piston.
3) When inserting the piston/connecting rod
assembly to the cylinder, be careful not to
hit the large end of the connecting rod with
the piston cooling nozzle (4JH4-TE and
4JH4-HTE) mounted to the back of the
cylinder block. The cooling nozzle may
warp or be damaged.
3) Align the large end match mark, mount the
cap, and tighten the connecting rod bolts.
Note:
If a torque wrench is not available, match up
with the mark made before disassembly.
Tightening torque Nm (kgf•m)
Connecting rod bolt 44.1-49.1(4.5-5.0)
010377-00E
Size mark & model mark
Camshaft side
Nozzle side
Flywheel side
Piston ID mark
Embossed mark
(Flywheel side)
Match mark
Cylinder size mark
Size markModel mark
Camshaft side
Nozzle side
Piston ID mark
Embossed mark
(Flywheel side)
Match mark
Cylinder size mark
Flywheel side
010376-00E
3JH4E and 4JH4E
4JH4-TE and 4JH4-HTE
Assembly direction of connectingrod and piston