Printer Setup and Operation
Print Engine Installation
54
P1051584-002 8/23/12
Install the Print Engine in an Applicator
This section provides the basic instructions for installing the print engine into an applicator.
To install the print engine into an applicator, complete these steps:
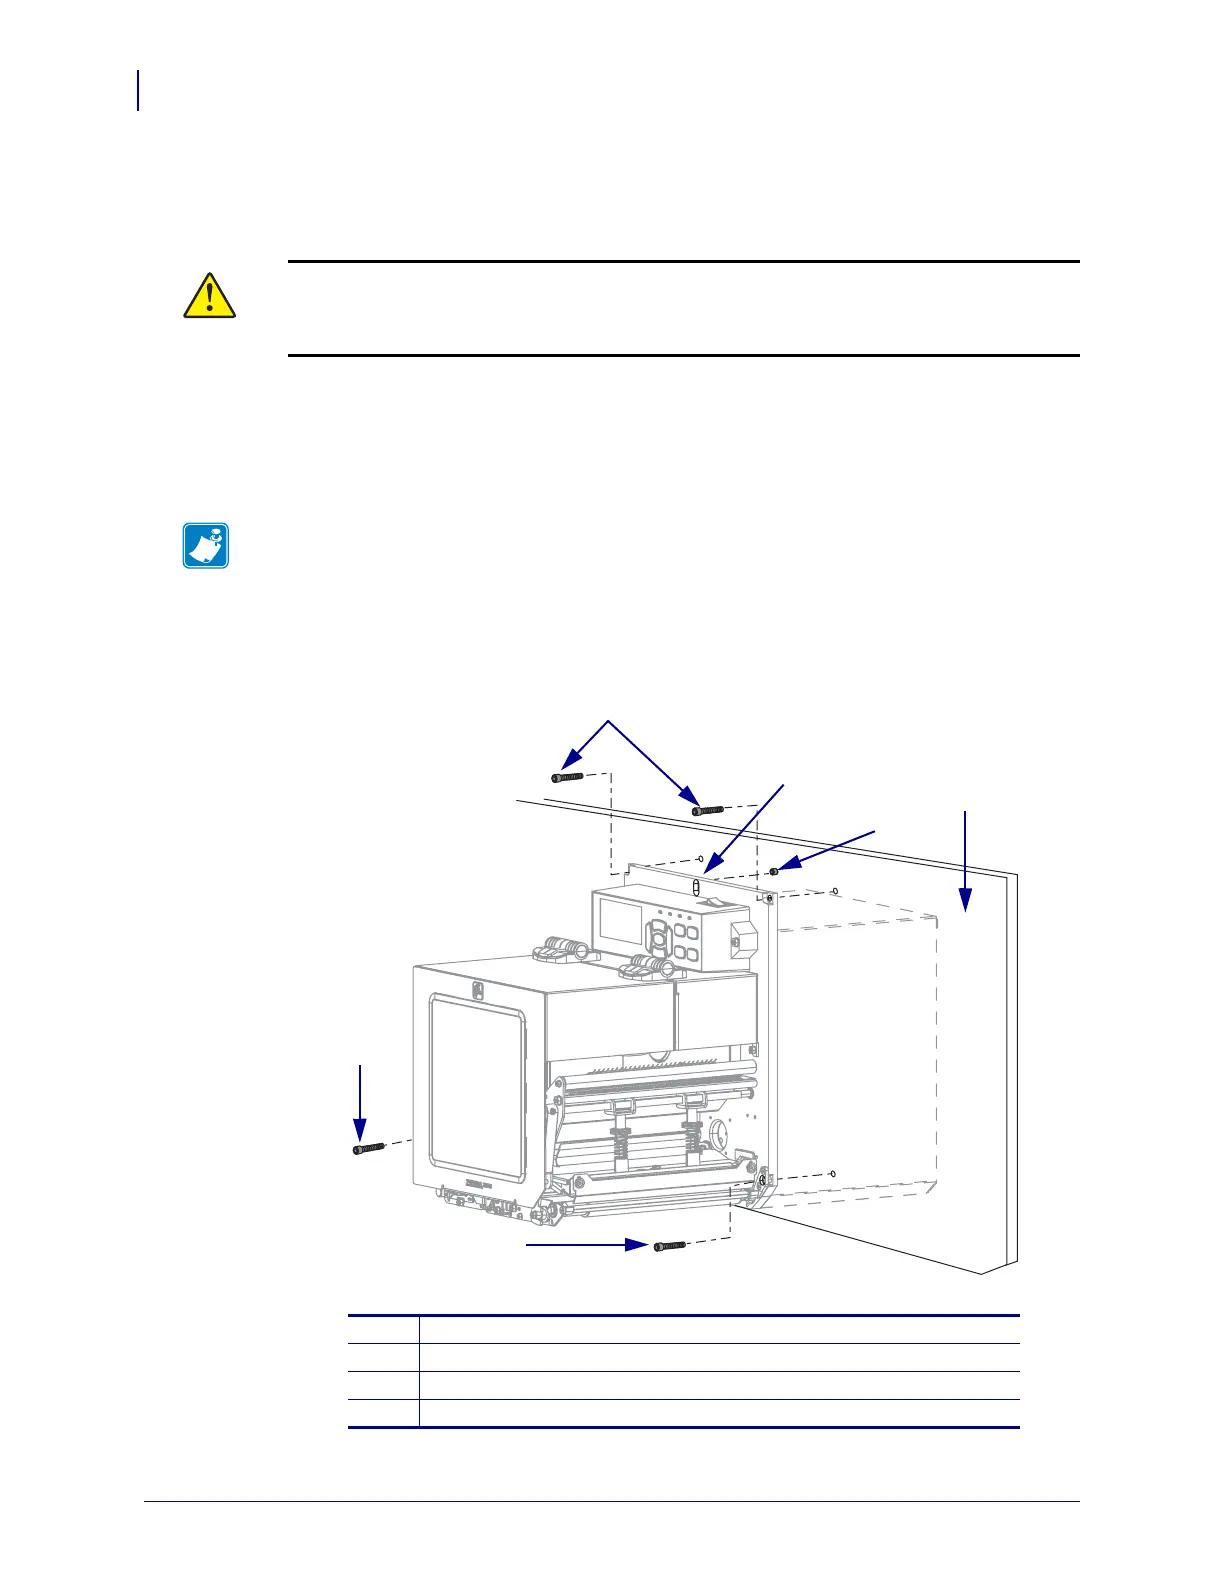
1. See Figure 7. Install the center mounting bolt into the center hole on the applicator.
2. Carefully place the keyhole on the center mounting bolt.
3. Install the four corner mounting screws to secure the print engine to the applicator.
Figure 7 • Front View of Print Engine in Applicator
Caution • If the print engine is installed improperly, it could fall out of the applicator and
cause injury. The center mounting bolt and four mounting screws must be installed and
secured. See
Figure 7 for the location of the bolt and screws.
Note • The keyhole and the center mounting bolt are designed to support the print engine
and assist in installing and removing the four mounting screws.
1
Mounting screws (four total)
2
Keyhole
3
Center mounting bolt (shown inside hole on applicator)
4
Applicator