104
The date and time displayed is the 965DSP “system
clock.” See the “Set Clock” section on page 12
for further information on setting the clock and for
information on the format of the date and time.
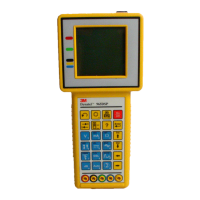
Use the blue keys to enter an alphanumeric ID. The
ID may have up to fourteen characters. Because there
are not enough keys for all twenty-six letters, each of
the number keys (except “1”) also function as letter
keys for ID entry. Whether a number or letter is entered
depends on how many times the key is pressed. As an
example, if the Ohms key is pressed once, the number
“3” will be displayed. If the same key is pressed
twice, the letter “d” will be displayed, three times
for the letter “e”, and four times for the letter “f”.
When the desired number or letter is displayed, press
any other key to insert the next number or letter.
This will cause the previously entered characters to
move to the left making room for the new character.
If the same key needs to be used multiple times in
a row (i.e. to enter the sequence ‘ABC2’), press the
[Up] arrow to insert multiple spaces to the left of the
cursor. Use the [Left] arrow to position the cursor
under the first space and enter the first character, and
then use the [Right] arrow to move the cursor under
the next space. Insert the next character and use the
[Right] cursor again to position the cursor to the next
position. Continue entering numbers or letters in this
manner until all have been entered. If you enter more
than 14 characters, the first entered character will be
discarded. To change or delete any of the characters,
use the [Right] or [Left] key to move the cursor
under the letter to be changed or deleted. To delete
the character, press the [Down] key. To change the
character, press the key of the new character once (for
a number) or several times (for a letter). Once the ID
has been entered, press the [Enter] key to save the
current TDR trace information unless the User Info
option (see User Info Setup page 19) is enabled.
If User Info is enabled, you will see another edit
screen as shown
: