NoteArt. no.Spare part no.Equipment, etc.
3HAB3772-23O-ring
3HAC3297-1Sealing, outside
3HAA2167-11Spherical roller bearing
3HAC3990-11Sealing, inside
Used to lubricate the shaft
on the robot where the tie
rod is to be refitted.
3HAB3537-1Grease
Loctite 243Locking liquid
Content is defined in section
Standard tools on page 291.
3HAC17594-1Standard toolkit
2 pcsPuller tool
Used to pull out the tie rod
alternately at the upper and
lower end if the tie rod.
Used to press in the spheric-
al roller bearing.
3HAB1598-1Press tool
2 pcs.3HAB1529-1Press tool, p-arm
Used to press on the tie rod
alternately at the upper and
lower end of the tie rod.
These procedures include
references to the tools re-
quired.
Other tools and procedures
may be required. See refer-
ences to these procedures
in the step-by-step instruc-
tions below.
General calibration informa-
tion is included in section
Calibration on page 263.
Calibration Pendulum In-
struction
CAUTION
Always cut the paint with a knife and grind the paint edge when disassembling
parts. See Cut the paint or surface on the robot before replacing parts on page 140.
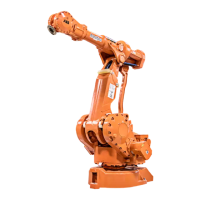
Removal, tie rod
The procedure below details how to remove the tie rod from the robot.
Info/IllustrationAction
DANGER
Turn off all:
• electric power supply
• hydraulic pressure supply
• air pressure supply (do not turn off for Foundry
Prime robots!)
to the robot, before entering the robot working area.
1
Lock the upper arm in a horizontal position with help
of a crane or similar.
2
Continues on next page
Product manual - IRB 4400 191
3HAC022032-001 Revision: Q
© Copyright 2004-2018 ABB. All rights reserved.
4 Repair
4.5.2 Replacement of tie rod
Continued
 Loading...
