AEQ FORUM
Digital audio mixer for broadcast applications
91
• “Control”: section where you can configure the initial activation of one or several keys
to send signal to monitor and headphones placed
under the display of the control
monitoring section. The available options are “Program”, “Audition”, “Cue” and “Sel”
(when section is configured in “Exclusive” mode, you can activate only one key: see
section 4.2.4.1 of this manual). “Sel Input” and “Sel Out” drop-down menus allows you
to select a single input or output to associate it initially with the “SEL” monitoring key
(that selection can be modify later by means of “HP/SOURCE” encoder).
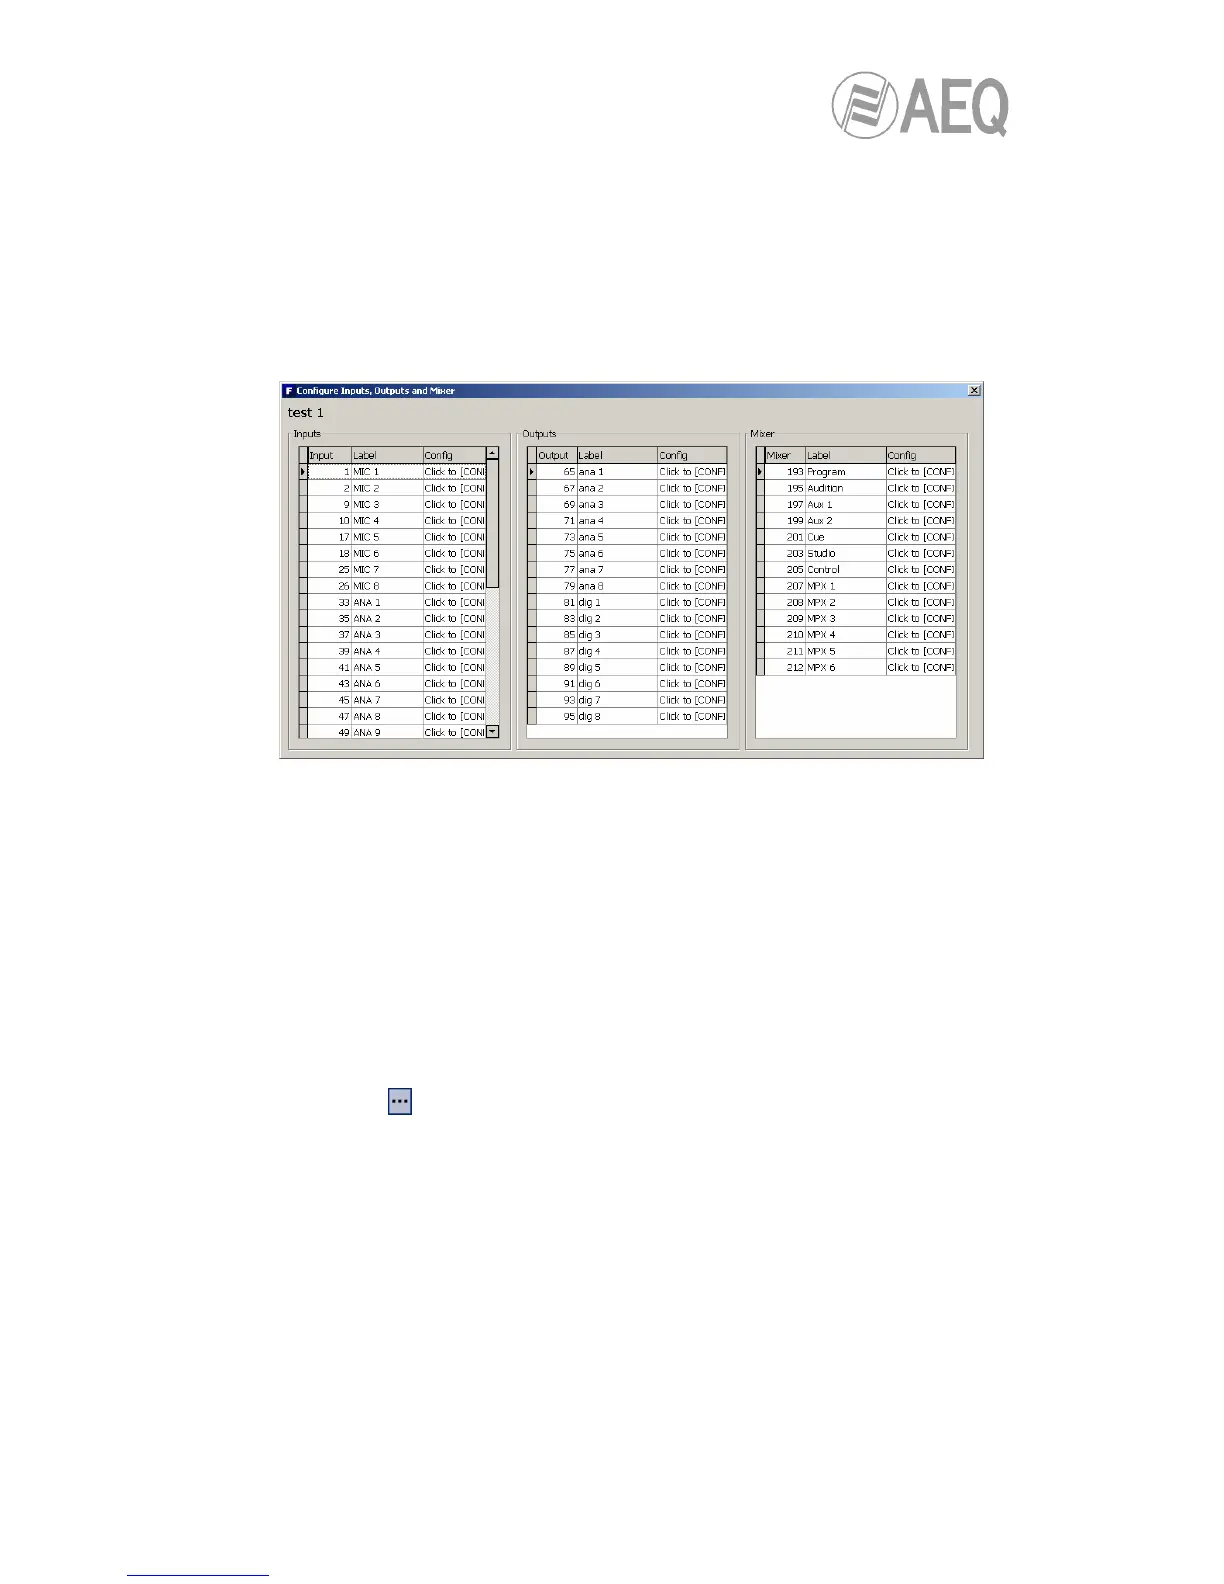
• “Configure Inputs, Outputs and Mixer”: this button gives you a quick access to the
advanced configuration section for audio inputs and outputs channels and internal mixer
buses, presented in three consecutive columns.
• “OK”: allows you to accept the created or edited configuration.
• “Cancel”: allows you to reject the created or edited configuration. No change you may
have made is saved.
4.3.5.1. Advanced configuration of inputs.
Within the “Configure Inputs, Outputs and Mixer” advanced configuration screen, the left part of
the screen shows the complete list of all the available audio input channels. Three columns are
shown:
• “Input”: shows the internal numeric identifier for the input.
• “Label”: shows the name or label associated to the channel.
• “Config”: allows you to configure the associated options for that input channel from a
specific screen. You can access by clicking “Click to [CONFIG]” and then clicking
again on the
button that will appear.