DD+DIS155
.11E
Controls, Connections, and Setup Procedures
DOCUMENT CONTROL NOTE:
The controlled version of this document is available from the Agfa HealthCare Library. Any printed copy of this document is uncontrolled.
(7) Insert the digitizer USB flash drive
into the USB Port of the NX
Workstation.
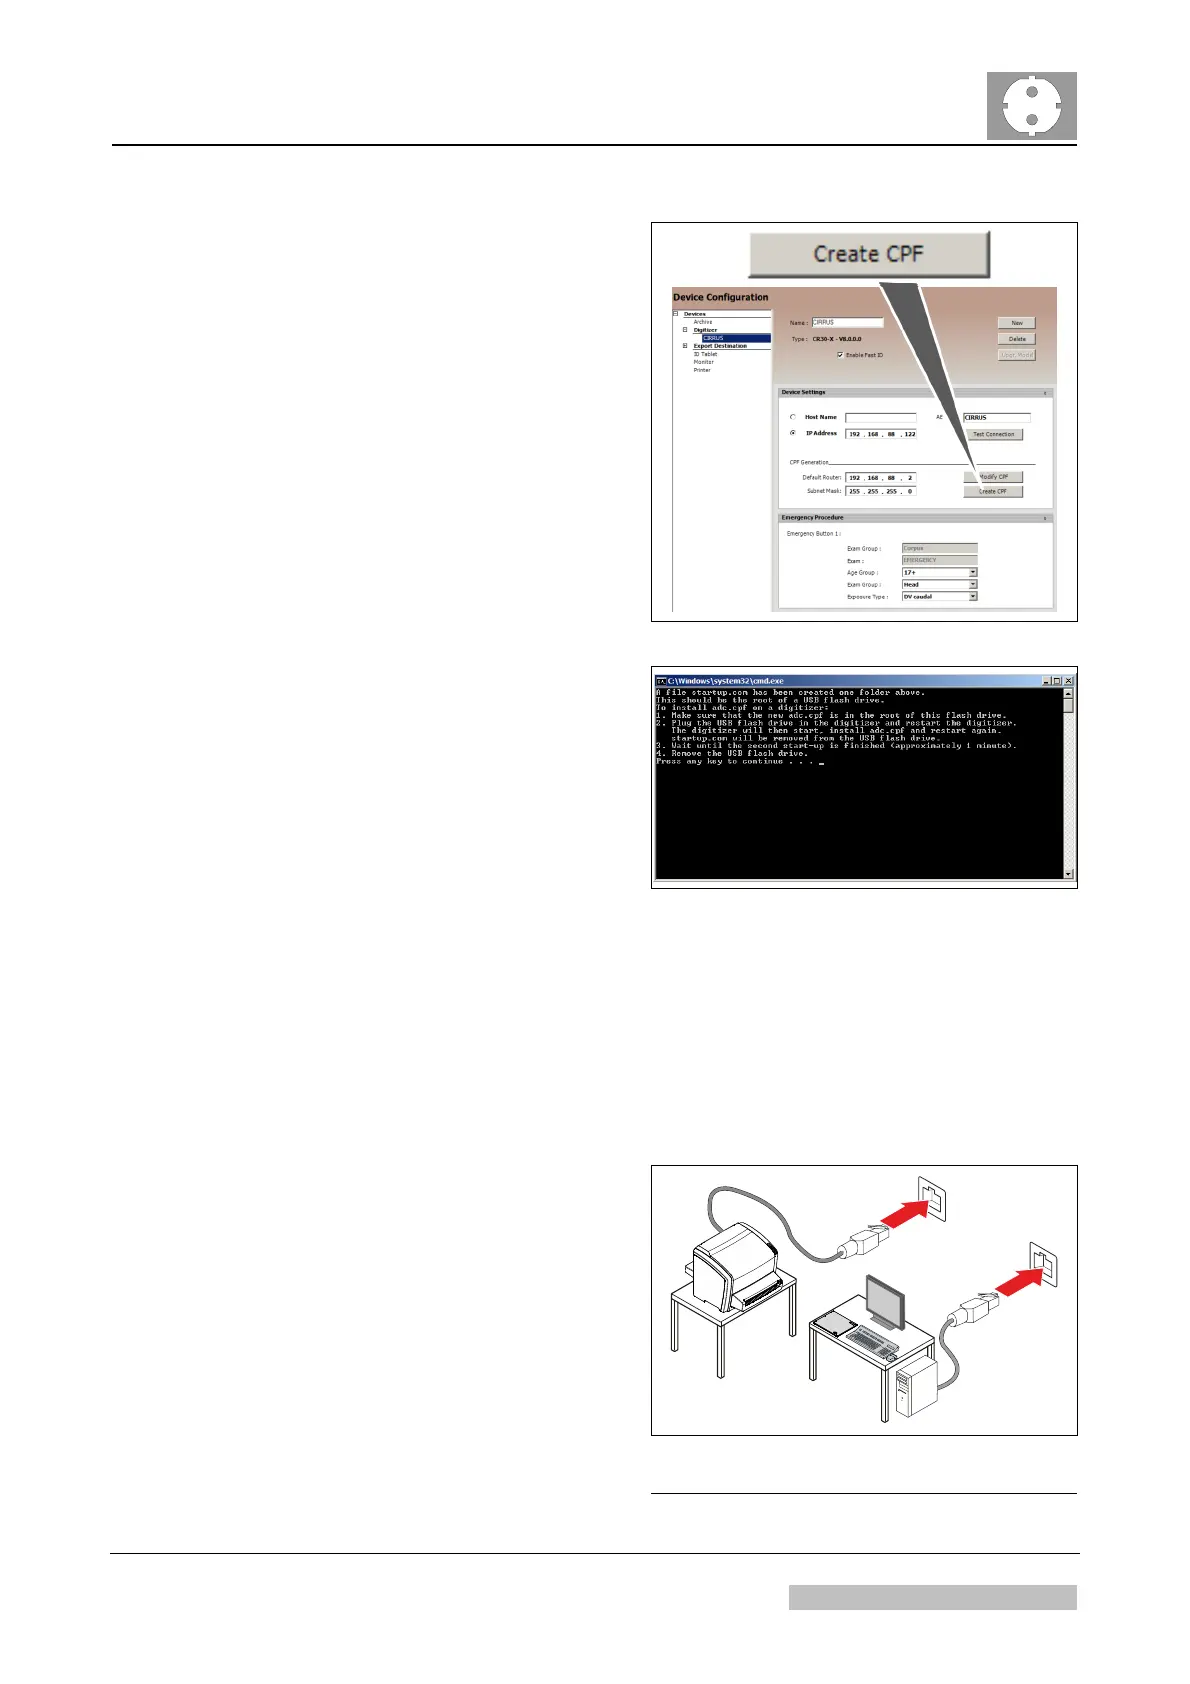
(8) Go to NX configurator screen:
Devices Digitizer
Configuration
Digitizer.
(9) Click on <Create CPF> and save
the file on the USB flash drive root
folder.
(10) Activate the configuration via
menu: File Activate
Configuration
Figure 11
(11) Navigate to directory \ARC_1404
(or higher version) on the USB
flash drive.
(12) Double-click file
InstallCPF.cmd
(13) Press any key to continue.
(14) Release the USB flash drive from
the NX Workstation and insert it at
the digitizer.
(15) Switch on the digitizer: The
digitizer boots-up and resets
automatically after approx.
3 minutes.
(16) Wait until the 2nd boot-up is
finished.
Figure 12
(17) Connect NX workstation and
digitizer to the local network.
(18) Switch on the digitizer.
(19) Enter the new digitizer IP address
in the browser address window.
515101ha.cdr
Figure 13
Edition 1, Revision 4 CR 10-X / CR Reader / CR 12-X / CR Advanced Reader Chapter 1 / Page 16 of 47
03-2013 Type 5151 / 100 / 110 / 200 / 210 Agfa Company Confidential
 Loading...