DD+DIS155
.11E
Controls, Connections, and Setup Procedures
DOCUMENT CONTROL NOTE:
The controlled version of this document is available from the Agfa HealthCare Library. Any printed copy of this document is uncontrolled.
5.4 Verifying the Installation
NOTE:
Verifying the installation means: Expose a flatfield and evaluate the image quality.
Following items are verified with the check:
The configuration was successful: Images arrive at the workstation.
Image quality is OK.
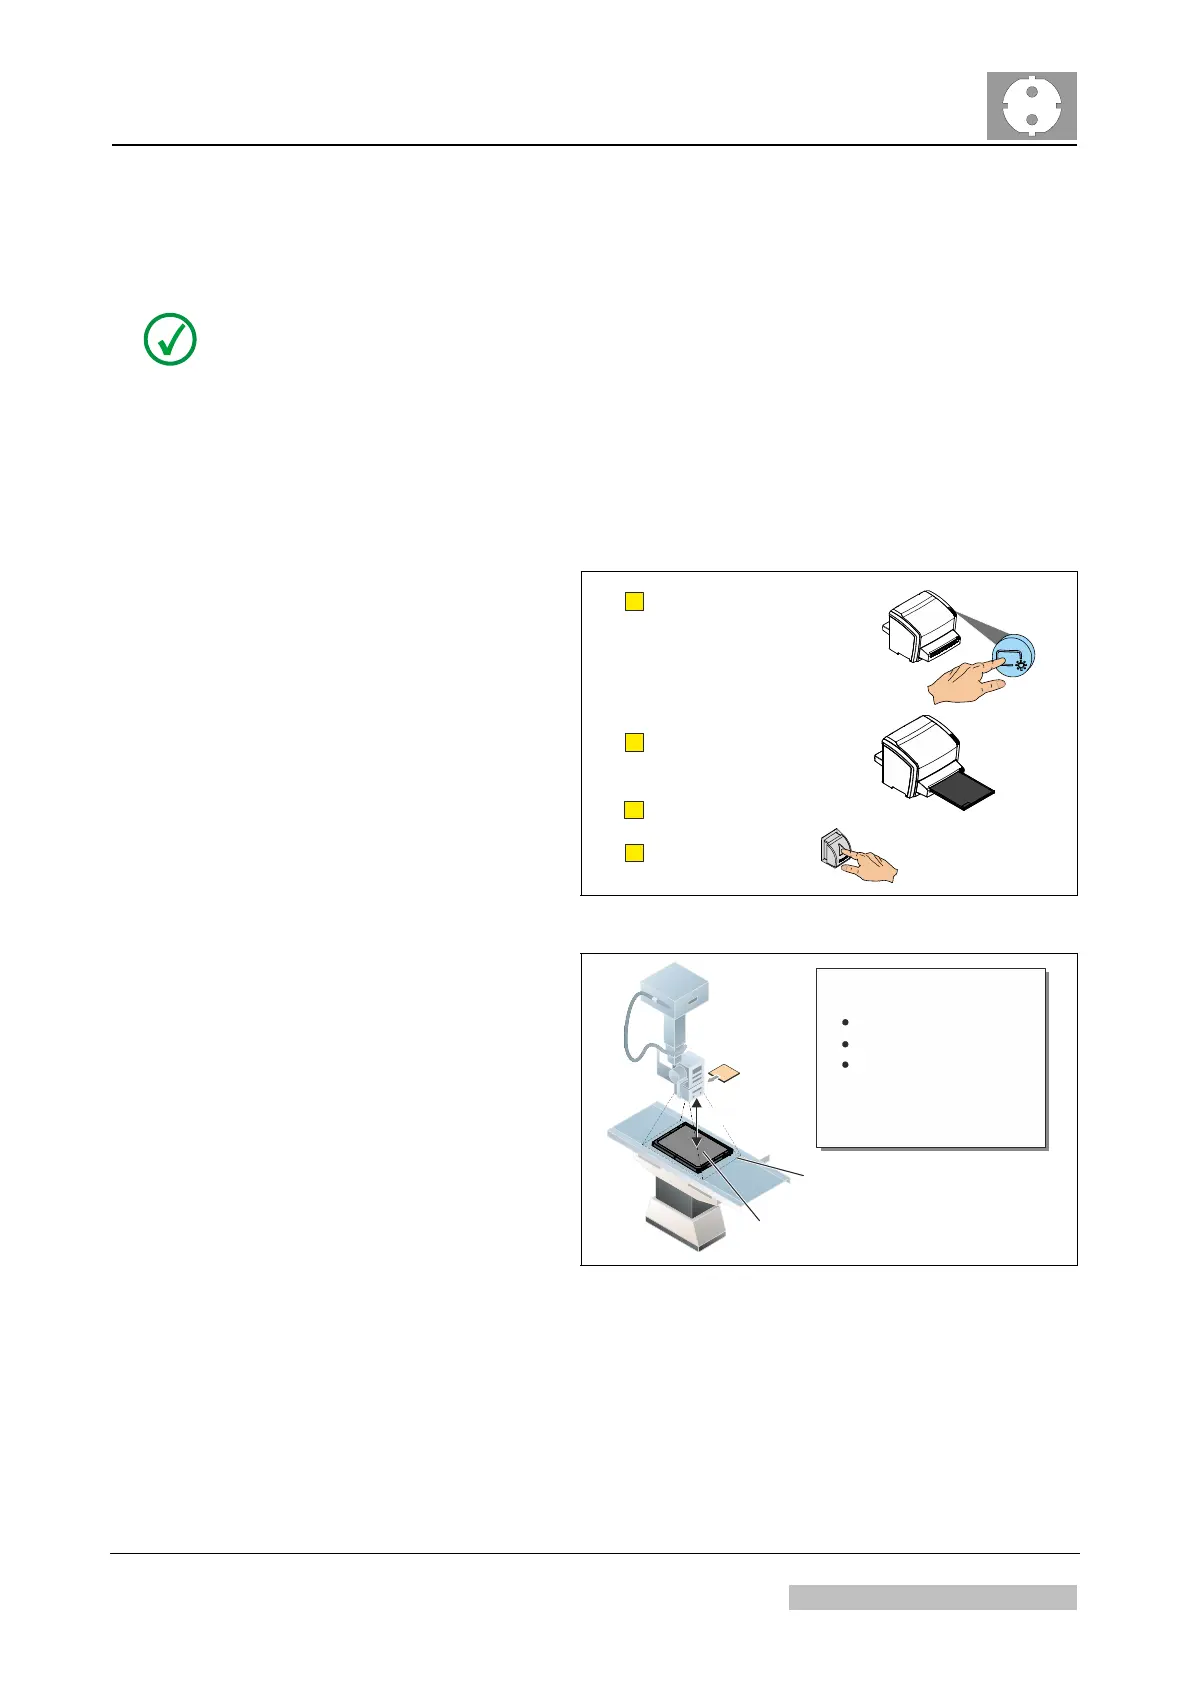
(1) Erase a cassette.
install_poster_12.cdr
B
C
D
A
Insert cassette with
black side facing up.
Press the "Erase" button.
Wait approx. 3 minutes.
Remove cassette.
Figure 61
(2) Use the erased cassette to
expose a flatfield.
The black cassette side
must be facing up.
The collimated area
should be larger than the
cassette.
Black side
facing up
Collimated
Area
1. Insert CU Filter
2. Expose Cassette:
Large Focus
12 mAs
75 kVp
3. Rotate cassette by 180°
4. Expose again
5. Remove CU Filter
1,3 m
install_poster_013.cdr
Figure 62
Edition 1, Revision 4 CR 10-X / CR Reader / CR 12-X / CR Advanced Reader Chapter 1 / Page 43 of 47
03-2013 Type 5151 / 100 / 110 / 200 / 210 Agfa Company Confidential
 Loading...