To setup your plotter — Serial
1
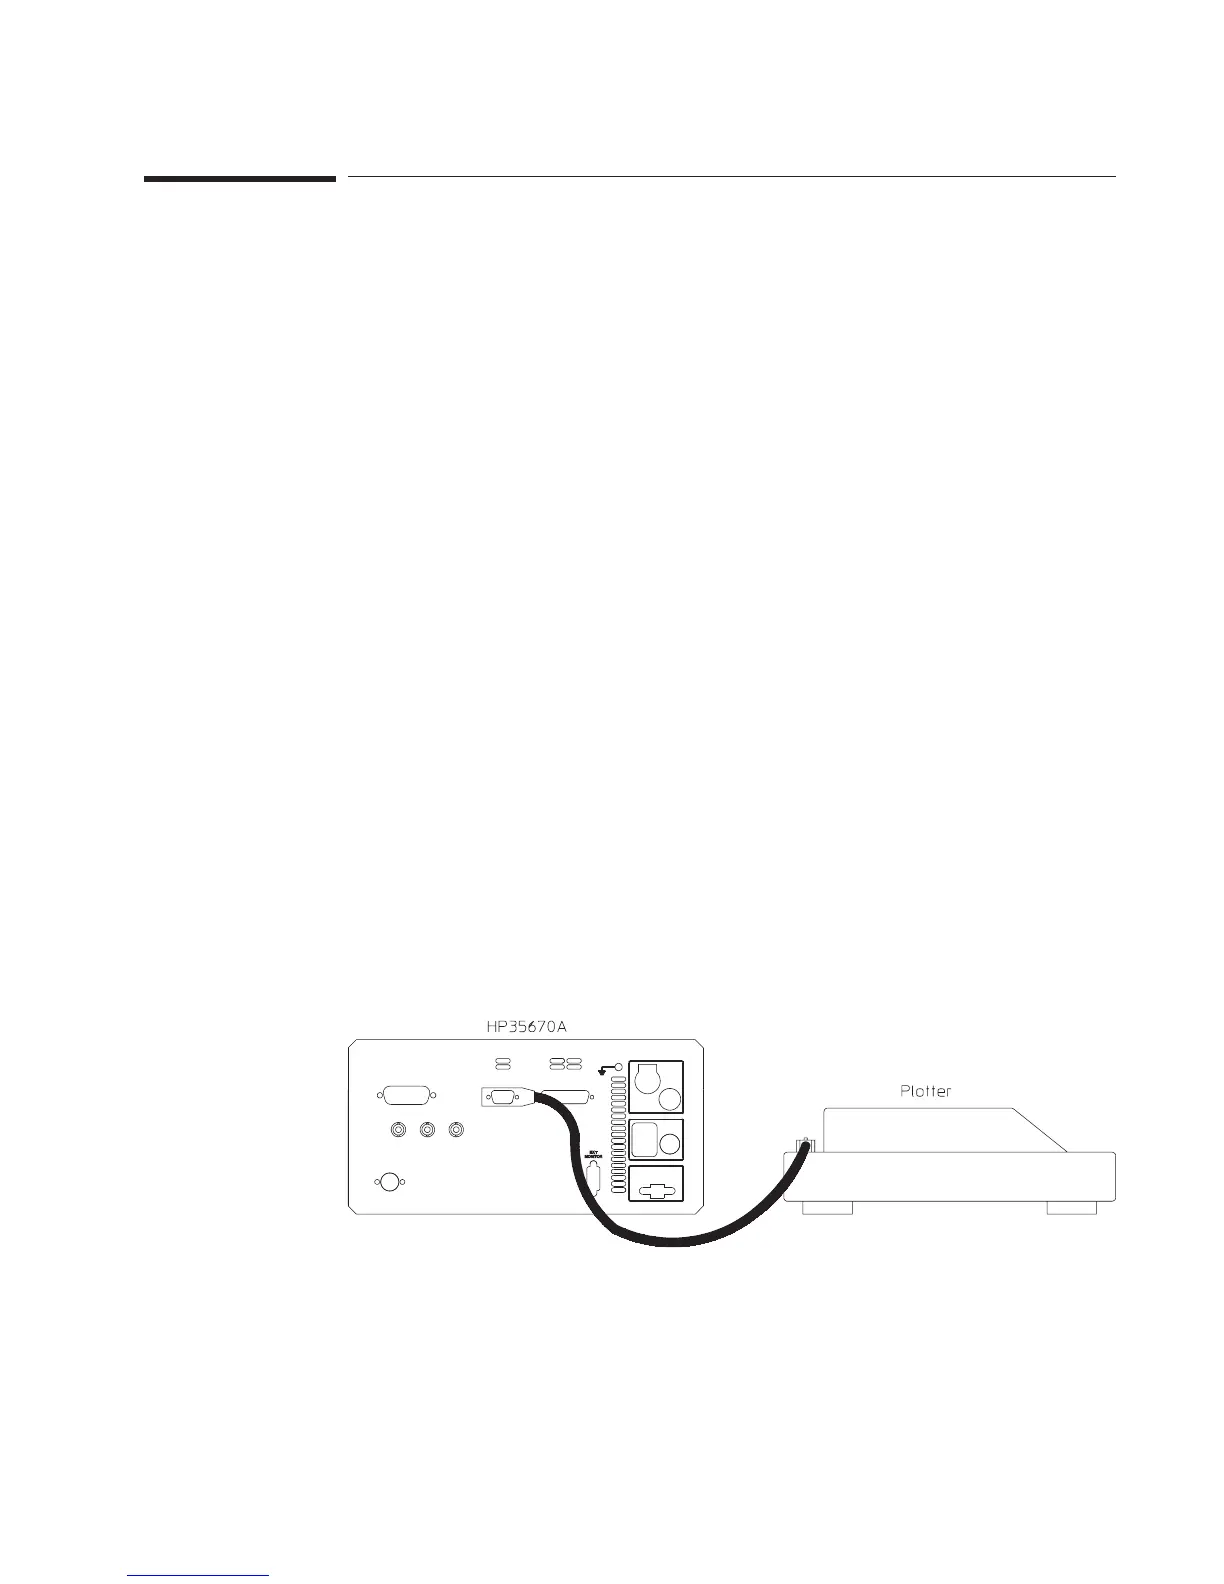
Connect the serial ports of your plotter and analyzer with a RS-232-C cable.
2 Check the plotter’s documentation to verify the serial configuration.
3 Turn on the plotter.
4 To set the plotter’s baud rate on the analyzer, press [
Plot/Print
] [
MORE SETUP
][
SERIAL
SETUP
][
BAUD RATE
]. The softkey steps through the available values.
5 In the same menu, set the transmitter’s (the analyzer’s) handshake pacing type. Press
[
XMIT PACE
]. The softkey steps through the available values.
6 Set the other parameter values, if you need to change the settings.
The configuration is saved in non-volatile RAM. Refer to your plotter’s
documentation to determine the required serial configuration. The analyzer is
considered the transmitter and the plotter is considered the receiver.
The default values should satisfy the configuration for most plotters. Additional
parameters that you can change are:
• [
BITS/CHAR
] — specifies the number bits in each character.
• [
STOP BITS
] — specifies the number of “stop bits” sent with each character.
• [
PARITY
] — sets the parity generated for characters.
• [
PRTY CHK
] — enables parity verification capability.
• [
RCVR PACE
] — sets the receiver handshake pacing type.
Agilent 35670A Quick Start Guide Saving and Plotting Data
53
 Loading...