27
Installing the Autosampler
Installing the Autosampler
5 Ensure the power switch at the front of the Autosampler is OFF.
6 Connect the power cable to the power connector at the rear of the sampler.
7 Connect the CAN cable to the other Agilent 1100 modules.
8 If an Agilent Chemstation is the controller, connect either
❏ The GPIB cable to the detector
❏ The LAN connector to the LAN interface
9 Connect the APG remote cable (optional) for non Agilent 1100 series
instruments.
10 Turn ON power by pushing the button at the lower left hand side of the
sampler.
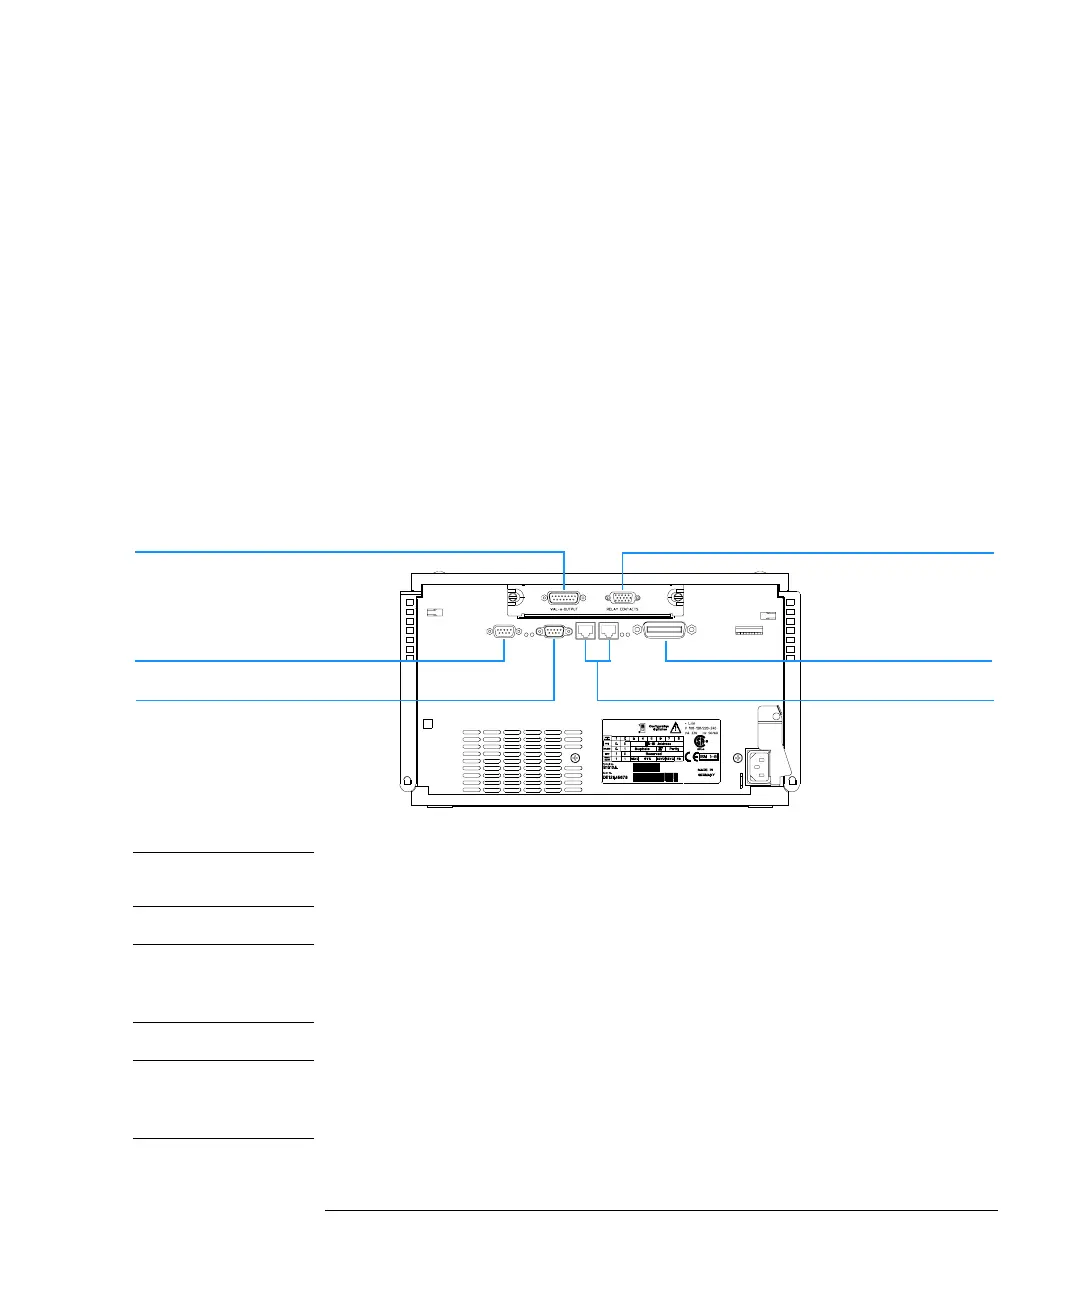
Figure 6 Cable Connections
NOTE If the front cover is not installed the autosampler is in a not ready condition
and operation is inhibited.
NOTE The sampler is turned ON when the line power switch is pressed and the
green indicator lamp is illuminated. The detector is turned OFF when the
line power switch is protruding and the green light is OF.
WARNING To disconnect the sampler from the line,unplug the power cord. The
power will supply still uses some power, even switch at the front panel is
turned OFF.
GPIB
RS232C
CAN-bus
Remote
Vial number output
Relay contacts
CAN cable to previous module

 Loading...


