140
Repairing the Autosampler
Injection-Valve Assembly
Injection-Valve Assembly
Frequency When defective
Tools required Pozidrive No. 1 screwdriver
1/4 inch wrench
Parts required Injection valve 0101-0921 for G1313A G1329A
Injection valve 0101-1050 for G1389A
Injection valve 0101-1267 for G2260A
Before beginning this procedure:
❏ Remove all capillaries from the injection
valve (page 31).
❏ Remove the top cover (page 128).
❏ Remove the transport assembly (page 132).
❏ Remove the sampling unit (page 134).
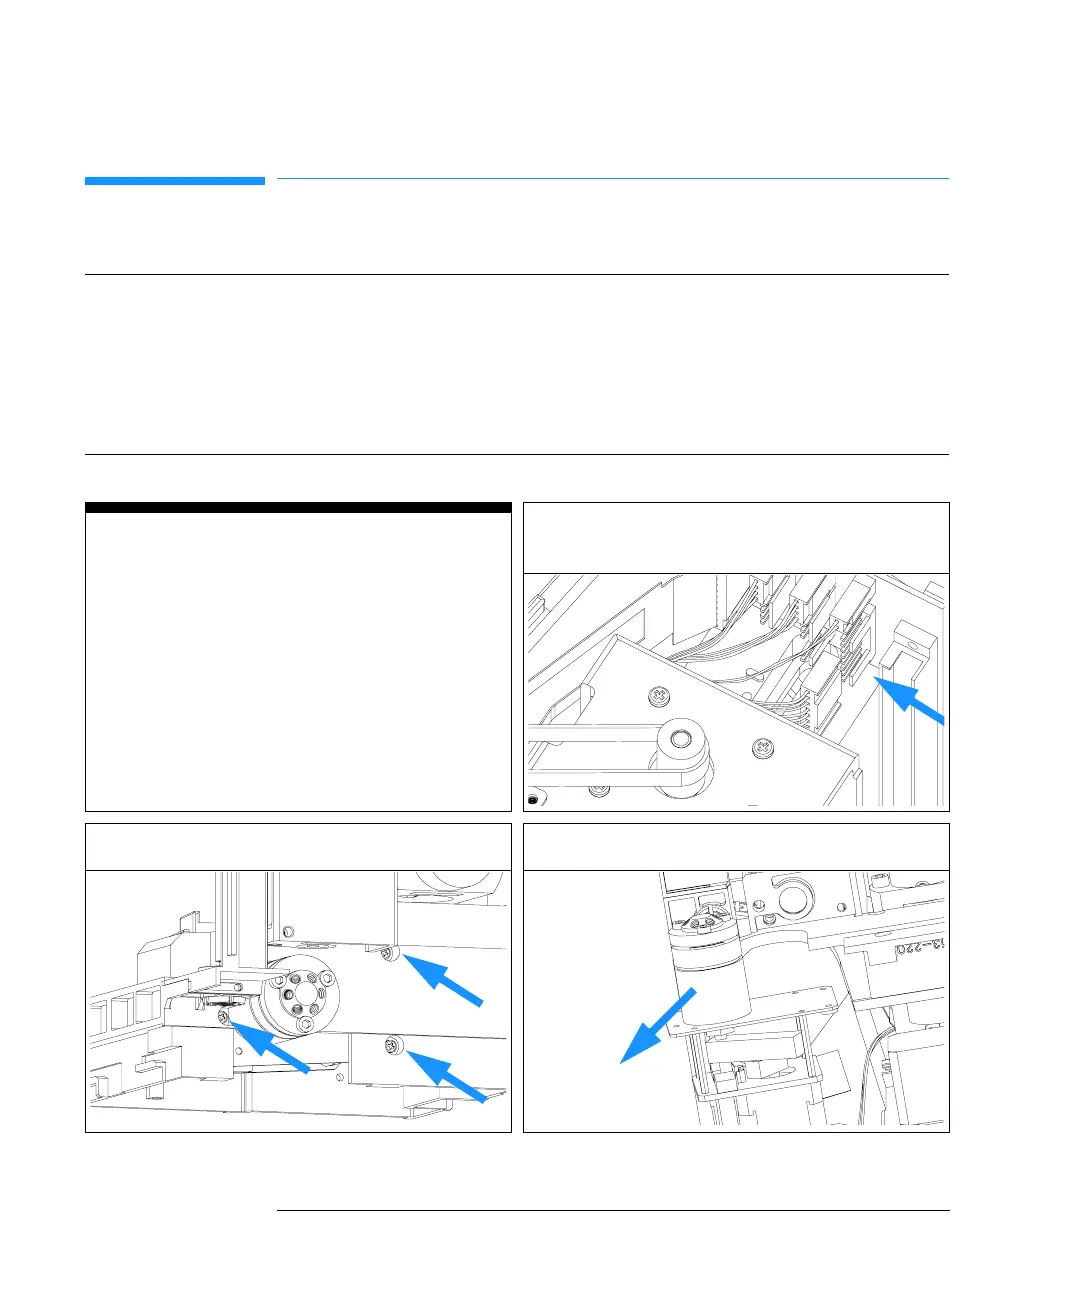
1 Disconnect the valve-cable connector from
the SUD board (labelled “Valve Assy”).
2 Remove the three fixing screws. 3 Remove the injection-valve assembly.
 Loading...


