111
Repairing the Autosampler
Needle-Seat Assembly
Needle-Seat Assembly
Frequency When the seat is visibly damaged
When the seat capillary is blocked
Tools required 1/4 inch wrench (supplied in accessory kit).
Flat-head screwdriver.
Parts required Needle-seat assy (0.17 mm i.d 2.3 µl) G1313-87101 for G1313-29A
Needle-seat assy (0.12 mm i.d 1.2 µl) G1313-87103 for G1313-29A
Needle seat assy (0.10 mm i.d 1.2 µl) G1329-87101 for G1389A
Needle seat assy (0.05 mm i.d 0.3 µl) G1329-87103 for G1389A
Needle-seat assy (0.50 mm i.d 20 µl) G2260-87101 for G2260A
Before beginning this procedure:
❏ Select “Start” in the maintenance function
“Change Needle” (see “Change Needle” on
page 81).
❏ Remove the front cover.
❏ Use the “Needle Up” command in the
“Change Needle” function to lift the needle
an addition 1cm.
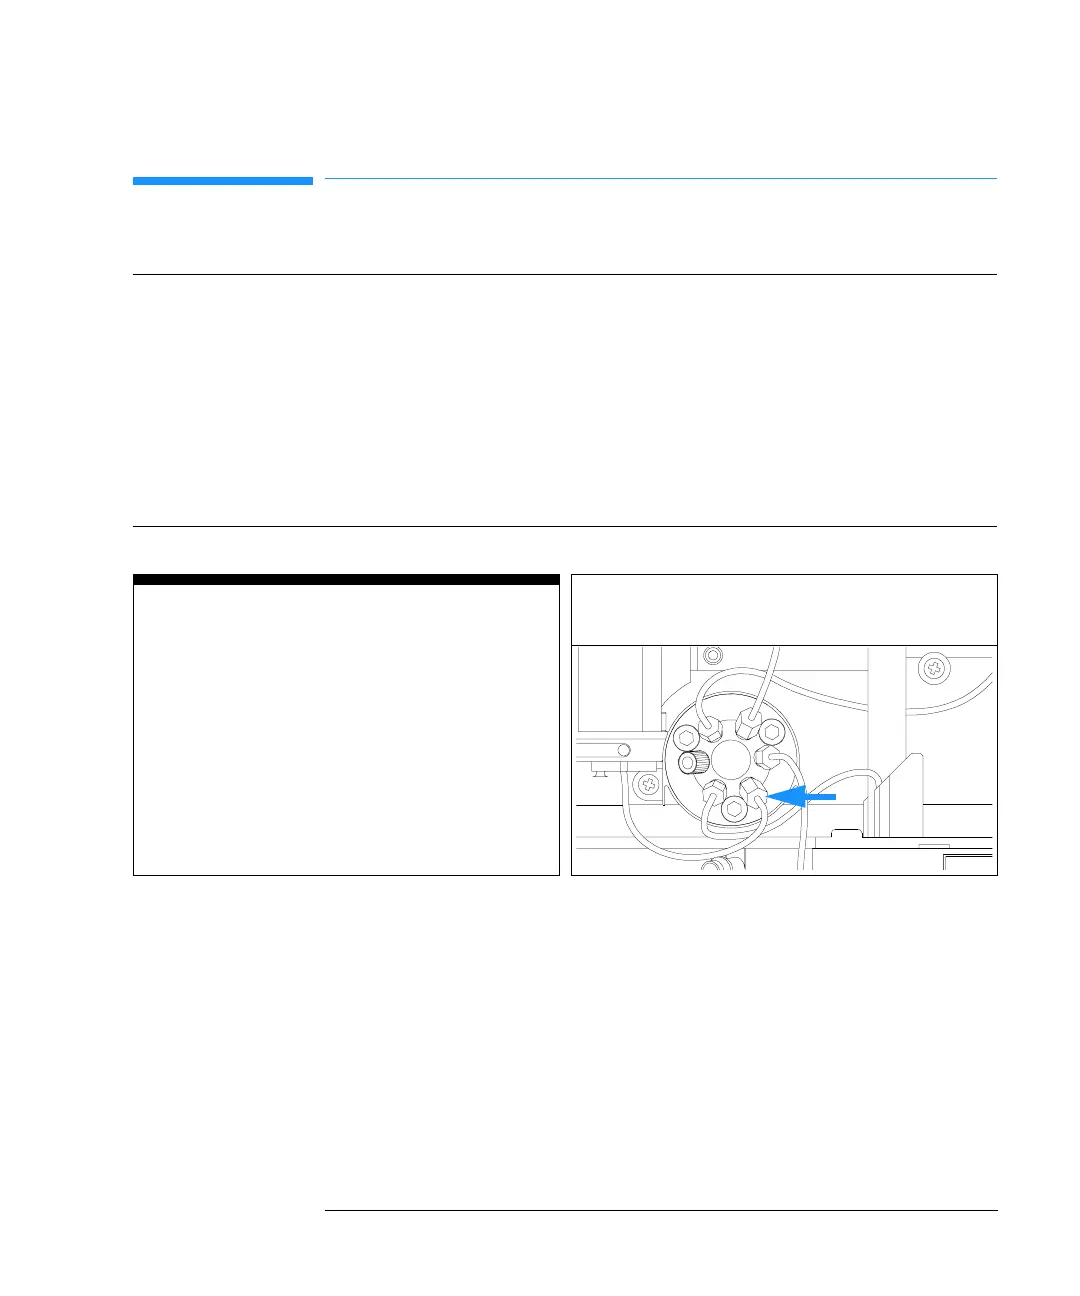
1 Disconnect the seat-capillary fitting from the
injection valve (port 5).
CellFrame

 Loading...


