26
Installing the Autosampler
Installing the Autosampler
Installing the Autosampler
WARNING To avoid personal injury, keep fingers away from the needle area during
autosampler operation. Do not bend the safety flap away from its
position, or attempt to remove the safety cover (see Figure 5). Do not
attempt to insert or remove a vial from the gripper when the gripper is
positioned below the needle.
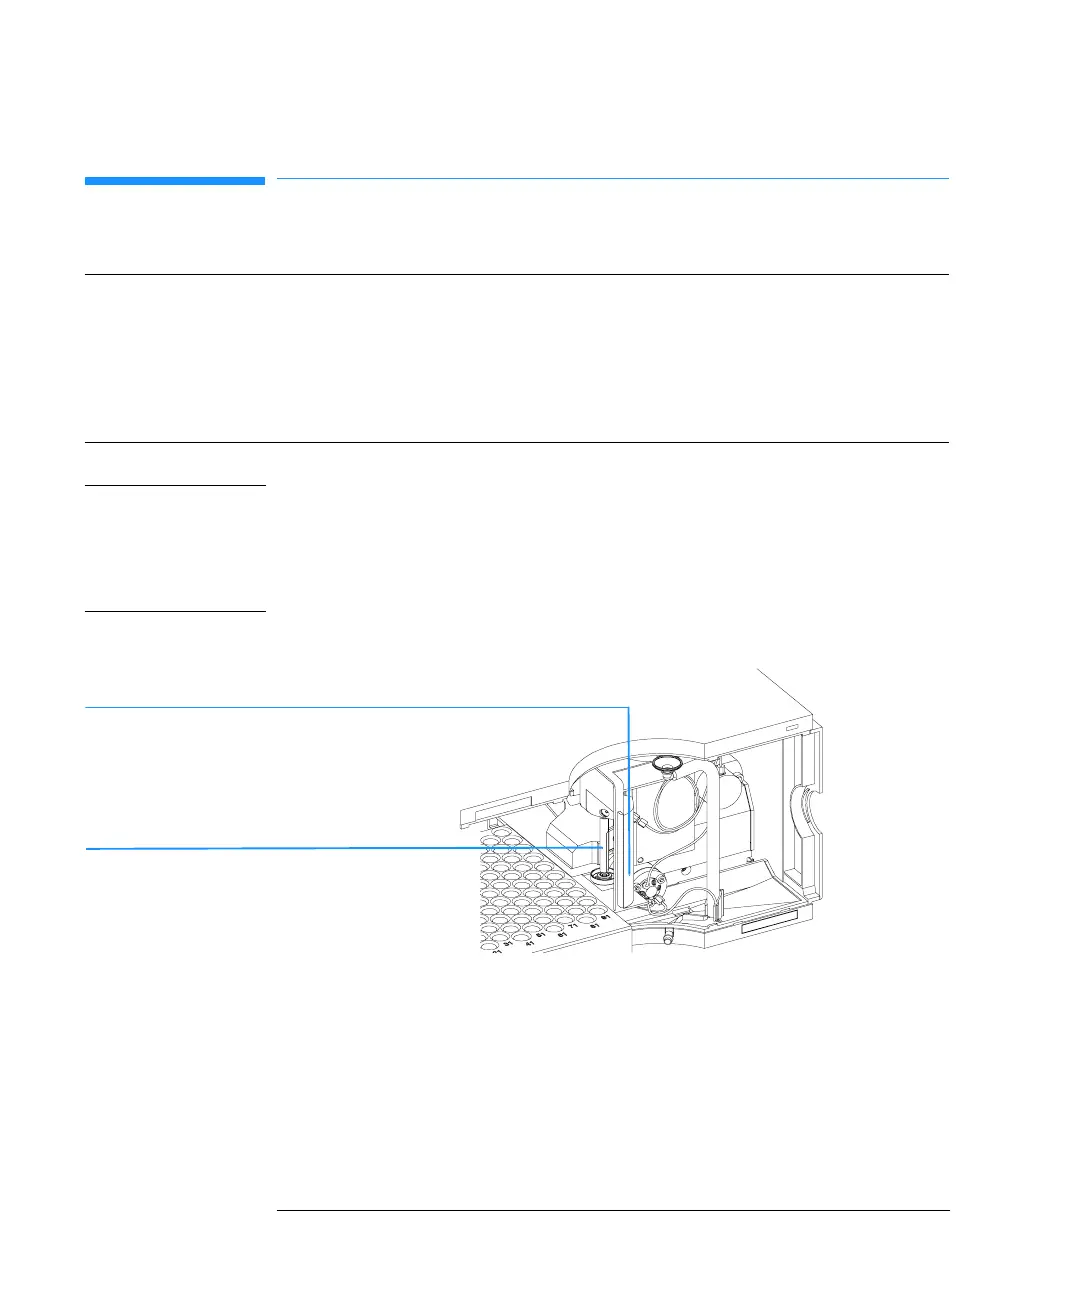
Figure 5 Safety Flap
1 Install the LAN interface board in the sampler (if required), see “Agilent
1100 Series Interface Board to general purposes” on page 198.
2 Remove the adhesive tape which covers the front door.
3 Remove the front door and remove the transport protection foam.
4 Place the Autosampler on the bench or in the stack as recommended in
“Recommended Stack Configuration for an Autosampler (Front View)” on
page 22.
Preparation Locate bench space
Provide power connection
Unpack the Sampler
Parts required Sampler
Power cord, for the other cables see below and “Cable Overview” on page 185
Chemstation and/or Control Module G1323B.
Safety flap
Safety cover