54 Agilent SPS 4 Autosampler User’s Guide
4Operation
Starting up the Autosampler
Before starting the autosampler, carefully read Chapter 1, "Safety Practices
and Hazards" and ensure that the laboratory is set up according to the
details specified.
To start up the autosampler:
1 Ensure the autosampler is connected via a three- pin, grounded power
cord of the AC adapter to a three- pin, grounded power outlet.
2 Ensure that the wash reservoir is properly connected.
3 Turn on the power using the Power Switch on the rear panel of the
autosampler.
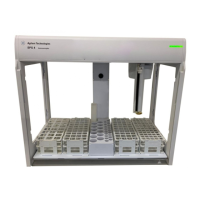
The autosampler performs an initialization sequence on startup. The
power/error indicator is illuminated green when the initialization
sequence is completed correctly.
If an error occurs during the initialization sequence, refer to Chapter 6,
"Troubleshooting".
4 Adjust the pressure plates of the wash pump until the desired rinse
solution flow rate is achieved. Refer to “Pressure Plate Adjustment” on
Page 48.
5 Purge air from the wash system (wash reservoir and flow path) by
placing the rinse solution uptake tubing in the rinse solution source
and running the rinse solution through the wash reservoir.
Ensure there are no air bubbles visible in the rinse uptake tubing
before you start using the autosampler.
NOTE
The initialization sequence moves the probe arm through the four corners of the rack
location mat and finishes with the probe repositioned above the fixed wash reservoir. This
process takes about 30 seconds.

 Loading...