Installation 3
Agilent SPS 4 Autosampler User’s Guide 39
For the materials of the rinse solution, see “Default Rinse Materials” on
Page 95.
Installing the Standards Rack
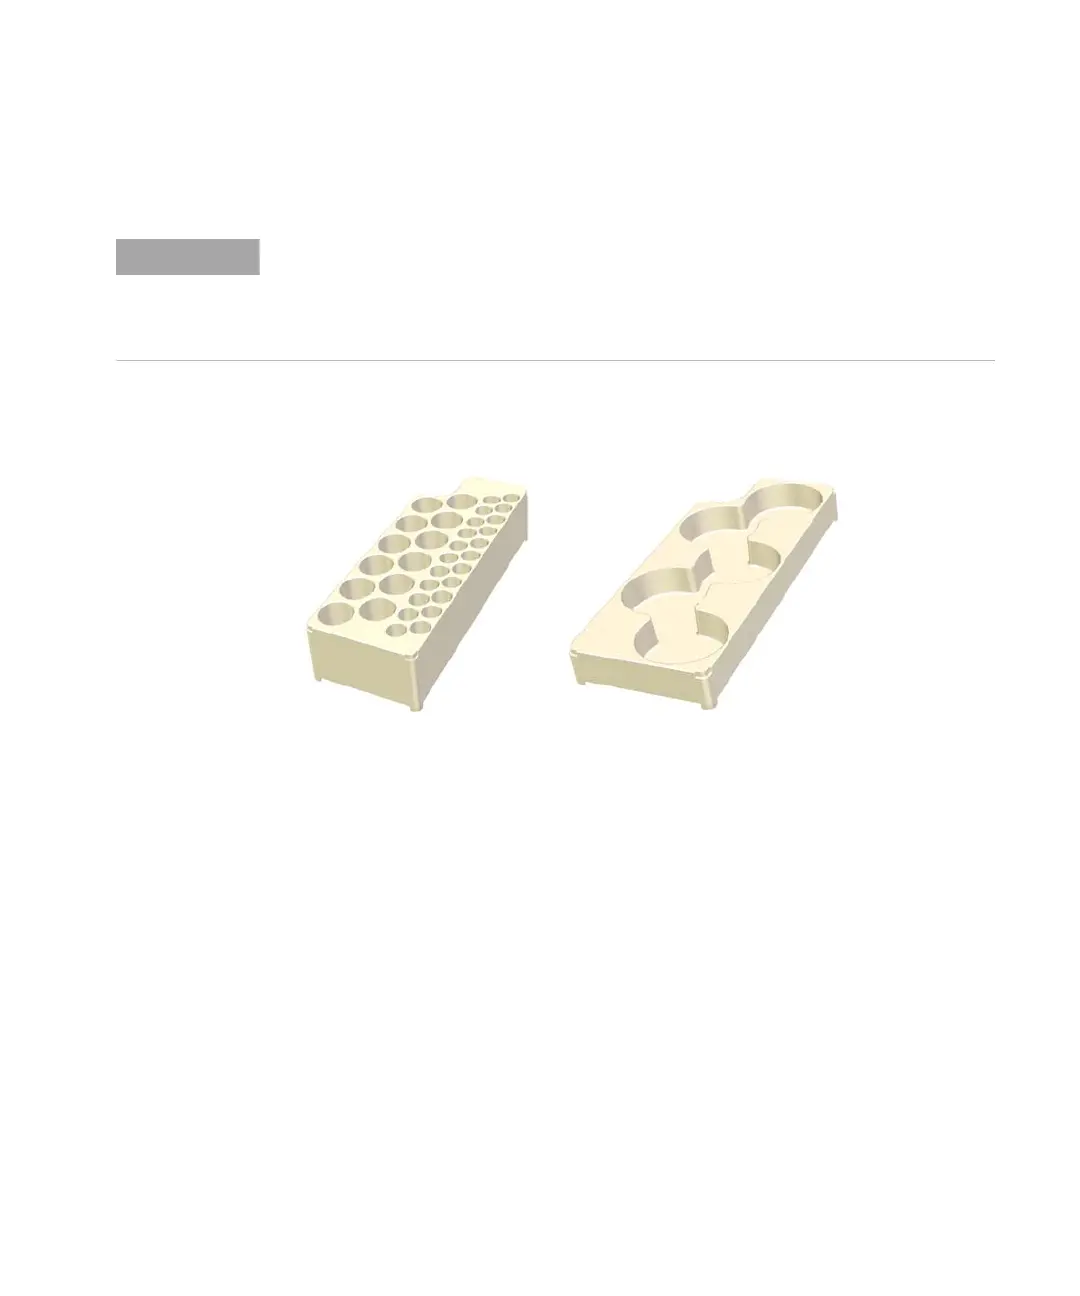
Figure 10 Standards racks
The standards racks are located in the center of the rack location mat by
placing the rack’s feet into the holes in the rack location mat. There are 2
standard rack options as shown in Figure 10. Either may be supplied with
the equipment depending on your application.
• 34 well rack (12 wells for 29 mm OD tubes + 22 wells for 17 mm OD
tubes)
• 5 well rack (for 61 mm OD bottles)
To install the standards rack:
1 Locate the holes for the standards rack in the rack location mat.
2 Align the feet from the standards rack with the holes in the rack
location mat. Press down on the rack to ensure it is correctly located
and the bottom of the standards rack is sitting flush with the rack
location mat.
NOTE
Check the following points regularly:
• There is no leakage between the main body and the connector of the
fixed wash reservoir.
• The drain is not blocked by rinse and sample solution chemistry.