38 Agilent SPS 4 Autosampler User’s Guide
3 Installation
autosampler (see Figure 8).
2 Ensure that the fixed wash reservoir is seated correctly by visually
checking that it is both perpendicular and firmly attached to the rack
location mat.
3 The larger (5 mm) nipple is the outlet nipple. Attach the 5 mm ID
tubing and place the other end of the tubing (drain line) into a suitable
waste container.
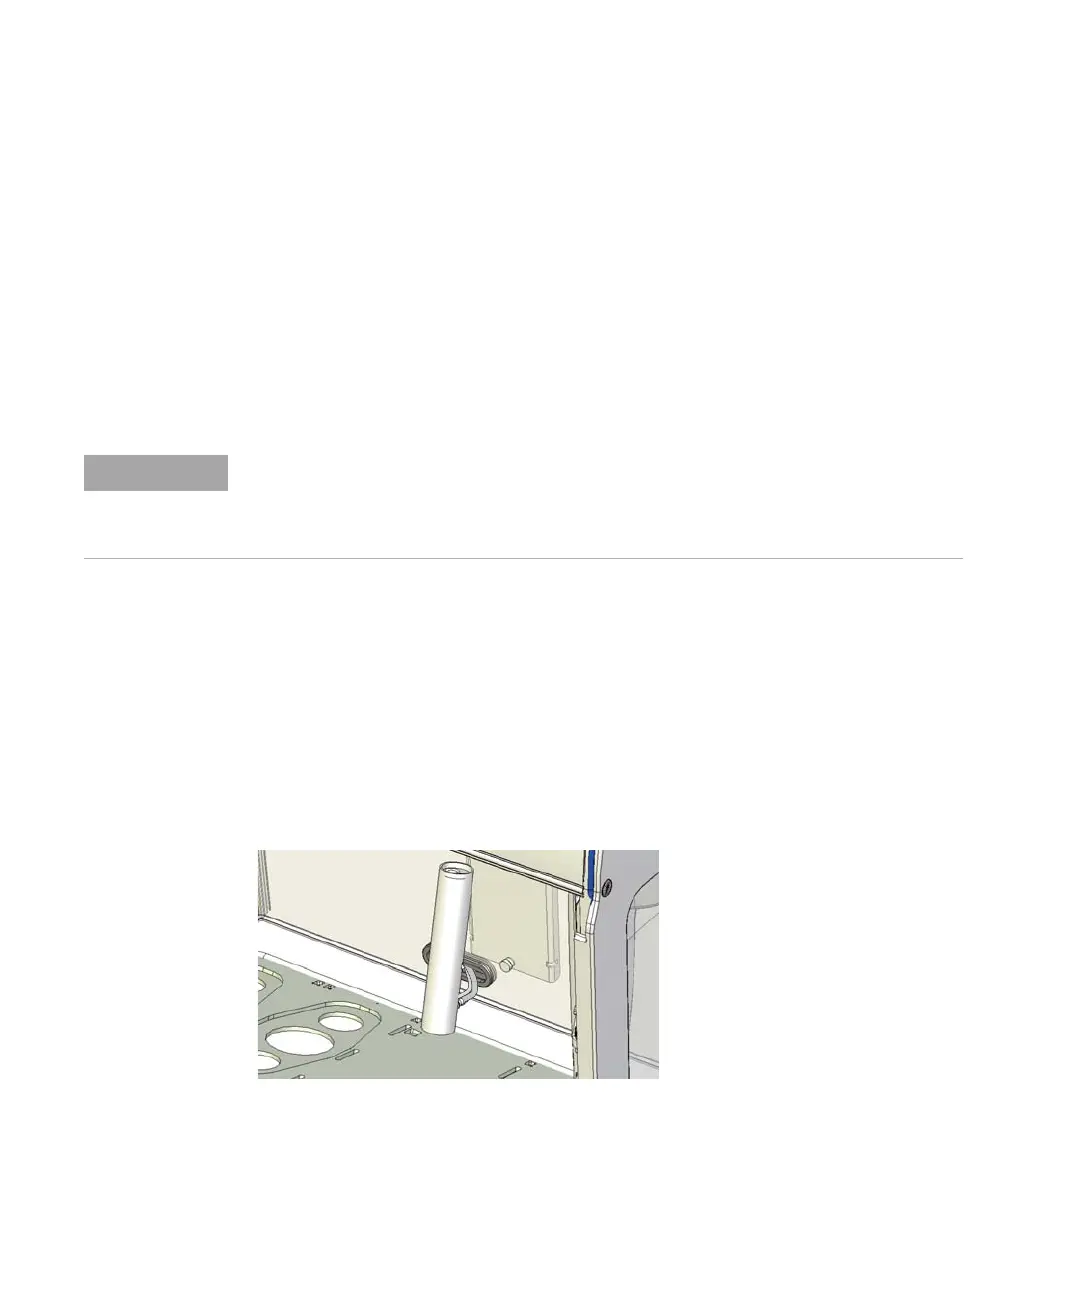
If a rear autosampler cover panel is fitted, the drain line needs to be
guided through the oval rubber grommet in the bottom of the rear cover
(see Figure 9).
4 The 2.5 mm tubing is attached to the inlet (lower) nipple which, in
turn, is connected to the outlet tubing from the wash pump. For the
dual port fixed wash reservoir, there are two inlet nipples which will
need to be connected to tubing from 2 separate channels of the wash
pump.
If a rear autosampler cover panel is fitted, the inlet tubing from the
wash pump needs to be guided through the oval rubber grommet in the
bottom of the rear cover (see Figure 9).
5 Re- fit the rack location mat to the unit.
Figure 9 Feeding tubing through rubber grommet on rear cover (if fitted)
NOTE
Air locks in the drain line may cause rinse solution in the fixed wash reservoir to back up
and overflow. To prevent air locks, the drain line should fall freely and drop vertically into the
waste container. The end of the drain line should be suspended above the liquid level in the
waste container.