Running the Calibration Wizard 7
Agilent SPS 4 Autosampler User’s Guide 75
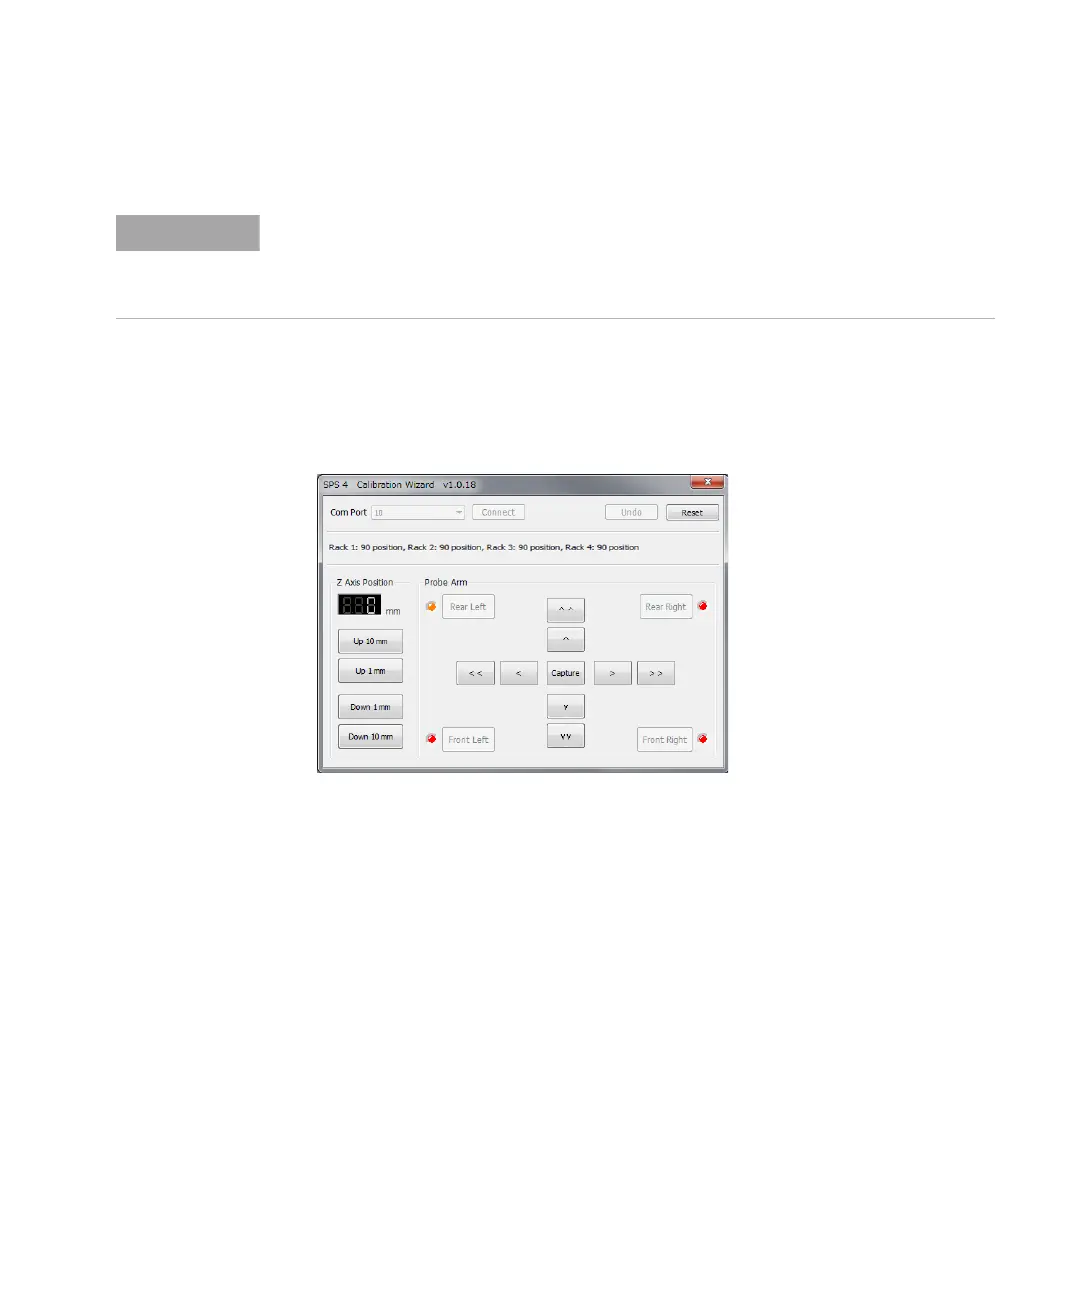
5 Click Reset to start the calibration process.
6 The button labeled “Rear Left” changes to orange and the sample probe
moves to point “Rear Left” above the far left sample well in the sample
rack or microtiter plate in that position. The sample probe is at the top
of the Z- Axis stroke (i.e., the Z- axis position is zero).
To adjust the probe position in point “Rear Left”:
a Adjust the sample probe height to the top of the sample well using
the Up/Down buttons.
b Adjust the XY position to the middle of the well using the arrow
buttons.
c When the position of the probe is centered in the sample well, click
Capture.
The indicator next to the “Rear Left” button changes from orange to
green.
NOTE
During the calibration process, it is important that you do not click the Capture button while
moving to the different calibration points. If you have adjusted the position to be too far
away from the theoretical XY position at any point during the calibration, an error message
is displayed to instruct you to try again.