tips:
a. Make sure there are no obstructions above the remote control to improve the accuracy and
speed of the marking.
Please do the marking according to the status bar color and remote control accuracy tips to
ensure the safety of the operation:
Status bar color:
Blue means high precision and can be used for normal marking.
Orange indicates that the accuracy is average and can mark, but the accuracy is low.
Please reserve a safe margin.
Red means that the accuracy is low, and you can't do the marking. Please make sure
that there is no obstruction above the remote control. Please wait for the accuracy to improve
before you do the marking.
Gray indicates that the marking is not connected. At this time, click the status bar to
reconnect.
Click the status bar to view the remote control positioning details:
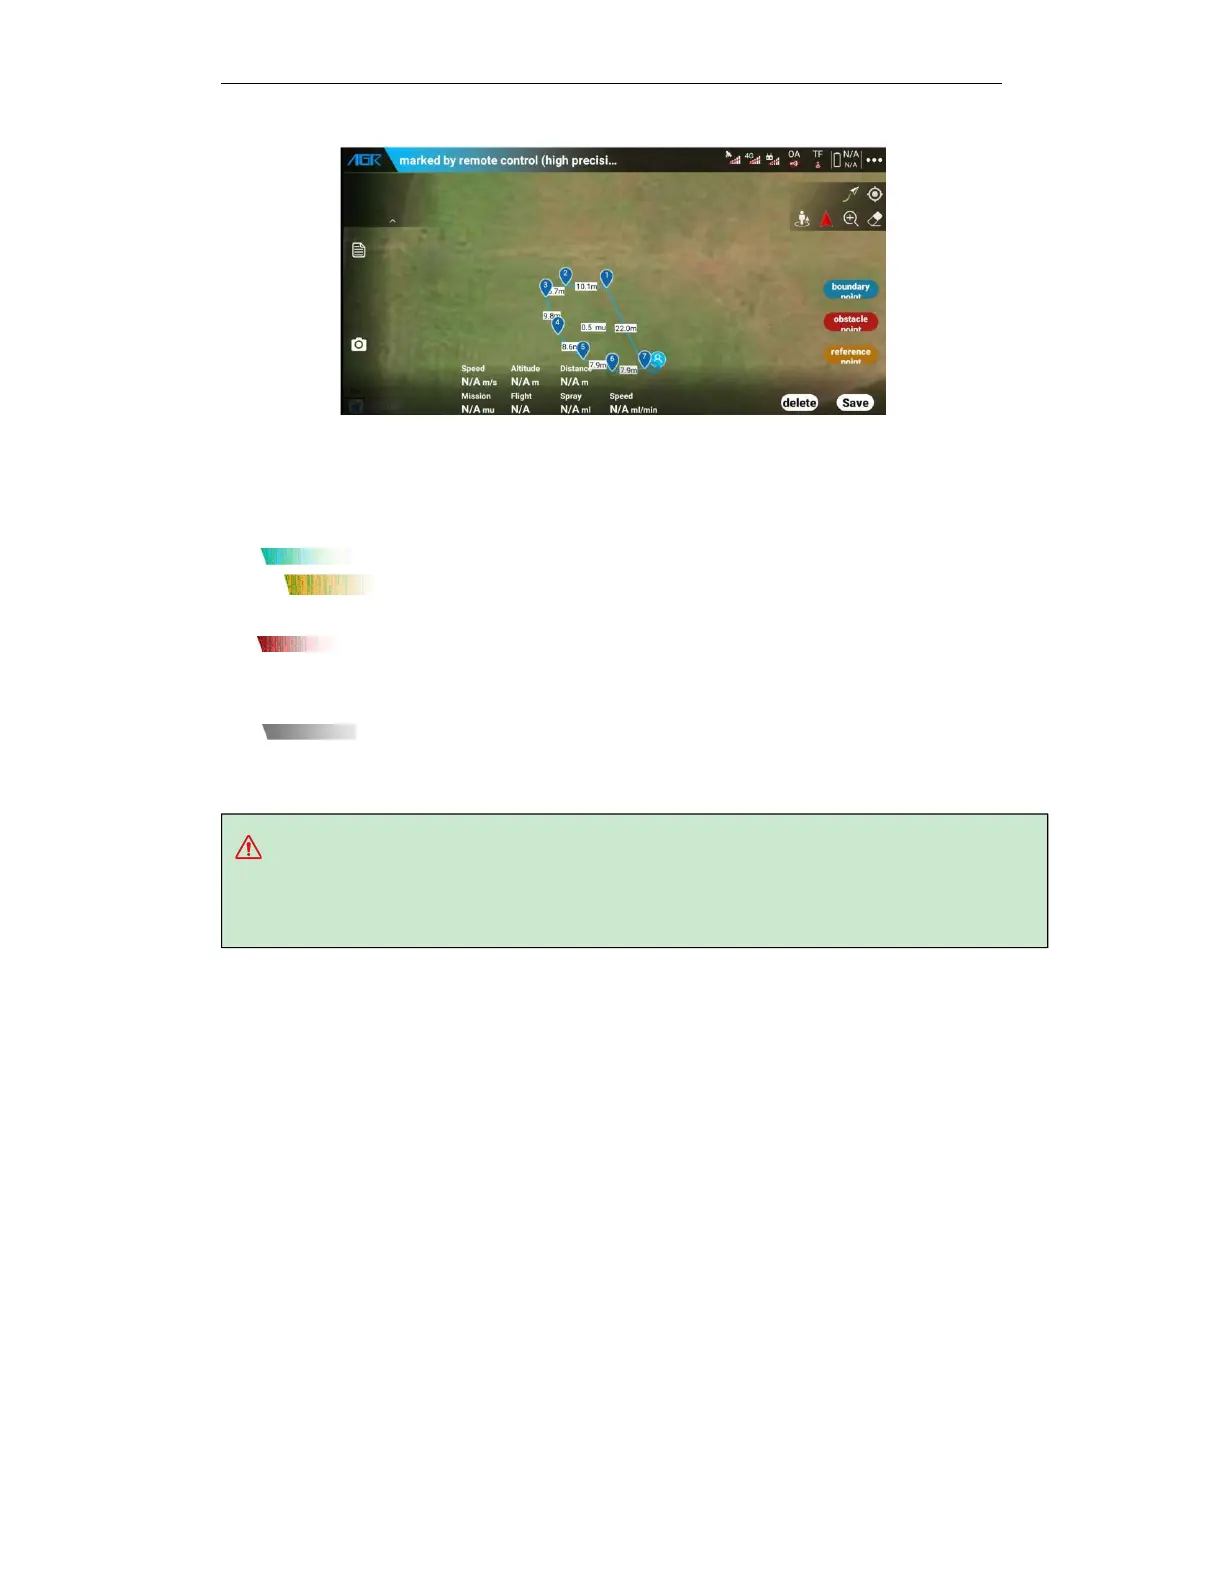
5.6.1.3. Drone marking
Operate the drone to the boundary of the plot, and use drone positioning for marking.
Operation process: Turn on the remote control
——
use the video cable to connect the remote
control——plug in the drone battery (not recommended to carry medicine——APP Bluetooth to
connect the drone——enter the APP mission planning interface——click to start the operation
——select drone marking——manually unlock and take off——fly the drone to the boundary of
the plot, obstacles, and reference points, and then add the boundary points, obstacles, and
reference points after hovering——land the drone after the completion of the plot and save the
plot.