35
FUNCTION
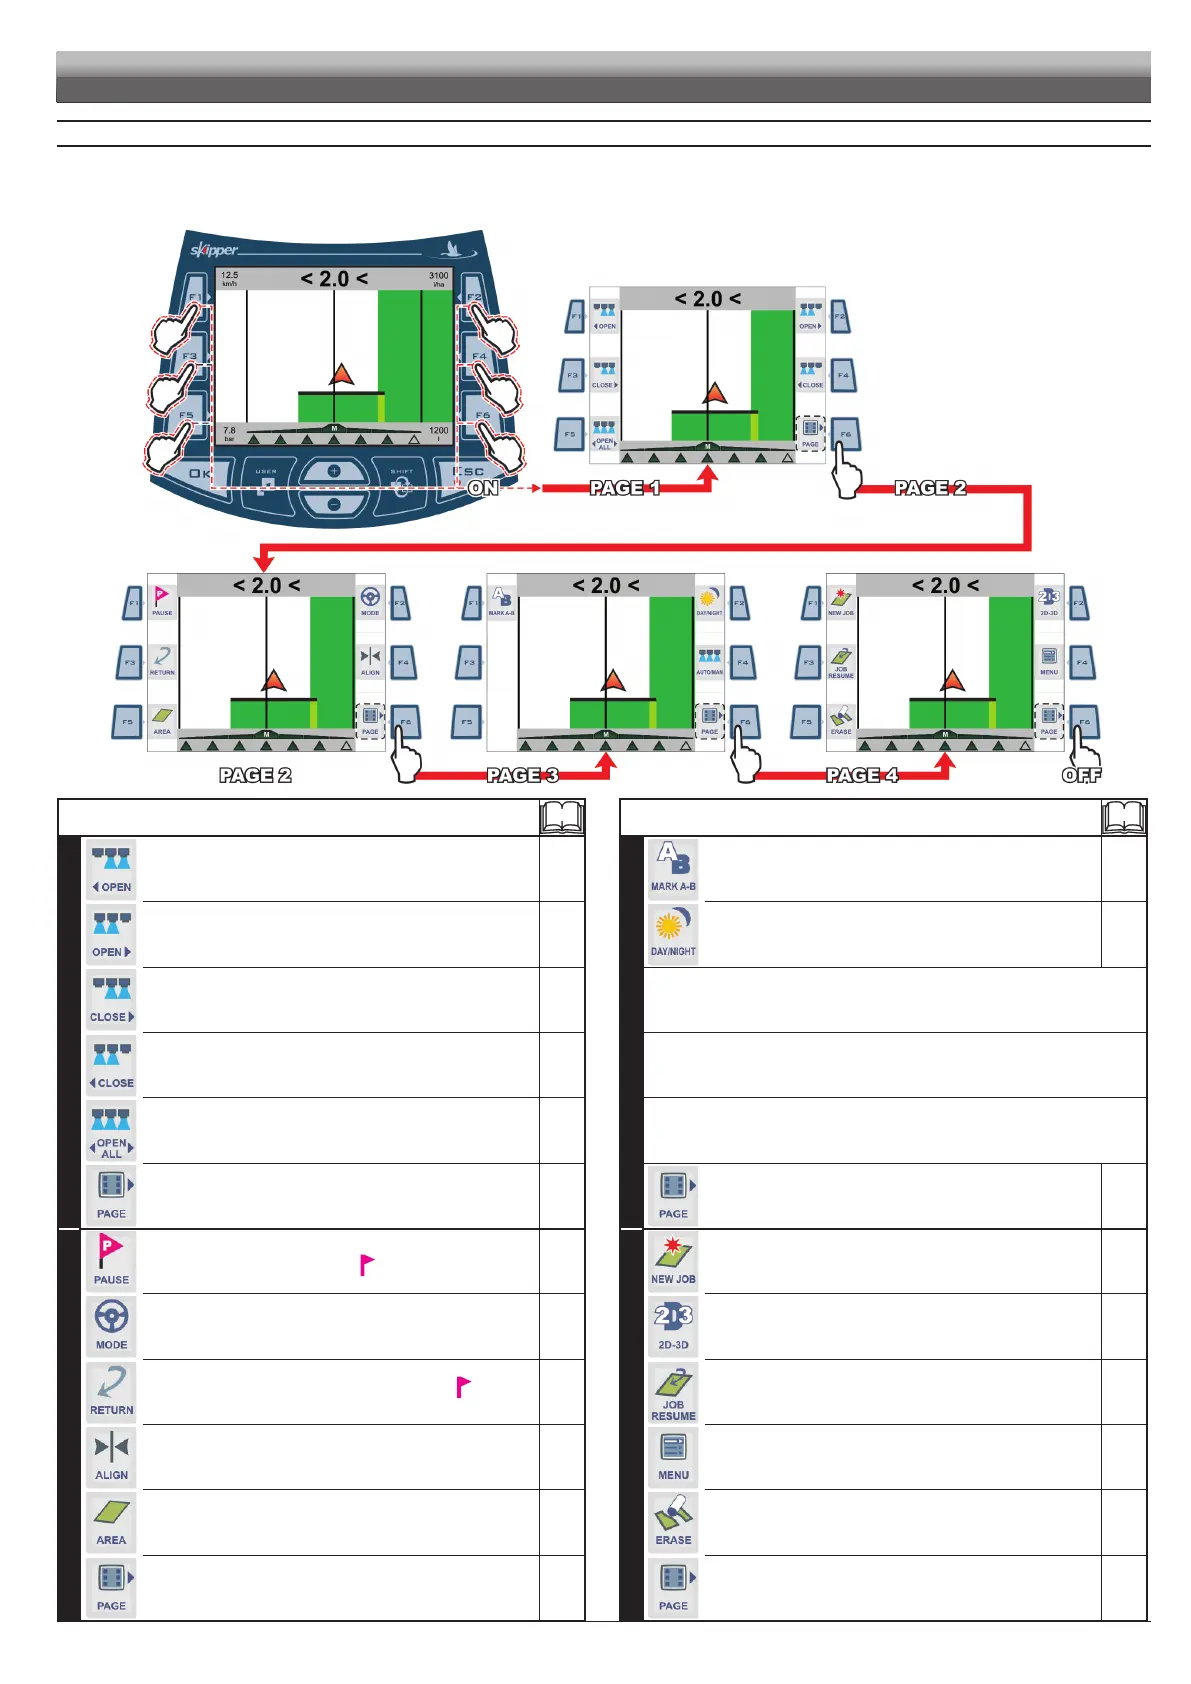
PAGE 1
F1Open(LEFT)
Indicates opening of rst closed section valve,
starting from boom left-hand side
8.1.1
F2Open(RIGHT)
Indicates opening of rst closed section valve,
starting from boom right-hand side
8.1.2
F3Close(LEFT)
Indicates closing of rst opened section valve,
starting from boom left-hand side
8.1.3
F4Close(RIGHT)
Indicates closing of rst opened section valve,
starting from boom right-hand side
8.1.4
F5OpenAll
Indicates opening of all boom section valves
8.1.5
F6 Page
Go to page 2 of functions list
--
PAGE 2
F1Pause
Store a job breaking point on eld
8.2.1
F2Mode
Select guidance mode between Straight parallel and
Curved parallel
8.2.2
F3Return
Activate procedure to go back to job breaking point
previously stored using function "Pause"
8.2.3
F4Align
Shift the closest reference track and realign it to machine
position
8.2.4
F5Area
Activate the procedure to calculate the eld area, while driving
on borders
8.2.5
F6 Page
Go to page 3 of functions list
--
Par.
FUNCTION
PAGE 3
F1MarkAB
Store two eld points A and B, that Skipper LT will use to
create a line to be used as a reference track for spraying job
underway.
8.3.1
F2Day/Night
Toggle from day display guidance mode to night one and vice
versa
8.3.2
FUNCTION NOT AVAILABLE
FUNCTION NOT AVAILABLE
FUNCTION NOT AVAILABLE
F6 Page
Go to page 4 of functions list
--
PAGE 4
F1Newjob
Start a new job
8.4.1
F22D-3D
Toggle from 2D display mode to 3D and vice versa
8.4.2
F3Jobresume
Activate the procedure to resume a spraying job previously
interrupted
8.4.3
F4Menu
Display menu page for programming Skipper LT
8.4.4
F5Erase
Delete stored job data
8.4.5
F6 Page
Disables functions list view
--
Par.
Fig. 105
8 WORK FUNCTIONS
Displayingtheworkfunctionslist: press any function key while driving (page shown in Fig. 105);
when list is active, pressing every key will activate the corresponding function displayed on the side; use F6 to scroll the pages.
The table below gives an overview of all possible work functions and corresponding function key:
WORK FUNCTIONS