EFD1000 Installation Manual
DOCUMENT # A-01-126-00 PAGE 158-225 Revision H
© Copyright 2009 Aspen Avionics Inc.
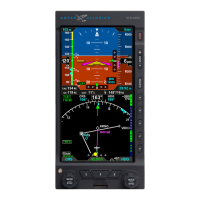
c) Tune the Nav Signal Generator to the ILS test frequency and generate a valid Glide
Slope signal. Verify the VDI (Glide Slope) scale appears on the right side of the ADI.
d) Generate a signal above and below the Glide Slope beam and verify proper polarity
of the GS deviation for Fly Up and Fly Down on the PFD.
NOTE: The EFD1000 system will not display a VDI (Glide Slope) indicator without
both valid localizer and Glide Slope signals.
e) Repeat procedure for NAV2 if installed.
10.6.8 Backup Navigation Indicator
a) Verify the backup navigation indicator continues to function after pulling the PFD
and ACU circuit breakers.
10.6.9 Autopilot Sensor Test
Refer to autopilot manufacturers’ post installation check out procedures for complete
autopilot post installation ground checks. At a minimum complete the following
checks to verify the EFD1000 interface is satisfactory.
NOTE: For attitude based autopilots it might be necessary to level the
autopilot gyro to get proper FD and autopilot response from the test.
CAUTION: Verify control surfaces are free and clear.
a) If installed, center the HDG Bug under the lubber line and engage the autopilot
and select HDG Mode.
b) The FD (if installed) should be level and the yoke should not turn.
c) Move the HDG Bug left of the lubber line and the FD and or yoke should bank
left.
d) Move the HDG Bug to right of lubber line and the FD and or yoke should bank
right.
e) With NAV1 selected on the PFD and a valid Nav Signal generated engage the
autopilot in NAV Mode and verify that the FD and/or yoke follow the CRS
Pointer in phasing.
f) Verify that the autopilot responds to correct Left/Right phasing by generating
left and right needle deflection. For autopilots that monitor the NAV FLAG,
generate an invalid Nav Signal and verify autopilot responds accordingly.