EFD1000 Installation Manual
DOCUMENT # A-01-126-00 PAGE 61-225 Revision H
© Copyright 2009 Aspen Avionics Inc.
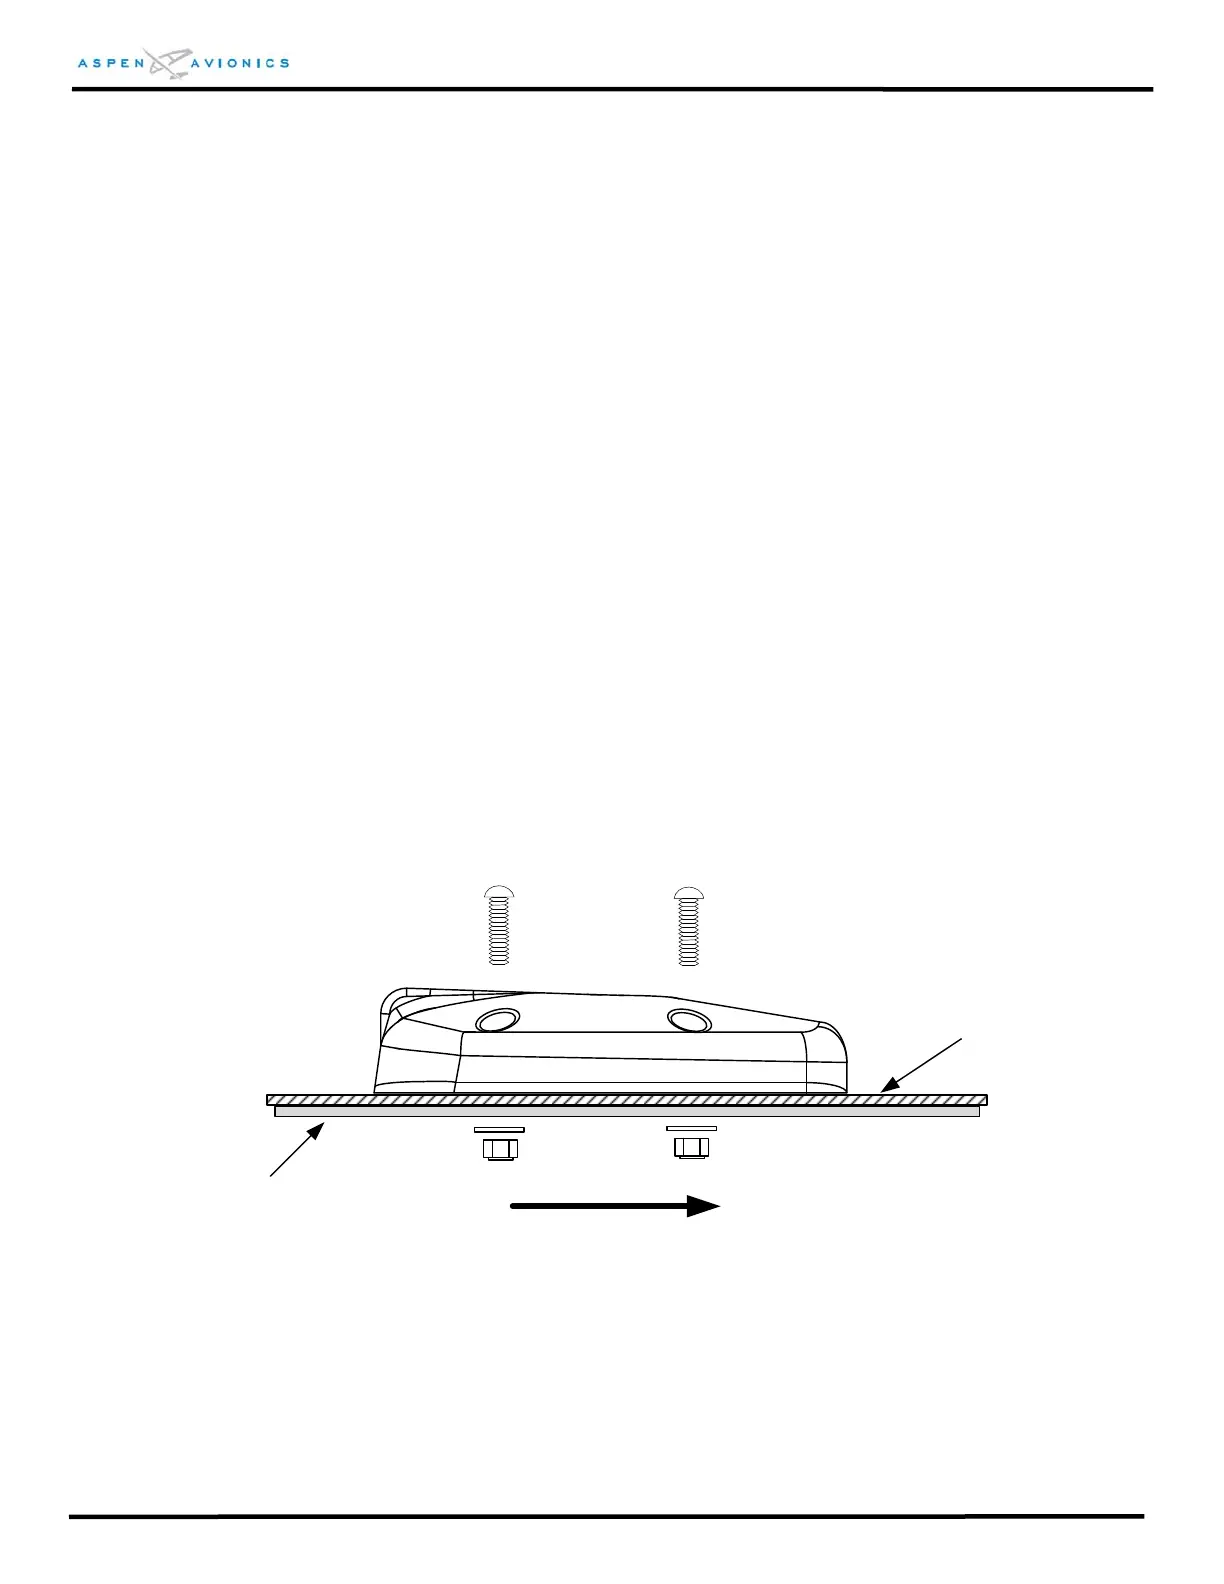
6.9.8 RSM Installation
1) It is not required to remove aircraft surface paint below RSM unless an aluminum
shim was required on extreme mounting angles. The shim must be bonded to the
fuselage. Bonding of RSM is through four (4) mounting screws to doubler.
2) Install the ring terminal to the RSM shield ground wire.
3) Install the RSM on the aircraft and secure it using four (4) screws, four (4) washers,
and four (4) nuts from the RSM Installation Kit. Torque hardware to 12-15 in-lbs.
Installer may substitute nut plates for washers and nuts provided the nut plates are
attached to the doubler only and not the aircraft skin. The nut plates must be
stainless steel.
4) Attach ring terminal to ground stud on RSM doubler.
5) Apply a bead of non-corrosive sealant around the RSM and over each mounting
screw.
CAUTION: Use of ferrous or magnetized mounting hardware will result in compass
errors and degrade the stability of the AHRS attitude solution. Use only the
specified hardware to mount the RSM.
Doubler
(installer fabricated)
Aircraft Skin
FWD
Figure 6.15 – RSM Mounting
 Loading...