Ch. 6. Fluid Imaging in a Droplet Sec. 6.3. Preparing for Imaging
• You are familiar with the basic names of the hardware components and software controls (Chap-
ter 1 on page 3.)
• You have powered up the Cypher and launched the software: (
Chapter 2 on page 10.)
• You are comfortable with AC Mode Imaging in Air, as instructed by the tutorial: (
Chapter 4 on
page 17
).
6.3.1. Mounting the Sample Dish
The sample dish was originally integral to the evaporation control in an earlier droplet holder design
where an evaporation shield attached to the droplet holder. This scheme was difficult to use so the
evaporation control components were redesigned as is now described. The sample dish is now only
used to catch fluid overflow.
Fluid scanning experiments can be carried out with or without the use of the sample dish since in either
case the fluid should be confined between the glass of the droplet holder and the sample. The dish is not
intended to be used as a reservoir for liquids. To install the sample dish remove the magnetic insert in
the scanner cap and thread the dish into the scanner.
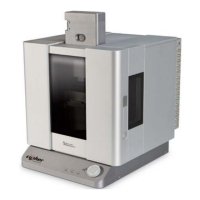
1.
Remove the magnetic insert
• Use a tool like the point of a pair of tweezers to fit into one of the holes in the insert.
• Push the insert counter clockwise to loosen the threads.
• Remove the insert and store in a safe place.
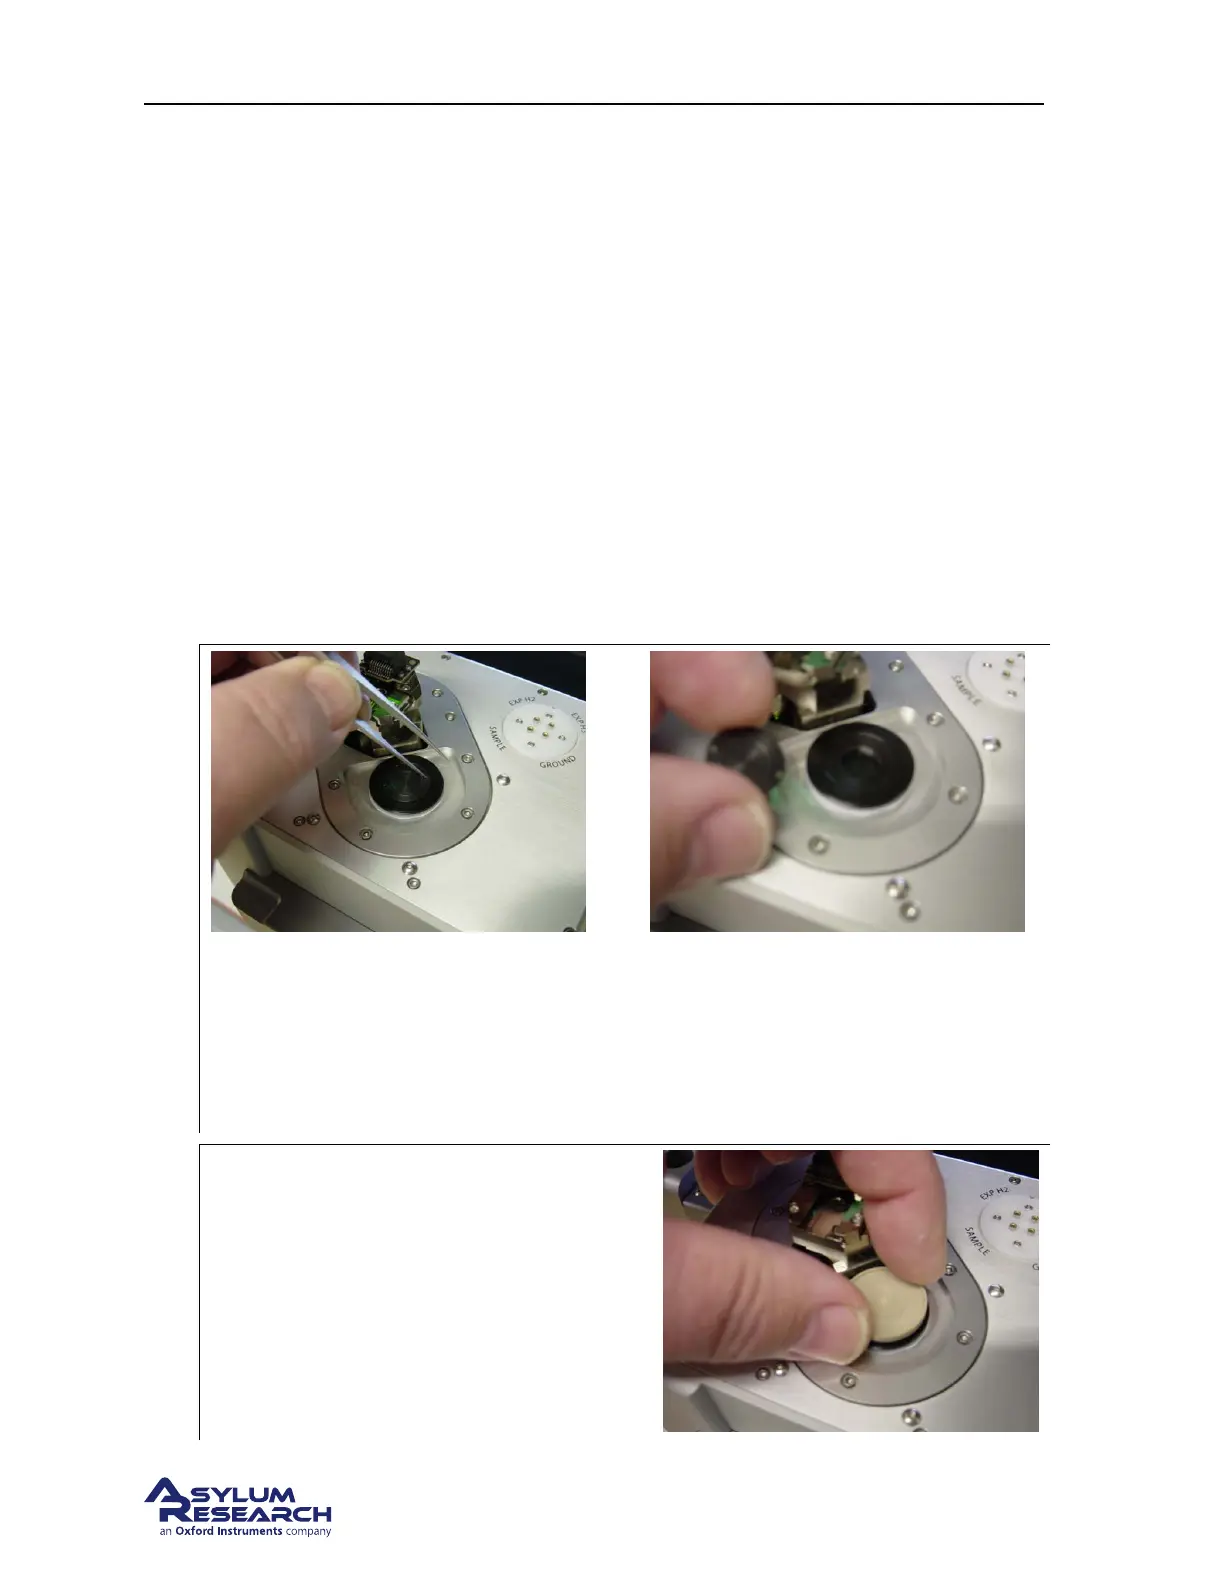
2.
Install the Sample Dish
• Thread the dish into the scanner cap and
gently tighten.
BETA
Page 57