Ch. 6. Fluid Imaging in a Droplet Sec. 6.3. Preparing for Imaging
6.3.2. Mounting the Cantilever
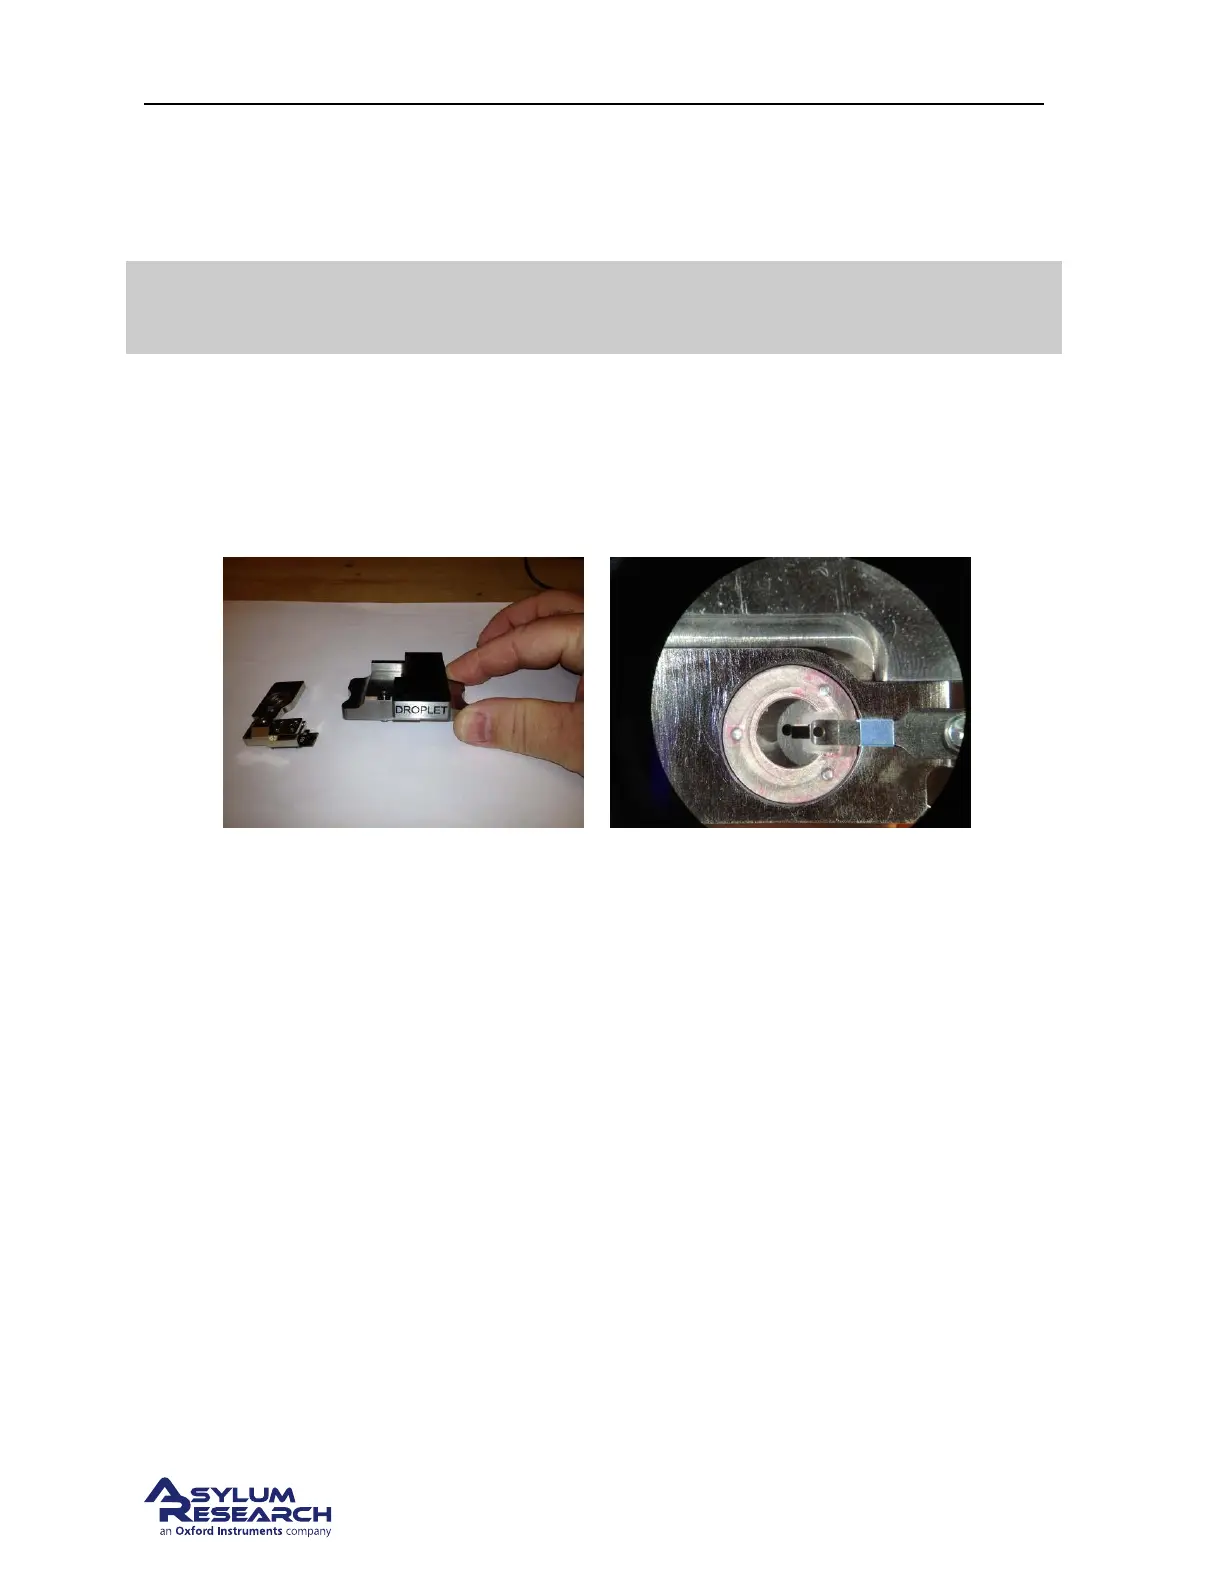
This cantilever holder requires the 901.716 droplet changing station (See Figure 6.2a on page 58).
Warning
Using the wrong changing station will not work and may damage your cantilever
holder.
Once you have located the changing station, the procedure is the same as you are probably familiar
with from AC mode imaging in Air. If you are not familiar with this you should seriously consider
following the tutorial in
Chapter 4 on page 17 at least once. Herein the specifics of mounting cantilevers
is described in
Step 9 on page 21 through Step 14 on page 22.
When finished your aligned cantilever should look like
Figure 6.2b on page 58.
(a) Droplet Cantilever Holder Changing Station
XXX.XXX. Notice the markings.
(b) Properly centered cantilever in the Droplet
Cantilever Holder.
Figure 6.2.
6.3.3. Using the Evaporation Shield
Since the volume of liquid is small, evaporation will limit the experiment time to about 30 minutes. It
is possible to extend the experiment without disengaging the tip by adding liquid into the gap between
the sample and the droplet holder from the side by using a pipette.
The droplet holder is supplied with a set of parts which will allow you to build a semi enclosed cham-
ber to help reduce the rate of evaporation. With the evaporation control in place, the typical time of
the experiment can be extended about three times compared to scanning without them. Basically, the
evaporation shield surrounds the scanning area while contacting the underside of the droplet holder
window.
The current design of the evaporation base is sized to work with or without the sample dish using a
sheet of mica or a glass cover slip mounted to a steel puck. Thicker bases can be provided if your
typical specimen thickness prevents the shield from contacting the holder.
BETA
Page 58


 To Next Page