Ch. 6. Fluid Imaging in a Droplet Sec. 6.3. Preparing for Imaging
1.
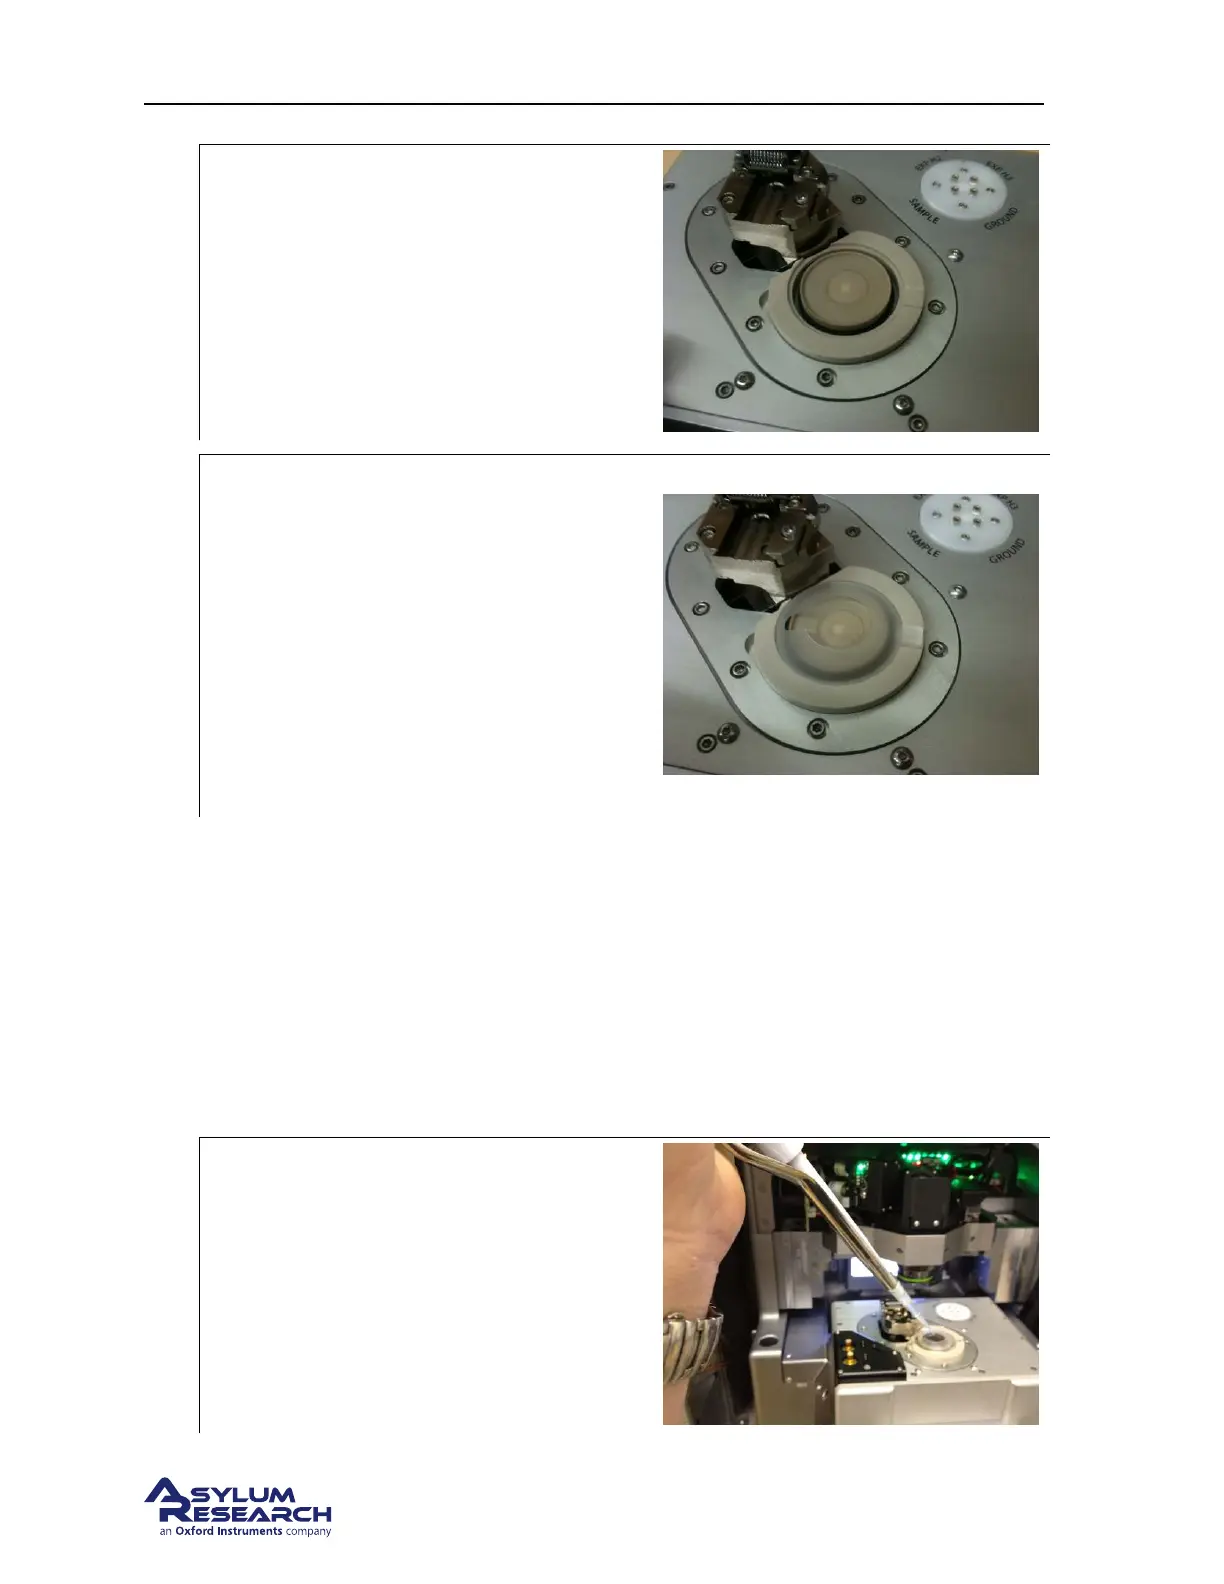
Install the evaporation shield base
• Place the base into the recess around the
sample stage
Note: The top of the base has a lip where the
evaporation shield fits.
2.
Install the evaporation shield
• Place your sample onto the scanner.
• Place the evaporation shield on the base.
• Add a drop (approx. 100uL) of liquid to
submerge the sample
Note: The tab on the shield makes a nice
handle to allow you to manipulate it into
position. Use tweezers to fit the bottom edge
of the shield into the groove on the base.
6.3.4. Sample Mounting
Typically a sample is mounted directly to a steel AFM puck as you would for air imaging. The sample
should be large enough to allow a drop of liquid to be placed on it. If the specimen is a material which
requires a substrate, a piece of mica or a 15mm glass cover slip should be epoxied to the steel puck.
6.3.5. Installing the Cantilever Holder
1. Install the appropriate cantilever for your experiment.
2.
Immerse the sample:
• Add a drop of liquid (approx. 100uL)
onto the sample surface.
• A laboratory pipette is recommended to
deliver the liquid.
BETA
Page 59