SIP User's Manual 138 Document #: LTRT-68806
Mediant 2000 & TP-1610 & TP-260/UNI
4. From the 'Profile Preference' drop-down list, select the preference (1-20) of the current
Profile. The preference option is used to determine the priority of the Profile. Where
'20' is the highest preference value. If both IP and Tel profiles apply to the same call,
the coders and other common parameters (noted by an asterisk in the description of
the parameter IPProfile) of the preferred Profile are applied to that call. If the
Preference of the Tel and IP Profiles is identical, the Tel Profile parameters are
applied.
Note: If the coder lists of both IP and Tel Profiles apply to the same call, an
intersection of the coders is performed (i.e., only common coders remain). The order
of the coders is determined by the preference.
5. Configure the Profile's parameters according to your requirements. For detailed
information on each parameter, refer to the description of the screen in which it is
configured as an individual parameter.
6. From the 'Coder Group' drop-down list, select the coder group you want to assign to
the Profile. You can select the gateway's default coders (refer to 'Coders' on page 96)
or one of the coder groups you defined in the Coder Group Settings screen (refer to
'Coder Group Settings' on page 133).
7. Repeat steps 2 to 6 for the second to fifth IP Profiles (optional).
8. Click the Submit button to save your changes.
9. To save the changes to flash memory, refer to 'Saving Configuration' on page 256.
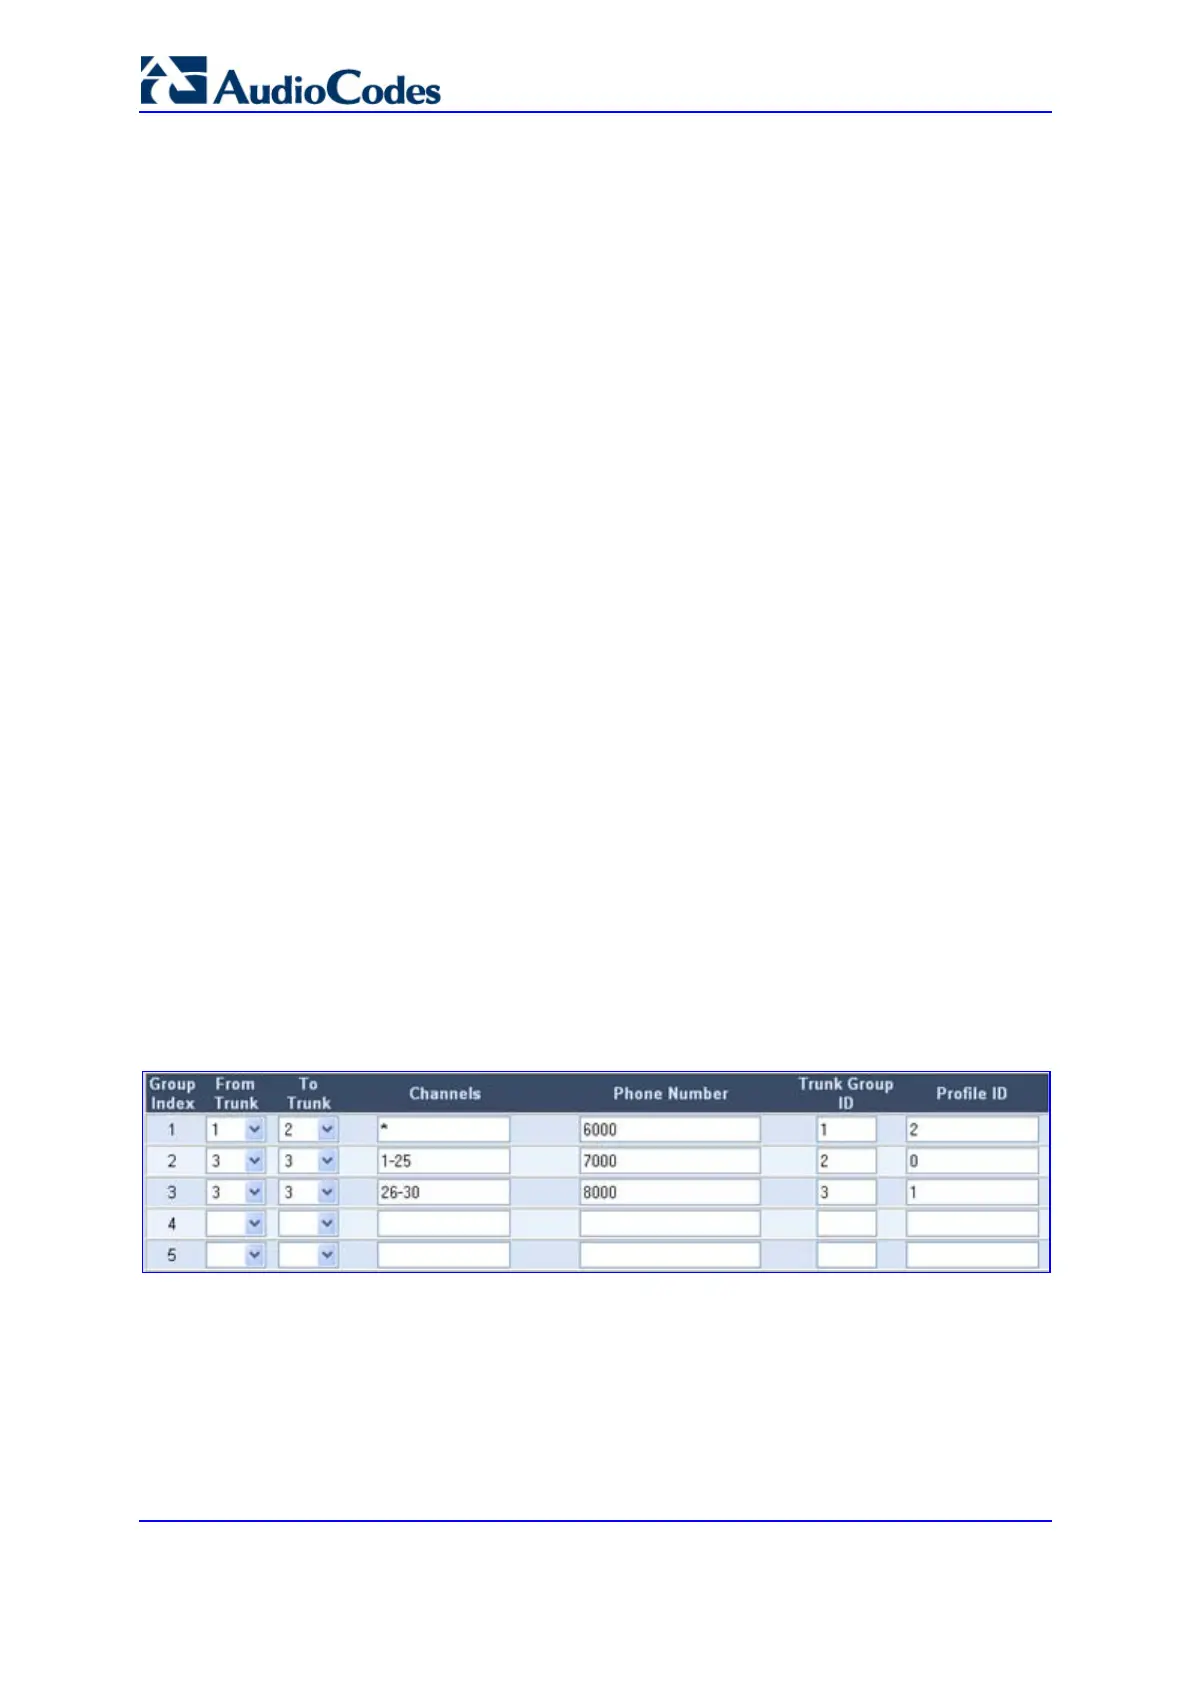
5.5.6 Configuring the Trunk Group Table
The Trunk Group Table option is used to assign trunk groups, profiles, and logical
telephone numbers to the gateway's channels. Trunk Groups are used for routing IP-to-Tel
calls with common rules. Channels that are not defined are disabled.
You can also use the ini file parameter TrunkGroup_x to configure the Trunk Groups (refer
to 'Number Manipulation and Routing Parameters' on page 318).
¾ To configure the Trunk Group table, take these 4 steps:
1. Open the 'Trunk Group Table' screen (Protocol Management menu > Trunk Group).
Figure 5-24: Trunk Group Table Screen
2. Configure the Trunk Group according to the table below.
3. Click the Submit button to save your changes.
4. To save the changes to the flash memory, refer to 'Saving Configuration' on page 256.