Connecting the components on page 49 shows the slots on the back of the IP
Deskphone.
2. Press the foot stand into the slots until it snaps into place.
Note:
If you mount your Avaya 1230 IP Deskphone on a wall, do not attach the foot
stand.
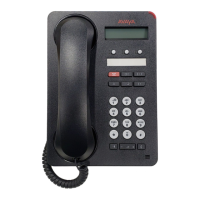
Connecting the handset
Use the following procedure to connect the handset to the IP Deskphone.
1. Plug the end of the handset cord with the short straight section into the handset.
2.
Plug the other end of the handset cord with the long straight section into the handset
jack marked with the handset symbol as shown
IP Deskphone Connections on
page 50.
3. (Optional) Thread the cord through the channel in the foot stand (if installed) so that
it exits on the side of the foot stand.
Connecting the headset (optional)
If you have a headset, you can connect the headset to the IP Deskphone as given in the
following procedure:
1.
Plug the headset cord into the headset jack on the back of the IP Deskphone as
shown in IP Deskphone Connections on page 50.
2.
Thread the cord through the channel in the side of the foot stand (if installed).
3. Set up the headset according to the headset instructions.
Connecting the AC power adapter (optional)
Your 1230
IP Deskphone supports AC power or Power over Ethernet (PoE). To use local AC
power, use only the Avaya-approved Global Power Supply (NTYS17xxE6) and country-
specific IEC cable. You can order the Avaya-approved AC adapter and country-specific IEC
cable separately.
Warning:
Use only the approved Avaya Global Power Supply with your 1230 IP Deskphone.
To use
PoE, where power is delivered over the CAT5 cable, your connected LAN must support
PoE. If you use PoE, you do not require an AC adapter.
Connecting the components
Avaya 1230 IP Deskphone with SIP Software User Guide November 2013 51

 Loading...