5. Palettes - Page 89
TitanUniversal_Man_v8-0_TT.doc 05 August 2014
1> Press Clear to clear the programmer.
2> Select the fixtures for which you want to store palette values.
3> Using the attribute buttons and wheels, set the attributes you
want in the palette entry. You can store any or all attributes of
a fixture in each palette entry.
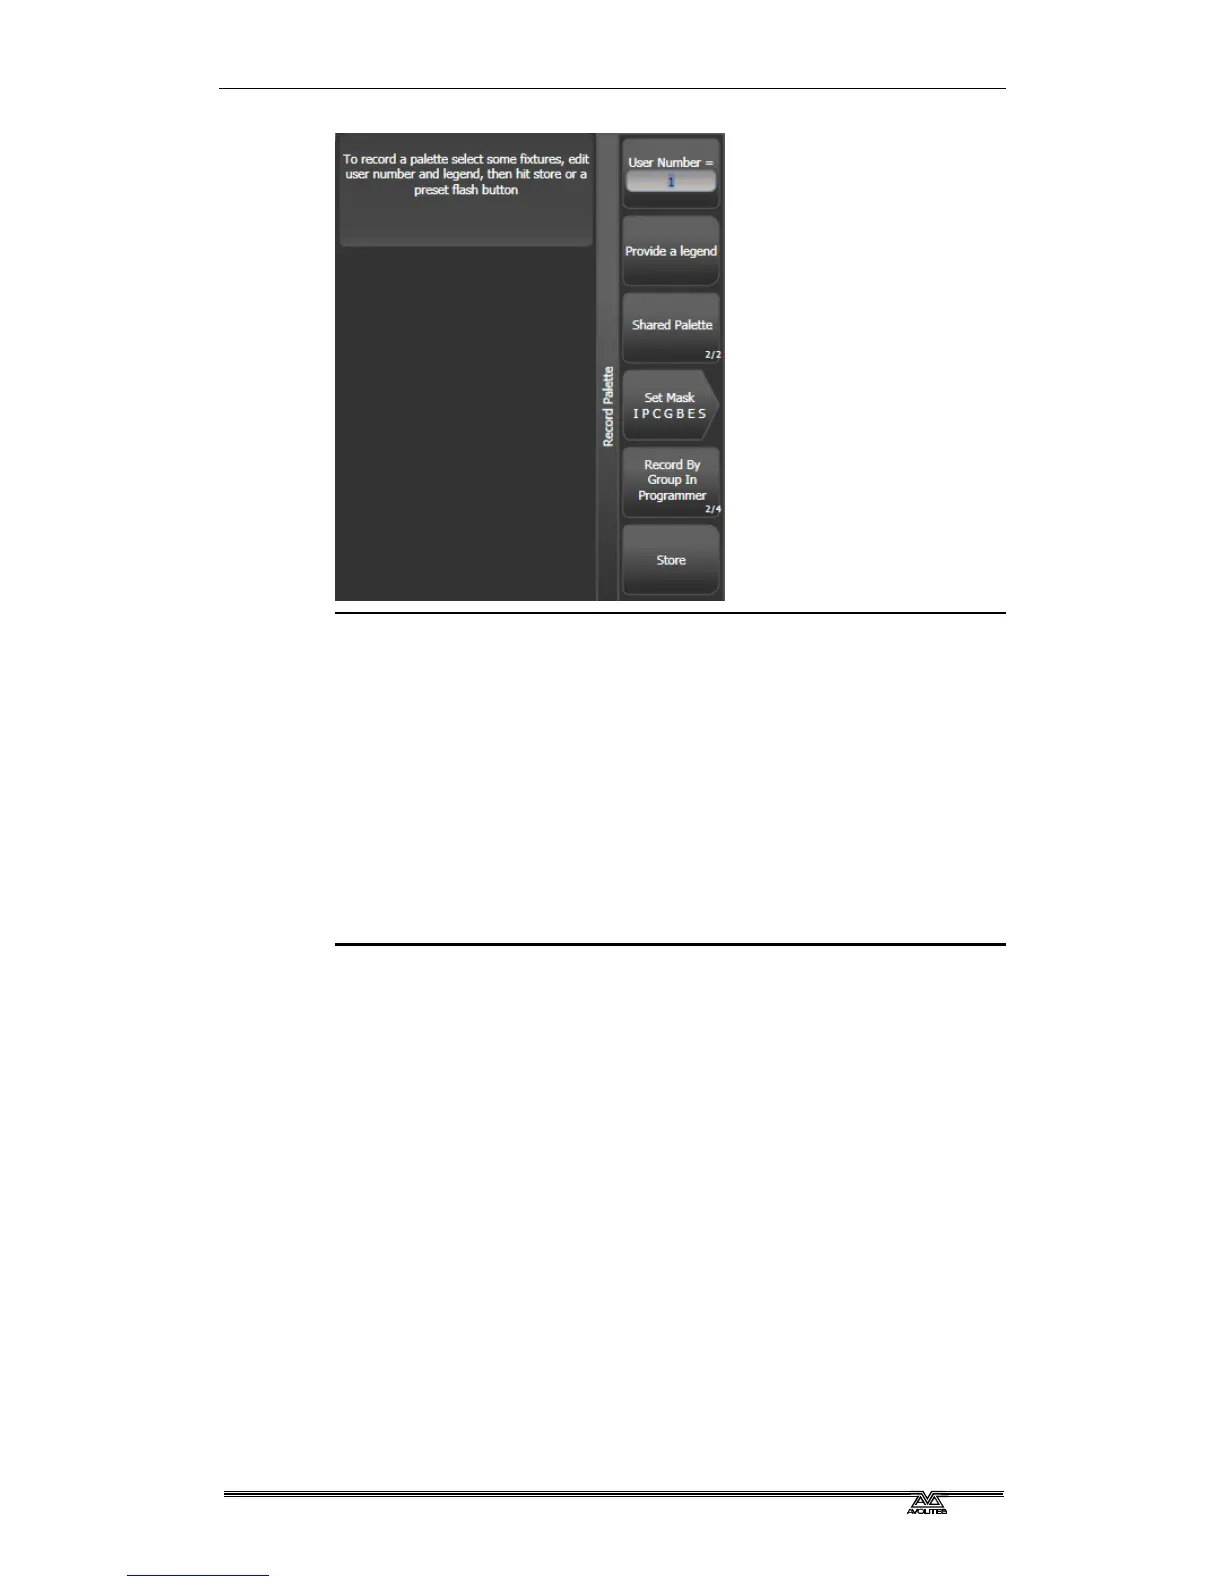
4> Press the Palette button, then [Record Palette]. Using Quick
Record (see next section) you can skip this step.
5> Set the palette Mask – this sets which attributes will be
recorded in the palette. Select attributes using the Attribute
Bank buttons – anything lit up will be saved. [Set Mask] and
[Record by] softkeys also control the Mask (see below).
6> Press an unused Palette button to store the palette (available
buttons will flash). Or enter a palette number and press [Store]
• The console will automatically set the palette as Global, Shared
or Normal (by checking if the values to be stored are the same
across all fixtures of the same type). You can override the
setting by pressing softkey C. See below for more details of
how this automatic choice works.
• [Set Mask] allows you to specify which attribute groups will be
included in the palette. You can also use the grey Attribute
Bank buttons on the right hand edge of the console to set the
mask.
An attribute group is included when the softkey is inverted (like
the Colour group in the picture) and when the LED is lit on the
Attribute Bank button. If you use Quick Record (see next
section) the mask is automatically set by the workspace window
you save the palette in – Positions only includes P, Colours only
C and Beams includes IGBES. If you use the Record Palette
button then you need to set the mask manually.
• Press the Attribute Options button to toggle each mask group
between Include and Exclude.