3. Getting started
3. GETTING STARTED
Overview
• Environmental Condition Check
•BasicWorkflow
3.1 Environmental Condition Check
Environment condition c h eck
A device must always be mounted in a manner which ensures both air inlets an d outlets are free. F or installations in environments
where the dev ice is subject to e xcessive dust, then it is highly advisable and desirable to have this dus t removed prior to it reaching
the dev ice clean air s upply. Devices or structures to extract or shield excessive dust well away from the device are a prerequisite; if
this is not a feasible solution then measures to reloc ate the device to a clean air environment should be considered.
It is the customer’s responsibility to ensure at all times that the device is protected from the harm ful effects of hostile airborne particles
in the environm ent of the device. The m anufacturer reserves the right to refuse repair if a d
evice has been subject to negligence,
abandon or improper use .
Ambient temperature conditions
Max. ambient temperature : +40°C or 104°F
Min. ambient temperature: +5°C or 41°F
Storage temperature: -20°C to +60°C (–4°F to 140°F)
Humidity Conditions
Storage: 0 to 90% relative hum idity, non-condensing
Operation: 0 to 85% relative humidity, n on-condensing
Environment
The ClickShare pro duct is intended to be used in office and indoor environments only.
Do not install the device in a site near hea t sources su ch as radiators or air ducts, o r in a place subject to direct sunlight, excessive
dust or humidity. Be aw are that r oom heat rises to the ceiling; check that temperature near the installation site is not excessive.
3.2 Basic Workflow
Before using ClickShare
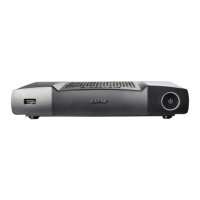
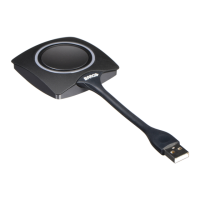
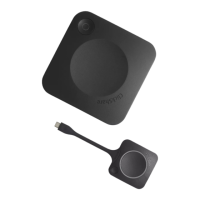
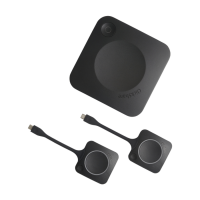
1. Unpack the ClickShare components and accessories
from the box.
For a detailed overview of the content of the ClickShare box, see "About the ClickShare product", page 5.
2. Install the Base Unit in the meeting room using one of the 3 possible installation methods.
For more information on the ins talling procedures, see "ClickShare installation", page 17.
3. Connect the video signal(s) between the Base Unit and the display(s).
For more information on connecting the Base Unit, see "Vide o signal connections to the Base Unit", page 23.
4. Connect the audio from the Base Unit to the meeting room’s s ound system (Only required for audio via jack).
For more information, see "Audio connection", page 25.
5. If an iPad is allowed to participate, install th
e ClickShare Link and set up the necessary connections.
For more information, see "Connecting an iOS device", page 27.
6. Connect the Base Unit to the mains power and start up.
For more information, see "Power connection and switching on", page 26.
7. If configuration v ia a network is needed, connect a network cable between the Base Unit and the local network.
For more information, see "LAN connection", page 25.
8. If desired, configure ClickS hare via the Web Interface.
For m ore information on the different w ays to c onfigure ClickShare, see "Accessing the ClickShare Web Interface", page 41.
R5900004 CLICKSHARE 23/12/2014
15