4. ClickShare installation
The antennas are removable. They can be fixed to the B ase U nit depending on the way the Bas e Unit is installed in the room. The
antennas can rotate for better wireless connection.
Using extension cables for the antennas is allowed, but this can reduce the perform ance.
4.2 Table mou nting
Overview
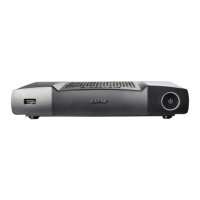
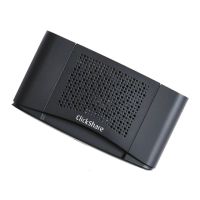
Put the Base Unit directly on the meeting room table.
The total weight of the Base Unit is 2,6 k g.
CAUTION: Wh en p lacing the Bas e U nit inside a closed cabinet, make sure there is sufficient ventilation for
hot air exhaust.
4.3 Wall mounting
About wall mounting
Use the mounting brackets, inserted in the ClickShare box, to mount the B
ase unit on the wall.
The total weight of the Base Unit — including the m ounting brackets — is 2,9 kg.
Necessary tools
• a drill ( type of drill depend s on the type of wall)
• Torx T10 screwdriver
• Additional screwdriver t hat matches the mounting screws (mou nting screws not delivered)
Necessary parts
• 2 m ounting screws
• 2 plugs
• Mounting brackets (included in the ClickShar e box)
How to install
1. Drill two holes in the wall, at a distance of 173 m m (6.81 inch) from ea ch other on a horizontal line.
2. Insert a plug in each hole (if needed, depends on the wall type) and drive in the 2 screws. Make sure not to drive in the screws
fully so that the bracket can be hooked on the screws.
Note: Mounting screws and plugs are not included in the ClickShare box . The type of screws and plugs depend on the type
of wall (stone, wood, plasterboard, ...) you are mounting the Base Unit to. Make s ure the head of the screw is not larger
than the hole in the bracket.
3. Install the brackets on the Base U nit as shown on image 4-1. U se the m echa nical fixation points at the bottom of the Base Unit.
Note: Use the p re-mounted Pan Head T10 M3 screws (refer to image 4-4) to m ount the brackets. Rem ove them from the Base
Unit and reuse them to fixatethebracketstotheBaseUnit.
18
R5900004 CLICKSHARE 23/12/2014