4. ClickShare installation
4. CLICKSHARE INSTALLATION
About this chapter
The installation chapter gives an overview of the different ways to install the base unit of ClickShare, the possible connections and
the use of ClickShare Link for an iPad connection.
Overview
• Installatio n m ethods for the Base unit
• Table mounting
• Wa ll mounting
• Ceiling m ounting
• Rack m ounting
• Recommendations about antenna placement and orientation
• Video signal connections to the Base Unit
• Audio conne ction
• LAN connection
• Power connec tion and switching on
• Connecting an iOS devic e
• About Network integration
WARNING: D o not connect to the mains power during installation.
WARNING: Make su re t he main s po w er conn ection to the Base Unit is ac cessible to the user at all times.
CAUTION: Mounting the Base Unit under a random angle is not allowed. It should be mounted horizontal or
vertical acco rding to the installation instructions.
WARNING: Only use the antennas t hat are delivered with the pro duct. Other an tennas a re n ot allowed.
WARNING: Use a power cord which complies to local regulations. If not included in the box, contact your
local dealer for a correct power cord.
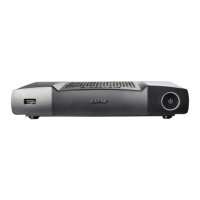
4.1 Installation methods for the Base unit
For optimal performance, install the Base Unit close to the d isplay and avoid obstacles between the Base Unit
and t he Buttons. Do not block the fan inlets and outlets of the Base Unit!
Introduction to the ins tallation methods
The base unit can be installed in different ways in a meeting room:
• Table mounted
• Wa ll moun ted
• Ceiling m ounte d
• Rack m ounted
R5900004 CLICKSHARE 23/12/2014
17