56926BA2, Rev. 02, 04/2019
5 Electric Installation
5.1 Initial Start-up
Danger to life by explosion
u
If the detector is located in a potentially explosive atmosphere, it is essential
to observe the corresponding instructions and safety instructions in the
safety manual / explosion protection manual.
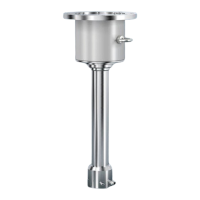
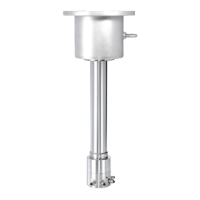
1. Make sure that the detector was mounted as described in chapter 4.
2. Loosen the screws on the cover and open the cover.
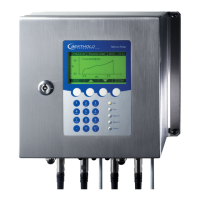
3. Connect the cable which connects the detector to the evaluation unit to ter-
minals 1 and 2 in the connection compartment. Also observe the operating
manual for the evaluation unit LB 47X. The screws for fixing the conductors
must be tightened with a torque of 1.2 Nm at the stud-type bushings.
4. Optional: Connect the connection cable of a Pt100 resistance thermometer
(for measuring the medium temperature) to terminals 3 and 4 in the connec-
tion compartment with a torque of 1.2 Nm.
5. If a shielded cable is used, connect the shield on terminal 5 on the connection
compartment. Make sure that the shield is sufficiently isolated from contact
with other current-carrying conductors.
6. Connect the detector to a local equipotential bonding.
7. Attach the O-ring to the groove on the face of the socket.
8. Attach the lid. For all threads fat must be used, OKS 217 is recommended. To
ensure the sealing function, the grease must be thickly applied to NPT threads.
u The cover screws (cylinder head screws ISO 4762 - M5x16-A2-70) for the
ATEX / IECEx variant must be underlaid with self-locking lock washers (NL5
SS from Nordlock®) and tightened with a torque of 4 Nm.
u The screw cap of the NEC / CEC version must be tightened on the hexagon
(spanner size SW 19) with a torque of 15 Nm.
9. Unused entries must be closed with the plugs listed (1/2 "NPT fitting) A tight-
ening torque of 20 Nm is recommended.
u The electrical installation is complete.