Installation
EN
bora.com 141
Fig.9.15
Sealing tape in the case of surface mounting
[1]
Black, heat-resistant silicone sealant
[2]
Sealing tape
Fig.9.16
Sealing tape in the case of flush installation
[1]
Black, heat-resistant silicone sealant
[2]
Sealing tape
Fitting the installation clamps
u
Push 2 installation clamps onto each side of the
cooktop until they come to a stop in the retaining
brackets provided.
2 installation clamps must be fitted to each side
of the cooktop.
Fig.9.17
Fitting the installation clamps
[1]
Retaining brackets
[2]
Installation clamps
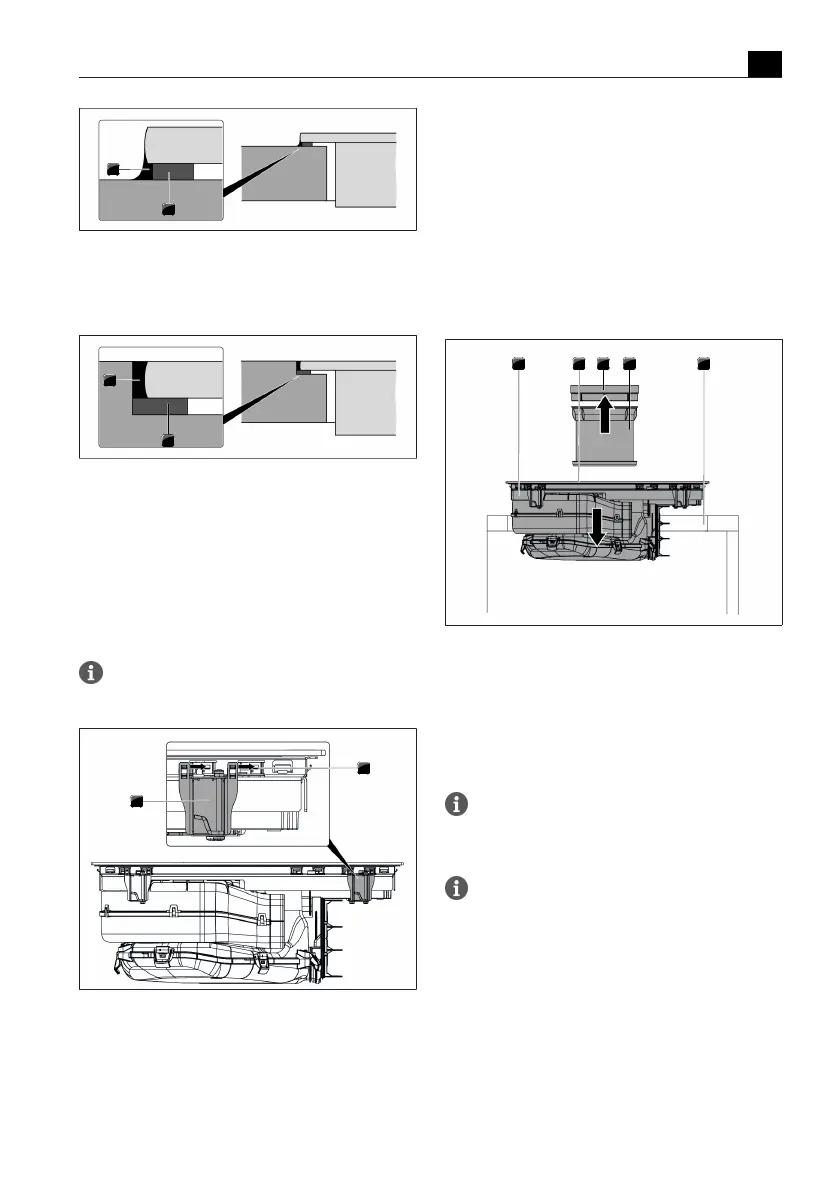
9.6.4
Inserting the cooktop
u
Before inserting the cooktop, remove the air inlet
nozzle and the stainless steel grease filter.
u
Use the inlet opening as a handle during insertion.
u
Keep the cooktop straight as you lift it into the
worktop cut-out.
u
Insert the cooktop into the centre of the worktop
cut-out.
u
Precisely align the cooktop.
Fig.9.18
Positioning the cooktop in the centre
[1]
Cooktop
[2]
Inlet opening
[3]
Air inlet nozzle
[4]
Stainless steel grease filter
[5]
Worktop cut-out
Make sure that the cooktop sealing tape is flat
against the worktop in the case of surface
mounting.
Make sure that the cooktop sealing tape is well
sealed all the way round in the case of flush
installation.
Height adjustment plates for flush installation
(optional)
T
The height adjustment plates are self-adhesive to
prevent slipping during installation.
u
If applicable, insert the height adjustment plates.
u
Place the height adjustment plates next to the
sealing tape.