T10: Creating a Continuous Label
Note: This example assumes you have the continuous marker roll PTL-8-422 loaded in
your printer.
Print the following label to be used to identify communications equipment:
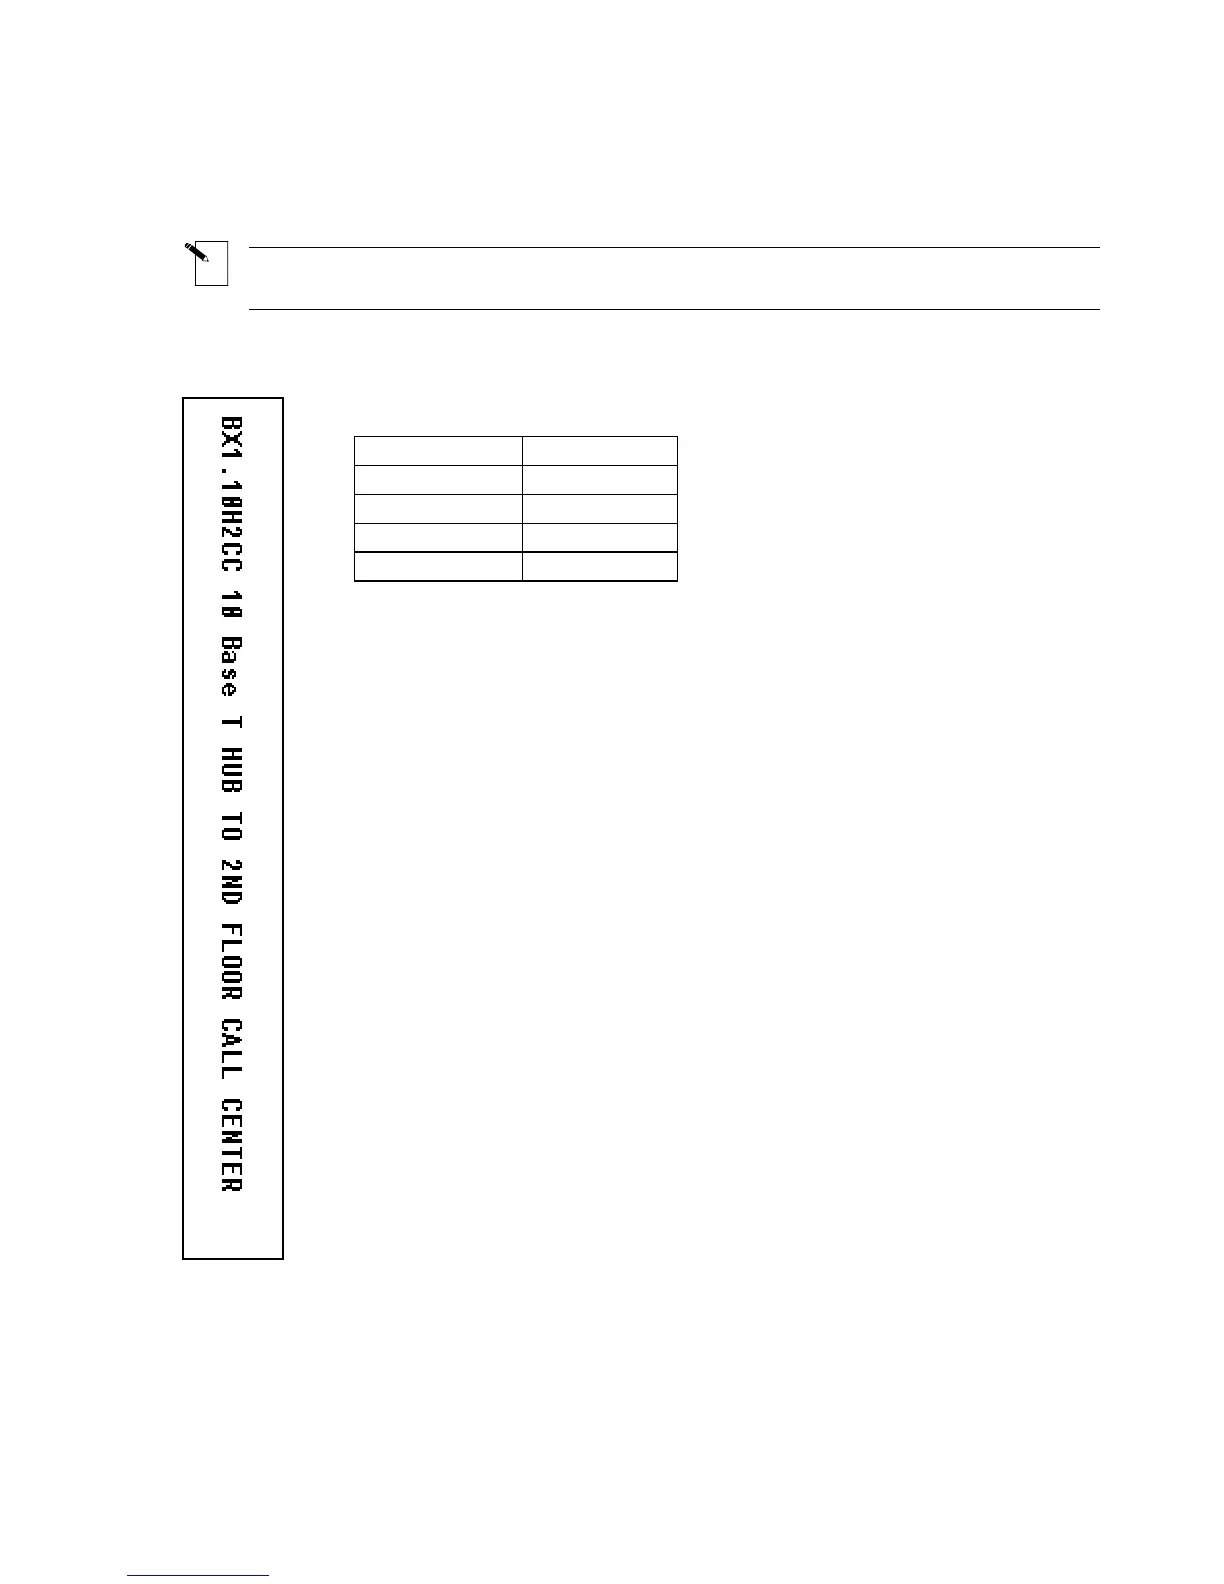
Setup Status:
Left
H Justify
Center
V Justify
0 Degrees
Rotation
Component
Format
Text
Legend Type
1. Press <Shift> + <Form Clear> to delete all lines of text and reset the
font to the default value of 14.
2. Press <Func> + <Setup> to access the Setup Menu.
3. Press the <
▼> key three times to select Style, then press <Enter>.
4. Press the <▼> key once to select H Justify, then press <Enter>.
5. Press the <▲> or <▼> keys to select Left, then press <Enter>.
6. Press the <Delete> button to exit back to the Setup Menu.
7. Press the <
▲> key once to select Continuous, then press <Enter>.
8. Press the <▼> key once to select Banner, then press <Enter>.
9. Press the <▲> or <▼> keys to toggle the direction to Horizontal,
then press <Enter>.
10. Press <Func> + <Exit> to exit back to the Text Editor screen.
11. Enter BX1.10H2CC 10 Base T HUB TO 2ND FLOOR CALL
CENTER on line one.
12. Press <Print>.
48 TLS2200
™
Thermal Transfer Printer User Manual