FRONT AXLE
KUKJE MACHINERY CO., LTD.
57
4. CHECKING, DISASSEMBLING AND SERVICING
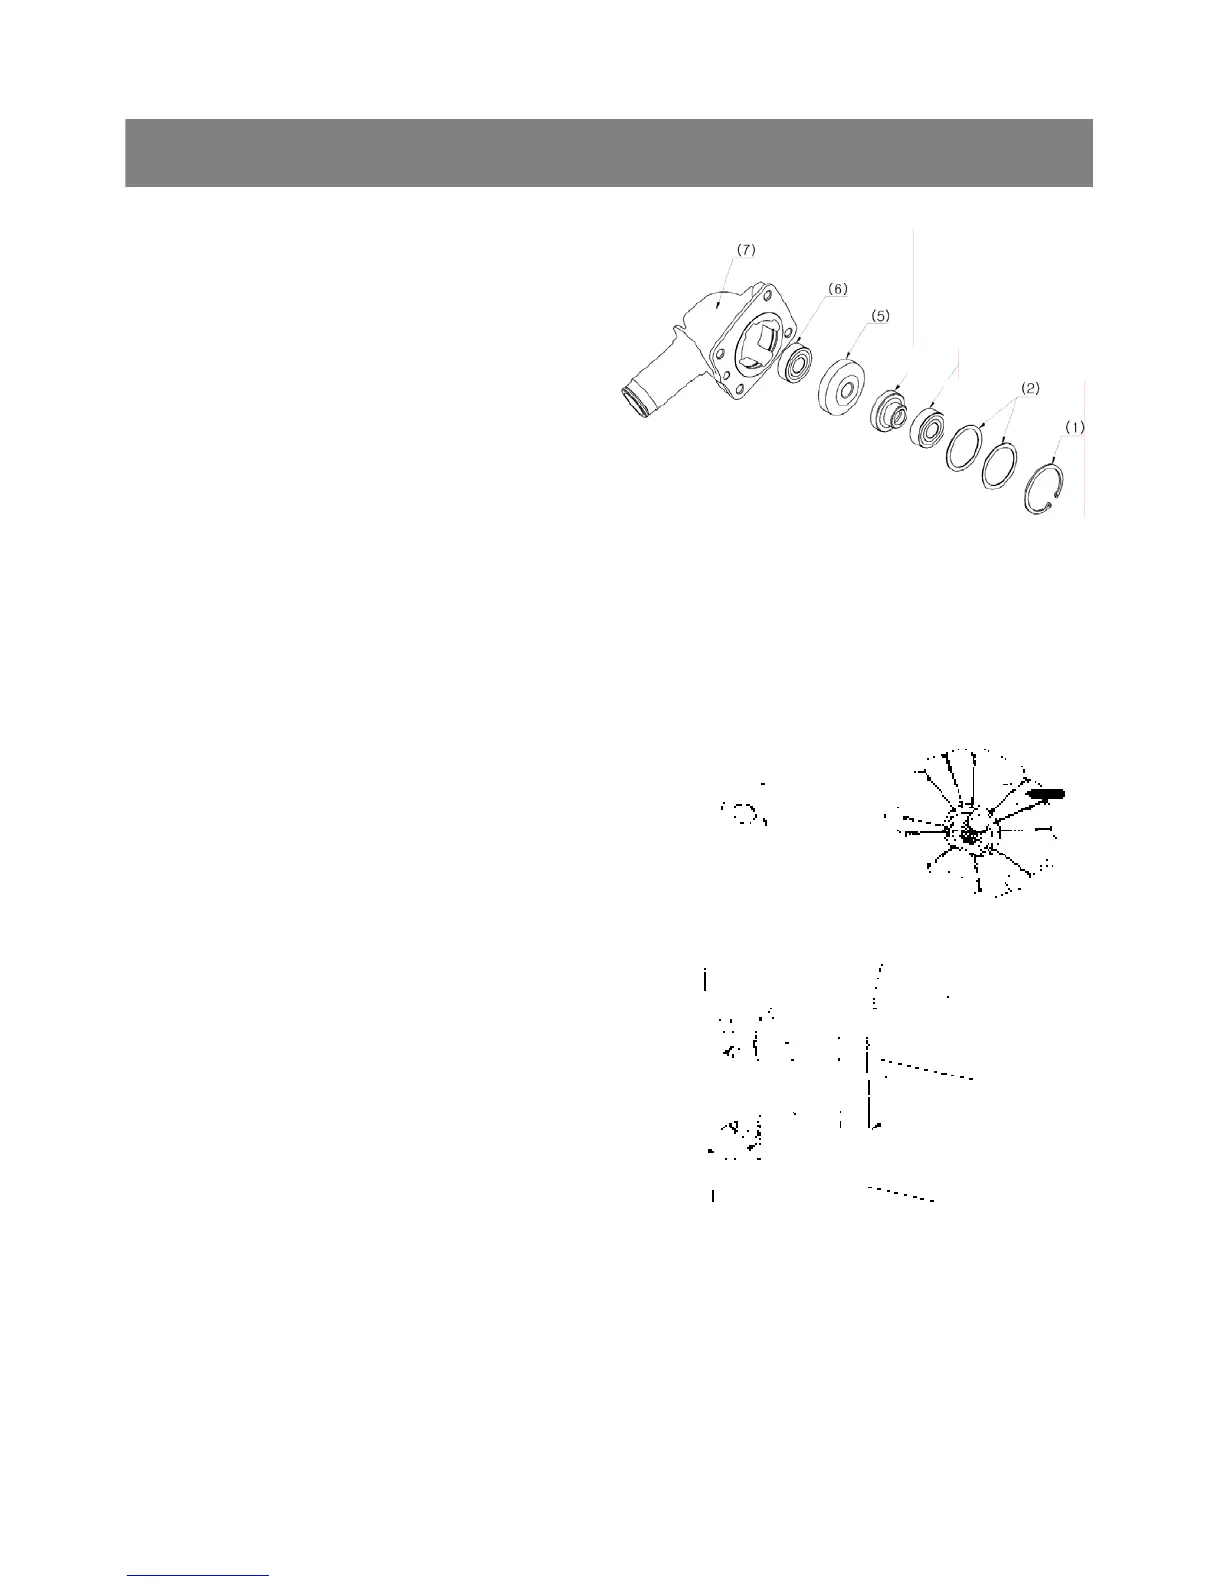
*. PART NAME
1) Internal snap ring 2) Shim
3) Ball bearing 4) Bevel gear
5) Bevel gear 6) Ball bearing
7) Bevel gear case
< Bevel gear case and front gear case >
1. Remove the internal snap ring(1).
2. Take out the bevel gears(4),(5) with ball
bearings(3),(6) and shims(2).
▷ Reassembling
9 Install the shims(2) to their original position.
▷ Reference
9 Thickness of adjusting shims:
0.8mm (0.031in.)
1.0mm (0.039in.)
1.2mm (0.47in.)
1.4mm (0.055in.)
< Axle >
1. Remove the bearing(1).
2. Take out the bevel gear(2).
3. Take out the collar(3).
4. Tap out the axle(4).
▷ Reassembling
9 Install the oil seal(7) of axle flange(6), noting its
direction as shown in the figure.
9 Install the shims(8),(9) to their original position.
▷ Reference
9 Thickness of adjusting shims(8) :
0.8mm (0.031in)
1.0mm (0.039in.)
1.2mm (0.47in.)
1.4mm (0.055in.)
9 Thickness of adjusting shims(9) :
0.8mm (0.031in)
1.0mm (0.039in.)
1.2mm (0.47in.)
*. PART NAME
1) Ball bearing 2) Bevel gear
3) Collar 4) Axle
5) Ball bearing 6) Axle flange
7) Oil seal 8) Shim
9) Shim
(4)
(3)
(1)
(2)
(5)
(4)
(3)
(6)
(6)
(7)
(4)
(8)
(9)