5-65
Confidential
1.4.31 Developing bias voltage correction (Function code 83)
<Function>
This function performs developing bias voltage correction to fix the density of each color toner
when printed color is not correct.
<Operating procedure>
(1) Press the 8 and 3 buttons in this order in the initial state of the maintenance mode.
The machine displays "PLEASE WAIT" on the LCD and starts the developing bias voltage
correction.
(2) Upon completion of the developing bias voltage correction, the machine returns to the
initial state of the maintenance mode. When an error message is displayed on the LCD,
take the measures described in the table below.
* # indicates the toner color (Y, M, or C) of which cartridge became empty.
Note:
Before this function is performed, there is a need that the "Sensitivity adjustment of density
sensor (Function mode 72)" has been done more than once. When performing this
maintenance mode 83 after replacing the main PCB ASSY, make sure to perform the
"Sensitivity adjustment of density sensor (Function mode 72)" first.
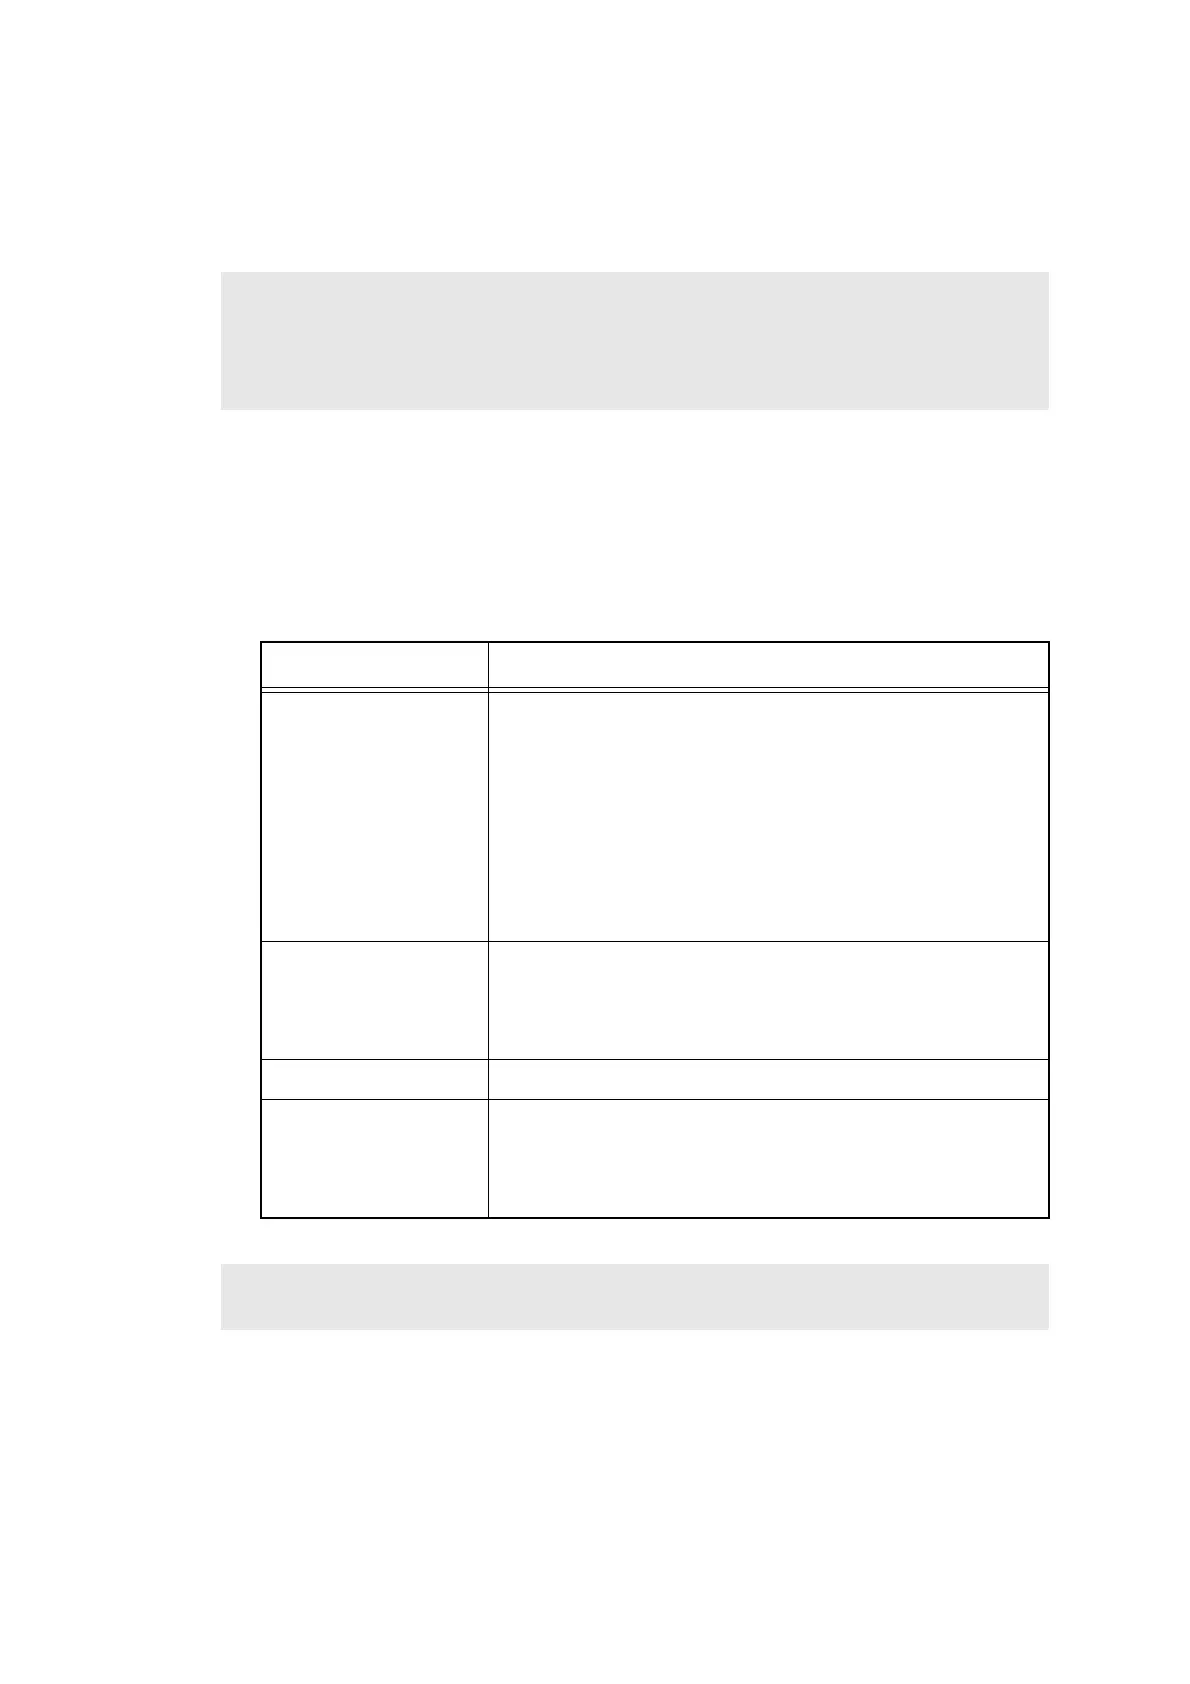
Error message Measure
FAILED Remove the error factors with the following operations and
press the Start/Black button to clear the error.
- Re-insert the toner cartridge in the correct position.
- Replace the toner cartridge.
- Replace the drum unit.
- Replece the waste toner box.
- Replace the belt unit.
- Replace the registration mark sensor holder ASSY.
TONER EMPTY # * Replace the empty toner cartridge and press the Start/Black
button to clear the error. Perform the developing bias
voltage correction again after performing the sensitivity
adjustment of density sensor (Function code72).
Cover is Open Close the front cover.
Replace Toner Replace the black toner cartridge and press the Start/Black
button to clear the error. Perform the developing bias
voltage correction again after performing the sensitivity
adjustment of density sensor (Function code72).
Note:
Any panel operation is invalid during the developing bias voltage correction.
 Loading...