20 (93) BRUKER CryoProbe Installation
Initial setup
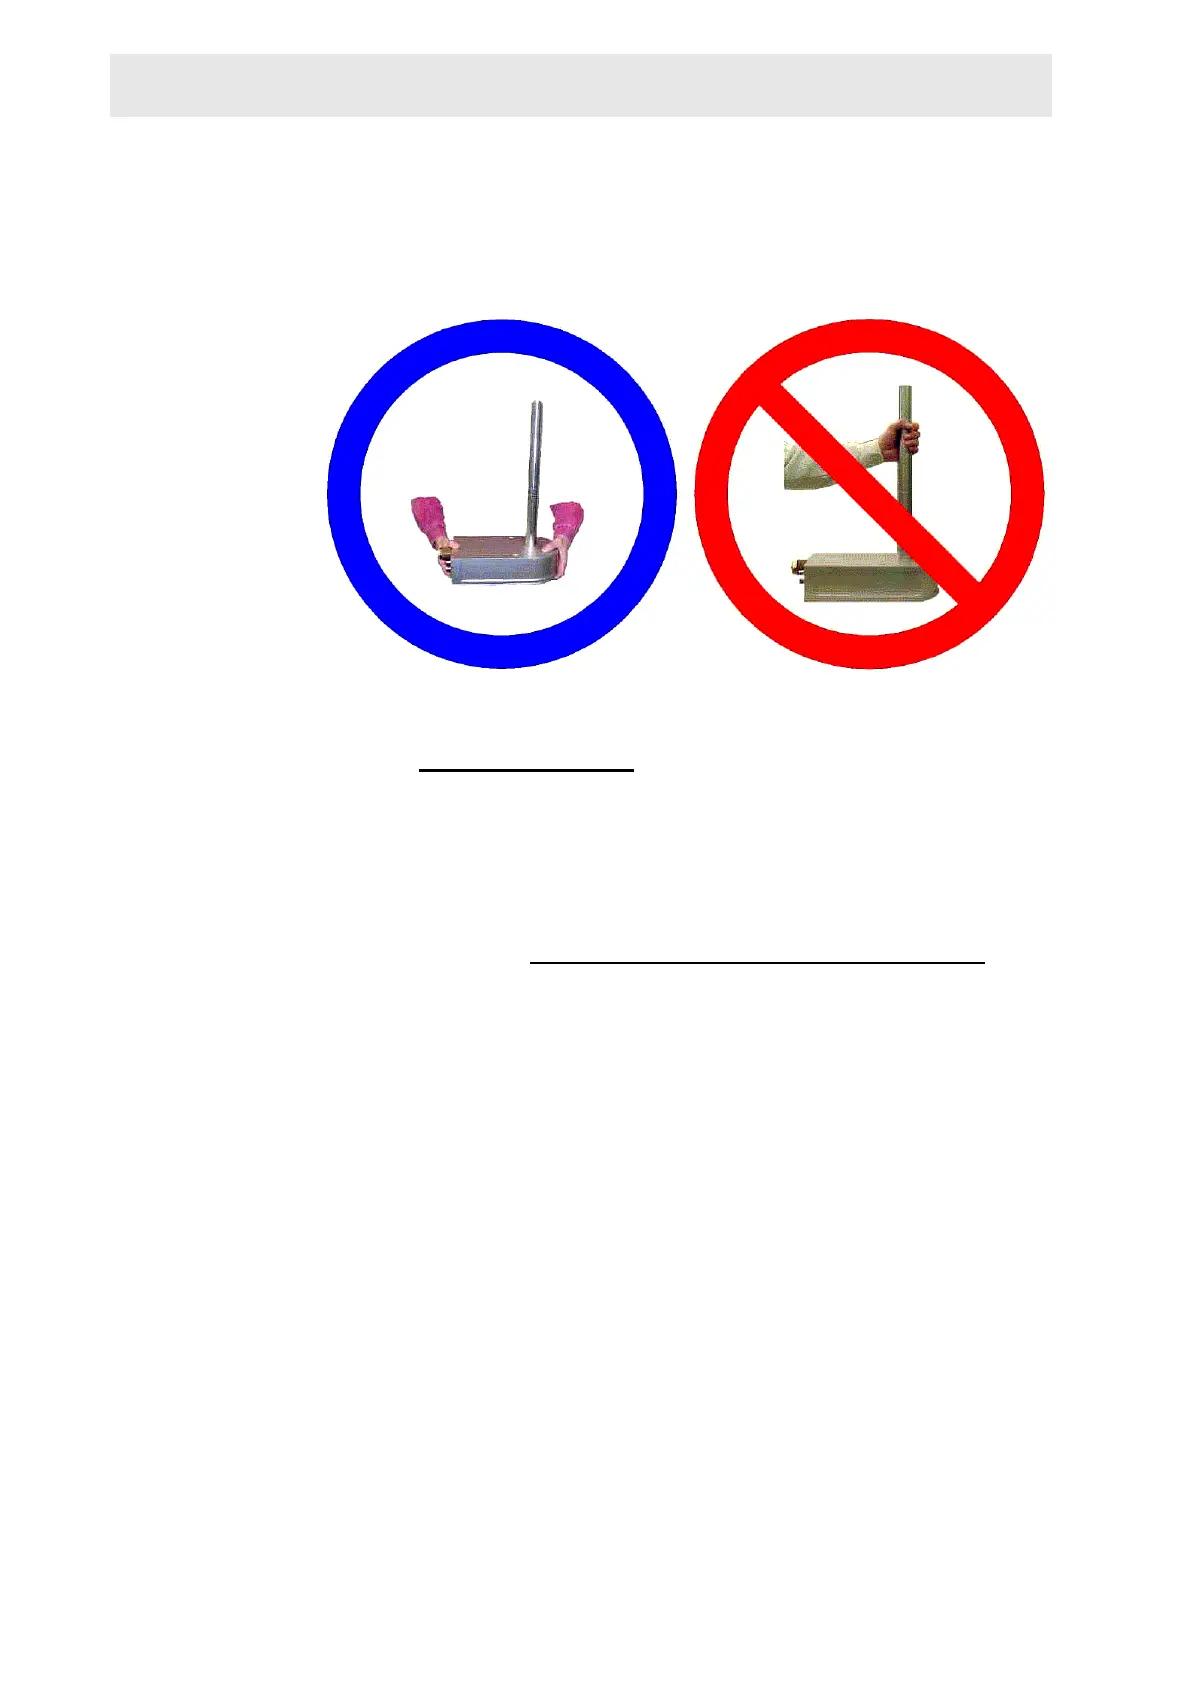
CAUTION: The CryoProbe is heavy (~12 kg) but fragile. Hold it only at its body,
not at the tube. Never bend the tube!
If only an additional CryoProbe is to be installed on a working CryoPlatform, con-
tinue with "Handling" on page 27
.
CryoCooling Unit
Disassemble the crate and remove the transport fixtures. The CryoCooling Unit
weights ~400 kg. It is most convenient to lift it off the pallet with a fork-lift truck. It
can also be lifted with a hoist. There are four eyes (for hooks or ropes) on the in-
ner frame of the CryoCooling Unit. To access them, remove the top panel of the
CryoCooling Unit (see "How to open the CryoCooling Unit" on page 67
).
IMPORTANT: Take special care of the He Transferline when unpacking and mov-
ing the CryoCooling Unit. Avoid tight bending! If the radius becomes smaller than
0.7 m, i.e. if a 180° turn has less than 1.4 m diameter, its internal structure can be
damaged.
On the back panel, there’s a plug without cable connected to R
EMOTE SWITCH.
Make sure this plug is in place. If the plug is missing, the mains of the whole Cryo-
Cooling Unit is inhibited.
He Compressor
Check the S
UPPLY PRESSURE gauge on the He Compressor front. It should indi-
cate about 0.1 bar (i.e. 0.01 MPa 0.1 kgf/cm
2
). If the pressure gauge reads plain
0 bar, contact B
RUKER: this is a major problem and a lengthy gas purifying cycle is
required.
Water-cooled He Compressor (P/N O00247) only: Set the selector switch accord-
ing to the available mains voltage and frequency. The switch is hidden behind the
right side panel. See section 2.5 in the He Compressor operation manual which is
delivered with the CryoPlatform.
NOTE: On the backside of the He Compressor, keep the protective cap on the
H
ELIUM GAS CHARGE. This connector is never used.
Figure 3.1. CryoProbe handling
 Loading...


