CryoProbe Installation BRUKER 59 (93)
Troubleshooting 5
5000000
See also the Troubleshooting chapter in the User Manual.
Read "Safety" on page 7
before manipulating the CryoProbe System!
WARNING: Do not manipulate tubes, valves, or the like on a working Cryo-
Probe System. The helium gas pressure in the running system can go up to
30 bar (above this, the safety valves will release excess pressure). A significant
gas pressure of about 17.5 bar may be present in some system components even
when warm, switched off, and disconnected.
CAUTION: Do not open the CryoProbe! Without appropriate tools, the Cryo-
Probe can be easily damaged in an attempt to open it.
There are no repair actions that could be performed by the user.
For troubleshooting, there is usually no advantage in taking the CryoProbe out of
the magnet except for those cases where it is obviously necessary, e.g. to remove
dirt from the sample cavity.
Fuses and reset buttons 5.1
0
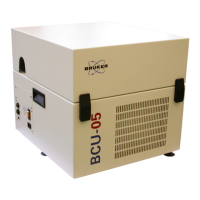
CryoCooling Unit
Automatic fuses are located on the back panel along with a small melting fuse
(European size, 50 mA).
To reset an E
RROR on the CryoCooling Unit front panel, press COOL DOWN if the
system is already cold or cooling down. If the CryoProbe System is warm or
warming up, press
WARM UP’.
CryoController
The CryoController is located inside the CryoCooler cabinet (see "How to open
the CryoCooling Unit" on page 67). Its primary fuses (2 ⌠ 2.5 A slow) are lo-
cated at its mains socket.
There are secondary fuses (2 ⌠ 10 A slow) on the main board close to the fan
module. To check them, the CryoController case must be opened. Ensure ESD
protection when working on an open CryoController!
He Compressor
See the schematics in the He Compressor operation manual for the location of the
fuses. The manual is delivered with the CryoProbe System.
HPPR CRP
There is a red reset button on the rear of the cover module

 Loading...