Joining the CryoCoupler
CryoProbe Installation BRUKER 37 (93)
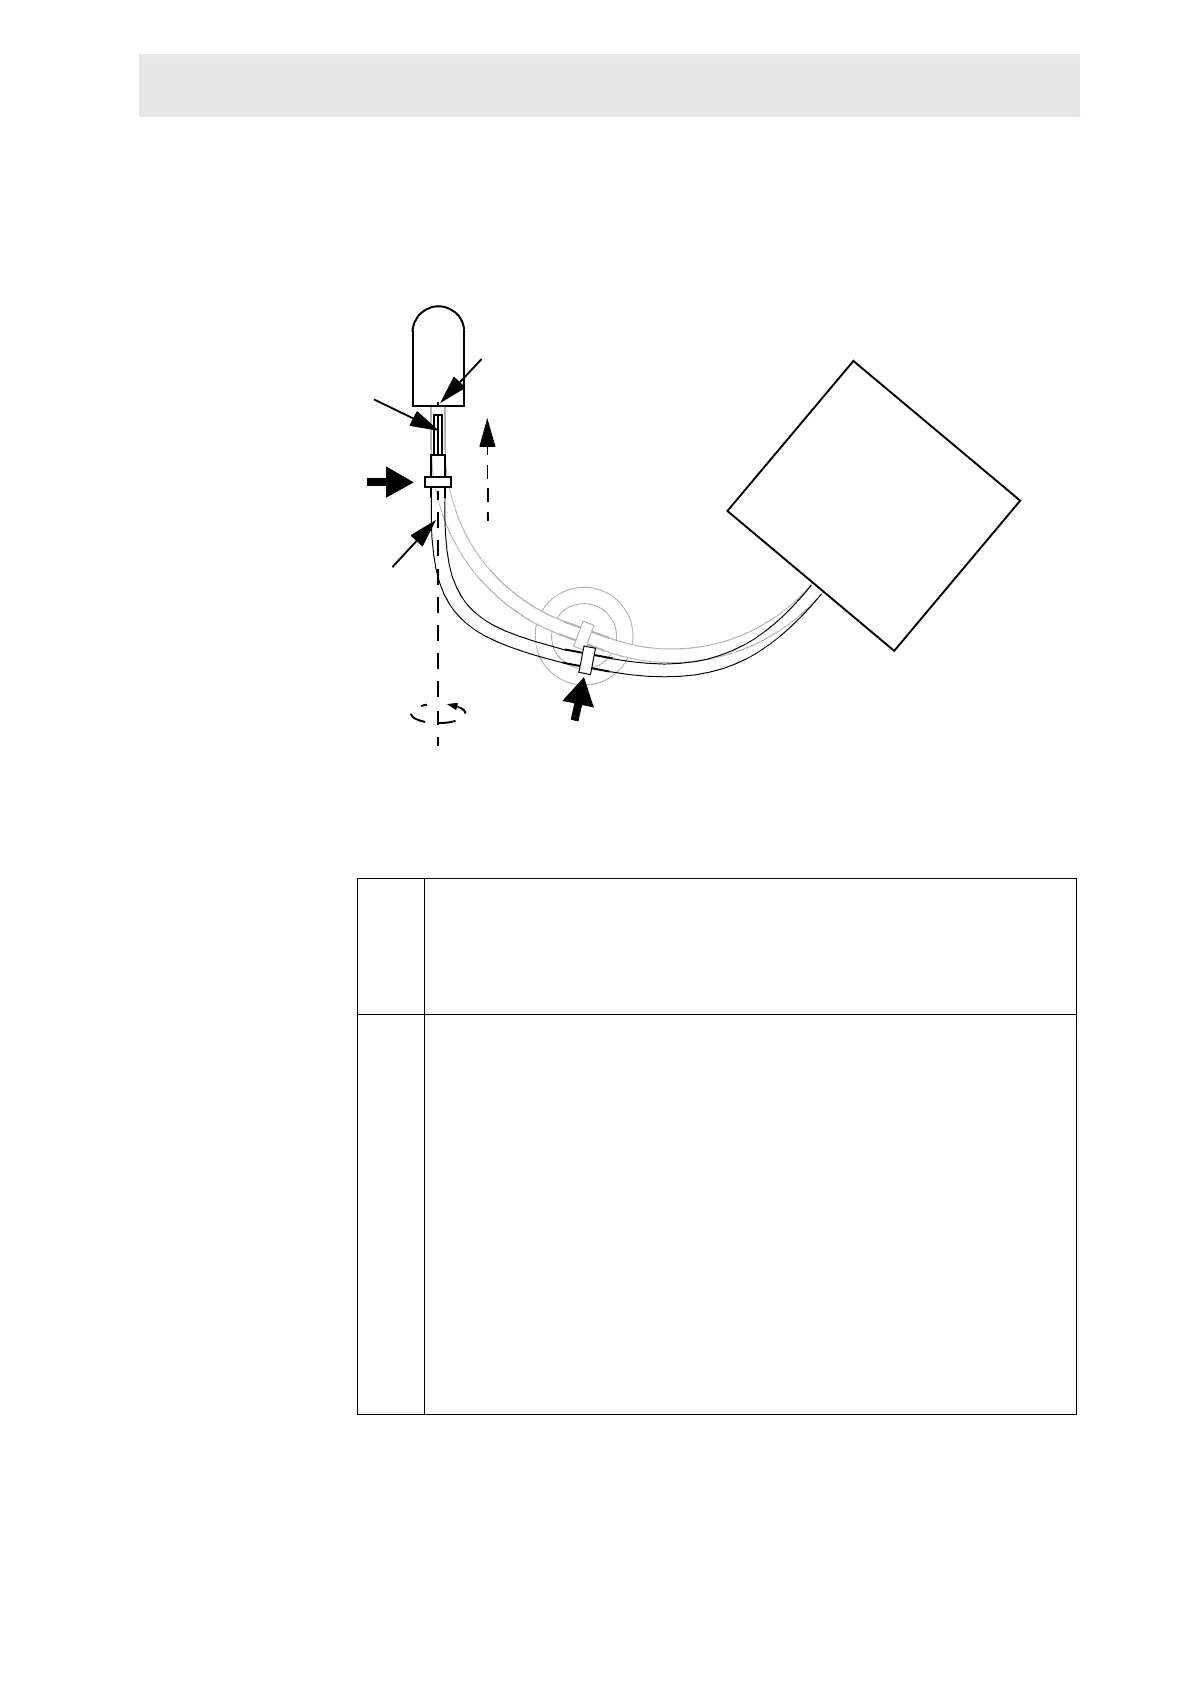
j.7 Align the CryoCoupler such that the notch on the He Transferline
meets the bolt inside the CryoProbe’s receptacle. Keep the CryoProbe
end of the He Transferline rather straight. When gently moving up
and down the hand that supports the He Transferline, you will feel
where the rotational alignment is just right.
j.8 IMPORTANT: It may be necessary to fine-tune the position of the Cryo-
Cooling Unit before the connection can be established. Do not pull the
He Transferline into position, its internal structure is fragile!
Slide the CryoCoupler into the CryoProbe. It should fit smoothly with-
out any significant movement of the suspended magnet.
CAUTION: If the CryoCoupler gets stuck, do not force it into position.
Do not bend the He Transferline to an extreme shape to make it fit -
permanent damage on CryoProbe or He Transferline could result!
The He Transferline Support may be in the way during the insertion
process. If this is the case, remove the CryoCoupler, move the Trans-
ferline Support a little aside and repeat the insertion process.
When a smooth insertion fails, take the CryoCoupler out and try again.
CryoProbe
C
r
y
o
C
o
o
l
i
n
g
U
n
i
t
hold
here
hold here,
move up and down
to rotate CryoCoupler
mark
notch
slide in
gently
keep this
part straight
Figure 3.11. Inserting the CryoCoupler

 Loading...


