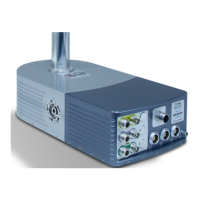
Before you unpack
CryoProbe Installation BRUKER 19 (93)
Before you unpack 3.4
0
Ensure safety
Read the instructions for "Safety" on page 7
before starting the installation.
Check instrument cases for damage
Inspect the cases, shock watches, and tilt indicators.
In case of damage: Do not unpack! You need to do certain things now for legal
reasons. Call your B
RUKER service office and ask for advice:
- Should you accept the goods or refuse them? (Note: Usually, B
RUKER is the ‘cus-
tomer’ of this transport, but not B
RUKER’s ‘NMR customer’ who owns the lab.)
- Do you need to write a statement?
- Is the visit of an insurance expert necessary?
- Should you unpack and install?
Record actual NMR spectrometer status
Mark the incoming gas pressure on the gauge at the rear of the spectrometer cab-
inet with a waterproof pen or write down the reading with a precision of 0.1 bar. If
there is a pressure gauge on the magnet suspension, mark or record that value,
too.
Is a NMR performance reference data set available (sensitivity, lineshape, water
suppression, etc.)? Are any spectral artifacts visible like spikes or noise?
IMPORTANT: Before installing the CryoProbe System, make sure there are no
performance problems with the conventional parts of the spectrometer. The Cryo-
Probe cannot reach its specifications if any other spectrometer component fails to
do so!
Unpacking 3.5
0
Use the shipping and packing lists to check if all parts arrived and if they are com-
plete. In case of obvious damage, proceed according to the recommendations
given in "Check instrument cases for damage" on page 19
. Keep all packing
material and transport certificates until the CryoProbe System runs satisfactorily.
The CryoProbe flight case is ideal for storing the CryoProbe when not in use.
CryoProbe
Keep the CryoProbe in its flightcase until you can mount it into the magnet. Leave
the protective caps on sample cavity, CryoCoupler, and RF sockets until you
make the connections.
In the upper right corner of the CryoProbe front, there is a little hole with an indica-
tor screw inside. This screw must not stick out but be flush with the front plate. If
the screw sticks out, a problem with the vacuum insulation may have occurred -
contact B
RUKER! Do not try to move the screw, neither in/out nor by rotation. When
cooling down the CryoProbe, this indicator will move in.

 Loading...