Using your LinkStation
LinkStation User Manual 100
RMM (RAID Mode Manage) and EDP (Easy Data Protection)
Note: LinkStation rmware version 1.25 and later only
With RMM or EDP, you can create or expand a RAID 1 or RAID 5 array without erasing the data on
the drives. The following example shows RMM. EDP, as used on LS-WVL, LS-WXL, LS-WSXL and LS-
WSXSL LinkStations, is similar.
Note: Each drive in a RAID array should have the same capacity.
Changing from normal mode to RAID 1:
Hard drives that aren’t in a RAID array will show [Normal (RMM available)].
Adding a drive to an existing RAID array or adding a drive and changing the RAID mode:
Drives not currently in the array will show either [Normal (RMM available)] or [Normal].
Caution:
If your hard drives show [Normal] instead of [Normal (RMM available)], then you cannot use RMM.
If you create a RAID 1 array, all data on both drives will be lost. Back up any important data before
changing your RAID array.
1
2
3
Note: Any data on the new drive is deleted. Be sure to back up any valuable data beforehand.
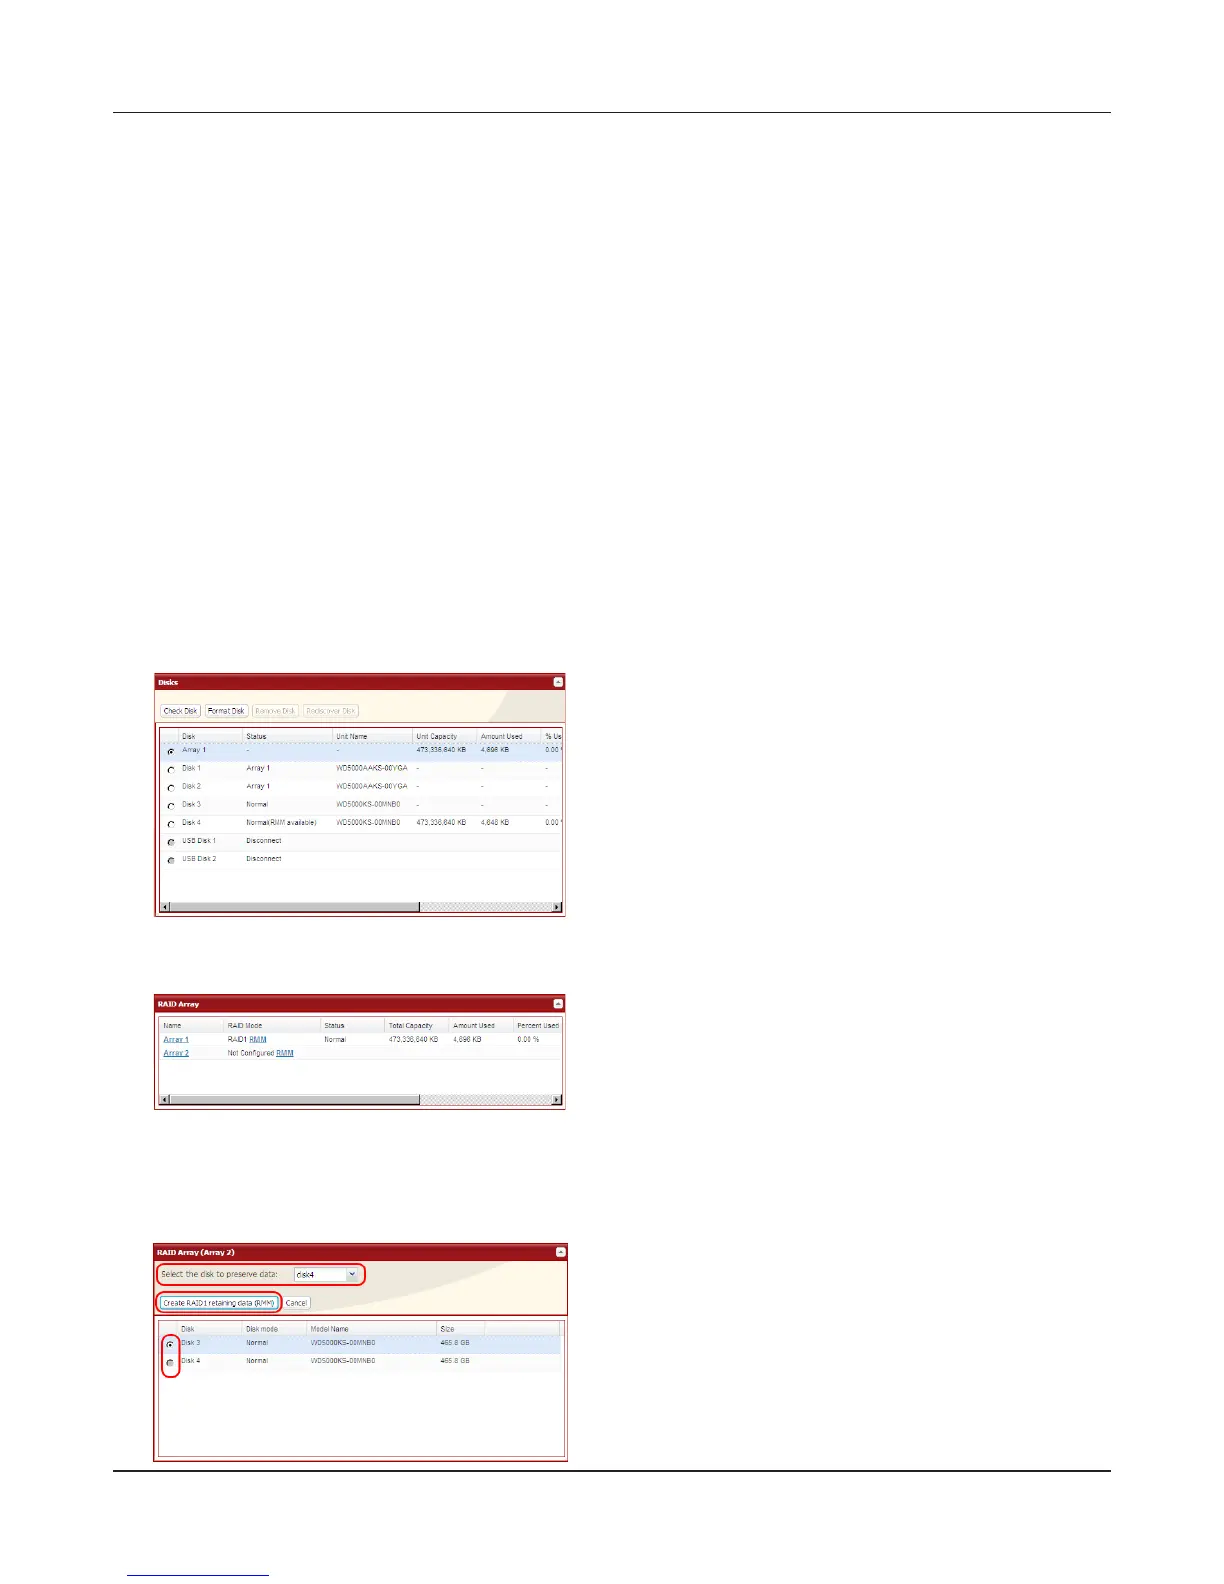
Changing from normal mode to RAID 1:
If there are multiple internal hard drives not
already included in a RAID array, or if drives were
formatted from the Web Admin interface, [Status]
under [System] - [Storage] appears as [Normal
(RMM available)].
In the Web Admin interface, navigate to [System]-
[Storage]-[RAID Array]. Select [RMM] for [RAID
Mode].
1 Select the drive whose data will not be erased
from the pull-down menu.
2 Select the drive to be added to the RAID array.
3 Click [Create RAID1 retaining data (RMM)].