Chapter 2 Operating Principles
2-1. Operation of Each Mechanism
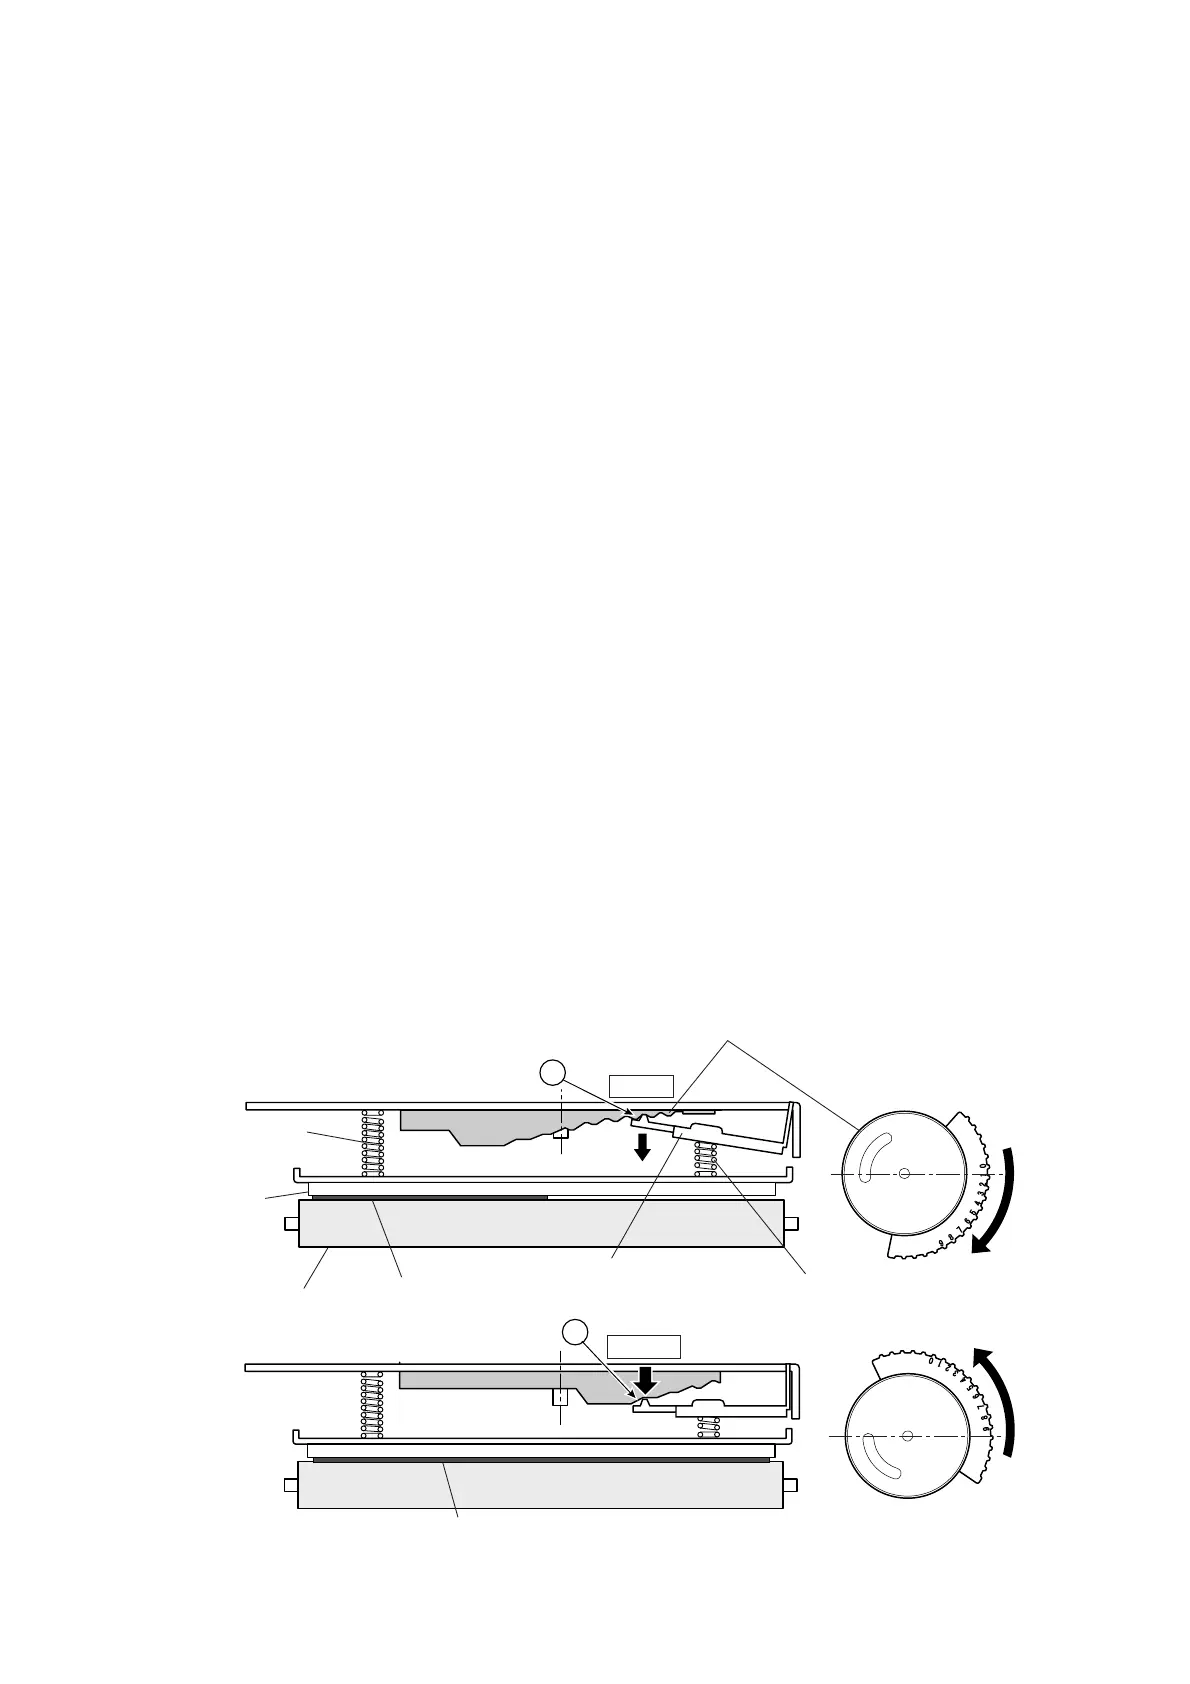
2-9 CL-S400DT
Cam Adjust Head Spring
Spring Head L
(Fixed)
Spring Head R
(Movable)
SA2 Platen
Plate Adjust Spring Holder
SA2 Head
0
9
0
9
A
A
Weak
Strong
Media (Narrow)
Media (Wide)
[Narrow media]
[Wide media]
(Media width adjustment dial)
2-1-5. Head Balance Adjustment Mechanism
The major components of the head balance adjustment mechanism are:
(a) Cam Adjust Head Spring (c) Spring Head L/R
(b) Plate Adjust Spring Holder
The head balance adjustment mechanism is used to eliminate uneven printing density on the right
and left sides of media.
The head balance adjustment is accomplished by changing the right side head pressure (viewing
from the front side of the printer) according to media width to be used. To adjust the head pressure,
the blue media width adjustment dial (Cam Adjust Head Spring) is used. When narrow width media
is used, the dial should be set toward “0” to give weaker pressure. On the contrary, when wide
width media is used, it should be set toward “9” to give stronger pressure.
When narrow media is used (need to give weak pressure):
The “Spring Head L” (Fixed side) and “Spring Head R” (movable side) act to press the “SA2 Head”
against the “SA2 Platen”. If the same pressure is given by both springs, since no media exists on
the right side of the “SA2 Head”, the “SA2 Head” will slant to the right, resulting in uneven printing
density. The part “A” of the “Plate Adjust Spring Holder” is pushed against the cam part by the
“Spring Head R” and it moves up step by step as the media width adjustment dial is turned toward
“0”. As it moves up, the “Spring Head R” is pressed with weaker force by the “Plate Adjust Spring
Holder”, and the right side pressure against the “SA2 Head” decreases, resulting in even printing
density. You need to align the dial number according to the media width to be used. (Smaller
number for narrower media)
When wide media is used (need to give strong pressure):
The same principle applies to wide media. However, in this case, the media width adjustment dial
should be turned toward “9”. Then the part “A” of the “Plate Adjust Spring Holder” moves down to
apply stronger pressure to the “SA2 Head”. (Larger number for wider media)
Factory default: The media width adjustment dial is set to “9”.

 Loading...