Chapter 3 Disassembly and Maintenance
3-6 Disassembly, Reassembly and Lubrication
3-11 CL-S400DT
0
1
2
3
4
5
Case
Cover Front
BH (N), M3x6 (NI)
BH (N), M3X6 (NI)
Cover SW
SA2 Cover Frame
Cover SW
Case
Label Inlet Volt
Label Energy Star (BK)
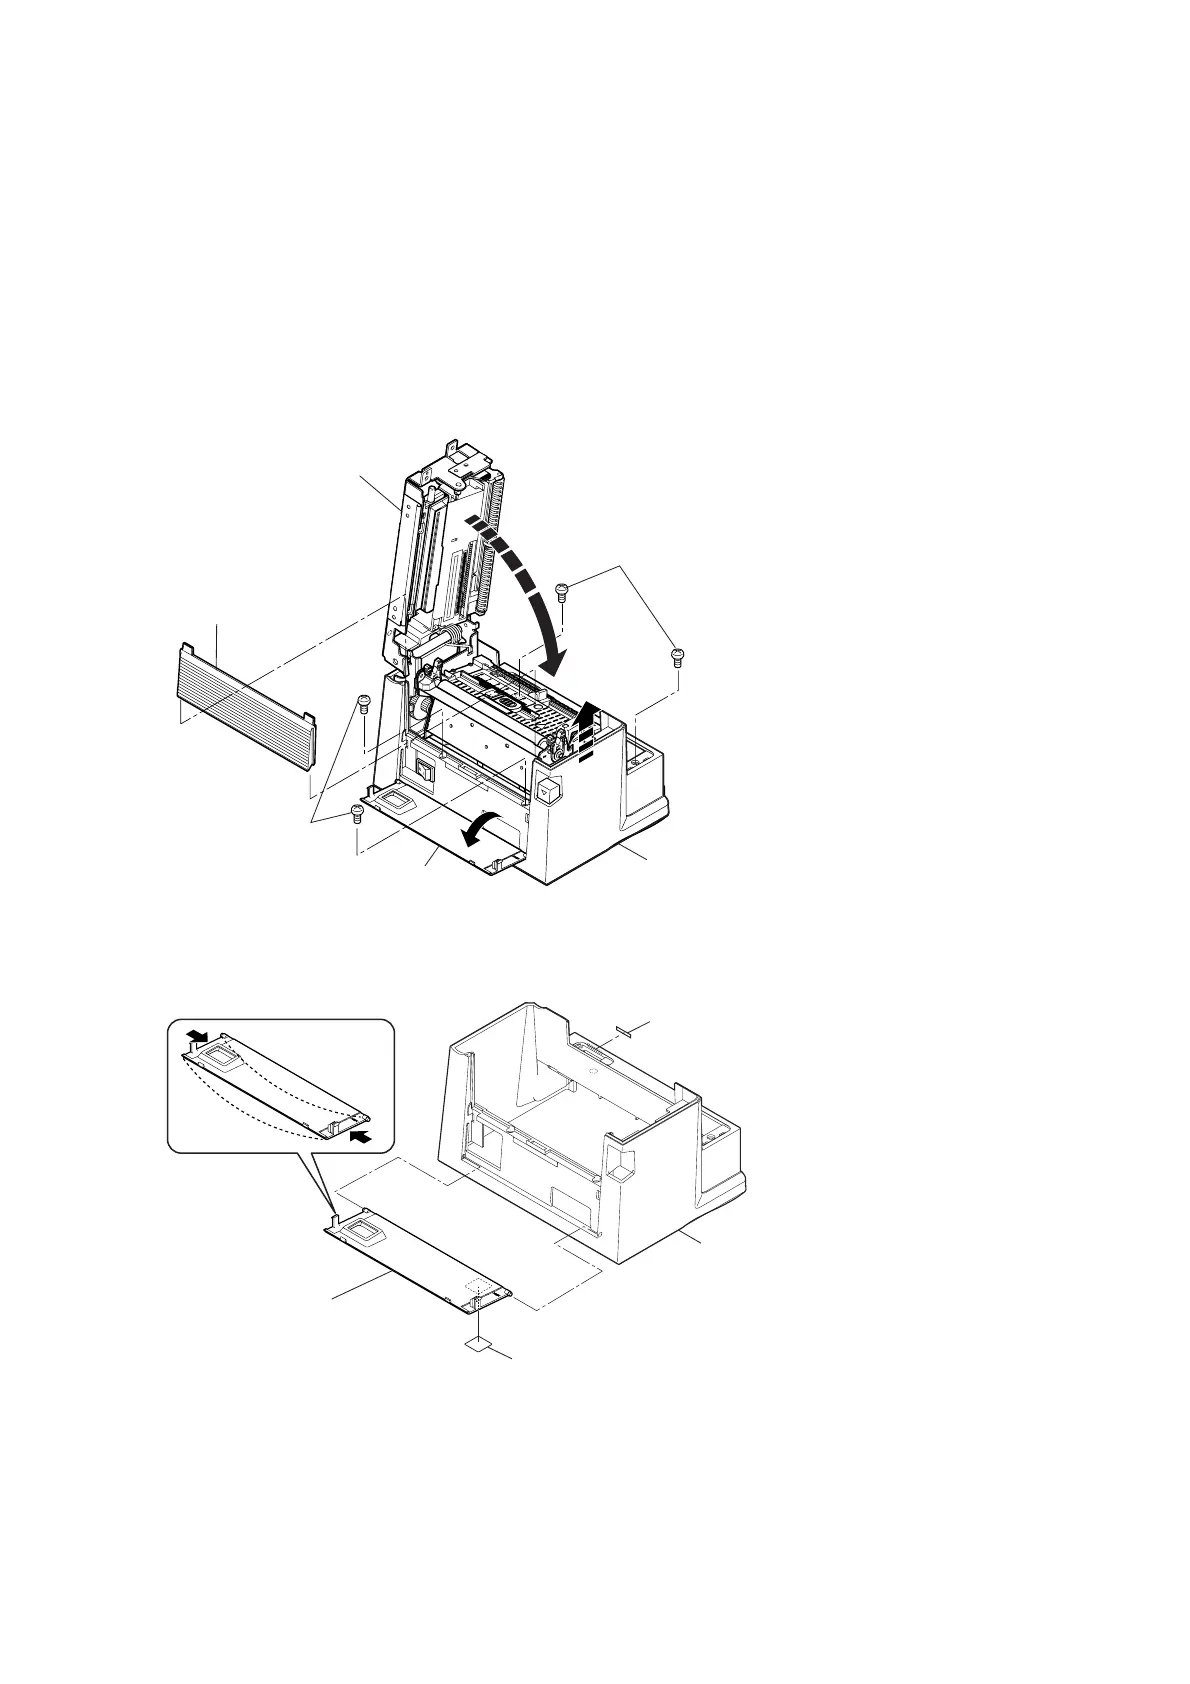
3-6-3. Case
1. Remove the “SA Cover”. Refer to “3-6-2 SA Cover and SA LCD PCB”.
2. Remove the “Case” upward from the main body.
1) Remove the “Cover Front” upward.
2) Remove 4 screws (BH (N), M3x6 (NI)) that fix the “Case” to the main body.
3) Open the “Cover SW” toward the front.
Note: If the “Cover SW” is closed, the “Case” cannot be removed upward as the power
switch of the main body is caught in the “Cover SW”.
4) Close the “SA2 Cover Frame” to some degree and remove the “Case” upward.
Note: If the “SA2 Cover Frame” is fully closed, the “Case” cannot be removed.
3. Bend the “Cover SW” and remove it from the “Case”. Then peel off the “Label Inlet Volt” from
the “Case”.
4. Peel off the “Label Energy Star (BK)” from the “Cover SW”.
Note on reassembling:
• When assembling the “Case”, leave the “SA2 Cover Frame” opened and insert the “Case” into
the main body. In the course of “Case” insertion, lower the “SA2 Cover Frame” to allow further
“Case” insertion. Then, fully insert the “Case” after checking that no cable is caught by the
“Case”.
 Loading...