Group 16, Electrical Motors
SM 765, Nov ’06 Drive Motor Overhaul • 16-2-1
Inspection Procedure
Before performing these service procedures:
• Park truck safely.
• Fully lower the upright.
• Apply the park brake
• Turn the key switch OFF.
• Disconnect battery from truck receptacle.
• Discharge capacitors by connecting a 200 ohm 10
watt resistor between the positive and negative
input post of the controller for 10 seconds.
Motor Cleanliness
Electric motors should be kept clean at all times to prevent
shorting, minimize wear, and optimize cooling.
• Wipe off all dust, dirt, oil, water, etc., from outer
surface of motor.
• Remove any debris from cooling fan air vents and
around motor frame to prevent overheating.
• Air-clean (blow off) motors using clean, dry (mois-
ture-free) compressed air at 207 kPa (30 psi) maxi-
mum air pressure.
The presence of any oil on or near the motor could indi-
cate either bad bearings or leaking hydraulic system.
Determine cause and repair problem before extensive
motor damage occurs.
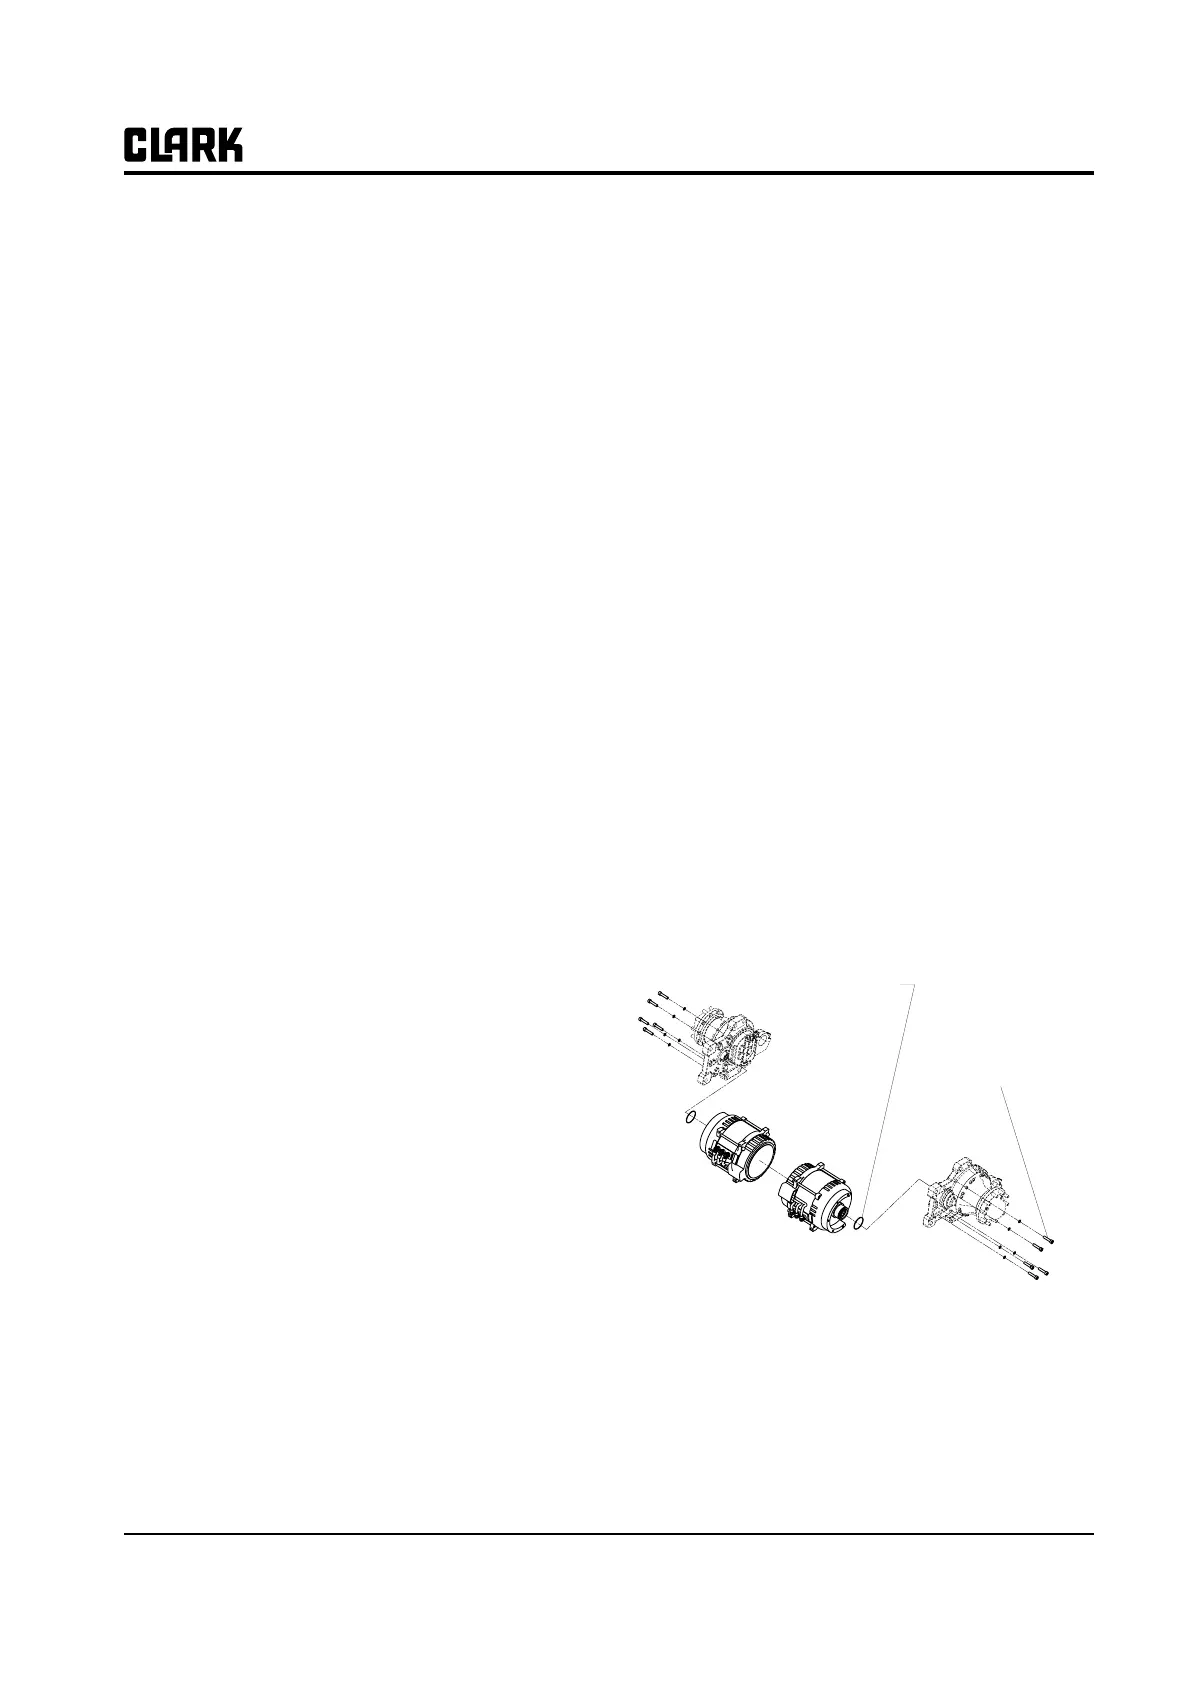
Drive Motor Removal and Installation
1. Remove the battery from the truck.
2. Tilt the steering column fully forward and remove
the floor plate.
3. Remove all electrical cables from the drive motor.
Tag cable terminals to aid in reinstallation and posi-
tion the cable out of the way.
4. Remove the mast from the truck.
5. Remove the drive axle from the truck.
6. Remove the bolts securing the lower battery plate
and tilt the plate back against the rear battery plate.
7. Remove all electrical cables from the motor. Tag
cable terminals to aid in reinstallation. Position
cables out of the way of motor removal.
8. Remove bolts holding motor to axle. Have drain pan
in place to catch axle oil.
9. Lower motor onto floor or through the top using a
suitable chain hoist or come-a-long.
10. Reinstall in reverse order. Use new O-ring, coated
with drive axle fluid.
11. Check and fill drive axle oil as described in Group
20.
N
TE
When removing or installing cables to motor,
hold the terminal's lower nut with a wrench
while turning the upper fastening nut with
another wrench.
Torque to 70 - 75 N-M
(51 - 55 lb/ft)
Coat O-Ring with Transmission
Fluid Prior to Installation
Section 2
Drive Motor Overhaul