Group 26, Steer Axle
26-6-2 • Steer Cylinder Overhaul SM 765, Dec ’06
Preparation for Steer Cylinder Disas-
sembly and Over haul
Refer to Section 5 for removal of steer cylinder from the
steer axle body.
IMP
RTANT
Cleanliness is of extreme importance in the
repair and overhaul of this assembly.
1. Overhaul steer cylinder only in a clean, dust-free
location, using clean tools and equipment. Dirt or grit
will damage the highly-machined surfaces and will
result in leakage or premature failure of components.
Cleanliness of the hydraulic circuit is extremely
important to the proper operation and maintenance of
the system. Be sure the work area is clean.
2. Before disassembly, the exterior of the steer cylinder
should be carefully cleaned to remove all dirt and
grease accumulation.
3. Be sure all hydraulic fluid has been removed from
the cylinder. Stroking the piston rod will help force
the fluid out.
4. Before starting disassembly, the steer cylinder should
be carefully examined to determine if there is any
external damage.
Steer Cylinder Disassembly
1. Clamp the steer cylinder assembly in a vise. Wrap
the cylinder in a course cloth to prevent slipping and
scratching. Use extreme caution when tightening vise
and do not overtighten; cylinder can be bent, dis-
torted, and potentially destroyed.
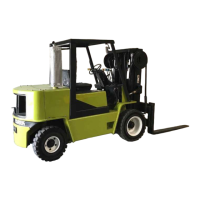
2. Remove one gland by pulling it from cylinder barrel
and pulling it off the piston rod.
3. Remove the piston and rod assembly from the Cylin-
der.
4. Remove gland from opposite end of steer cylinder.
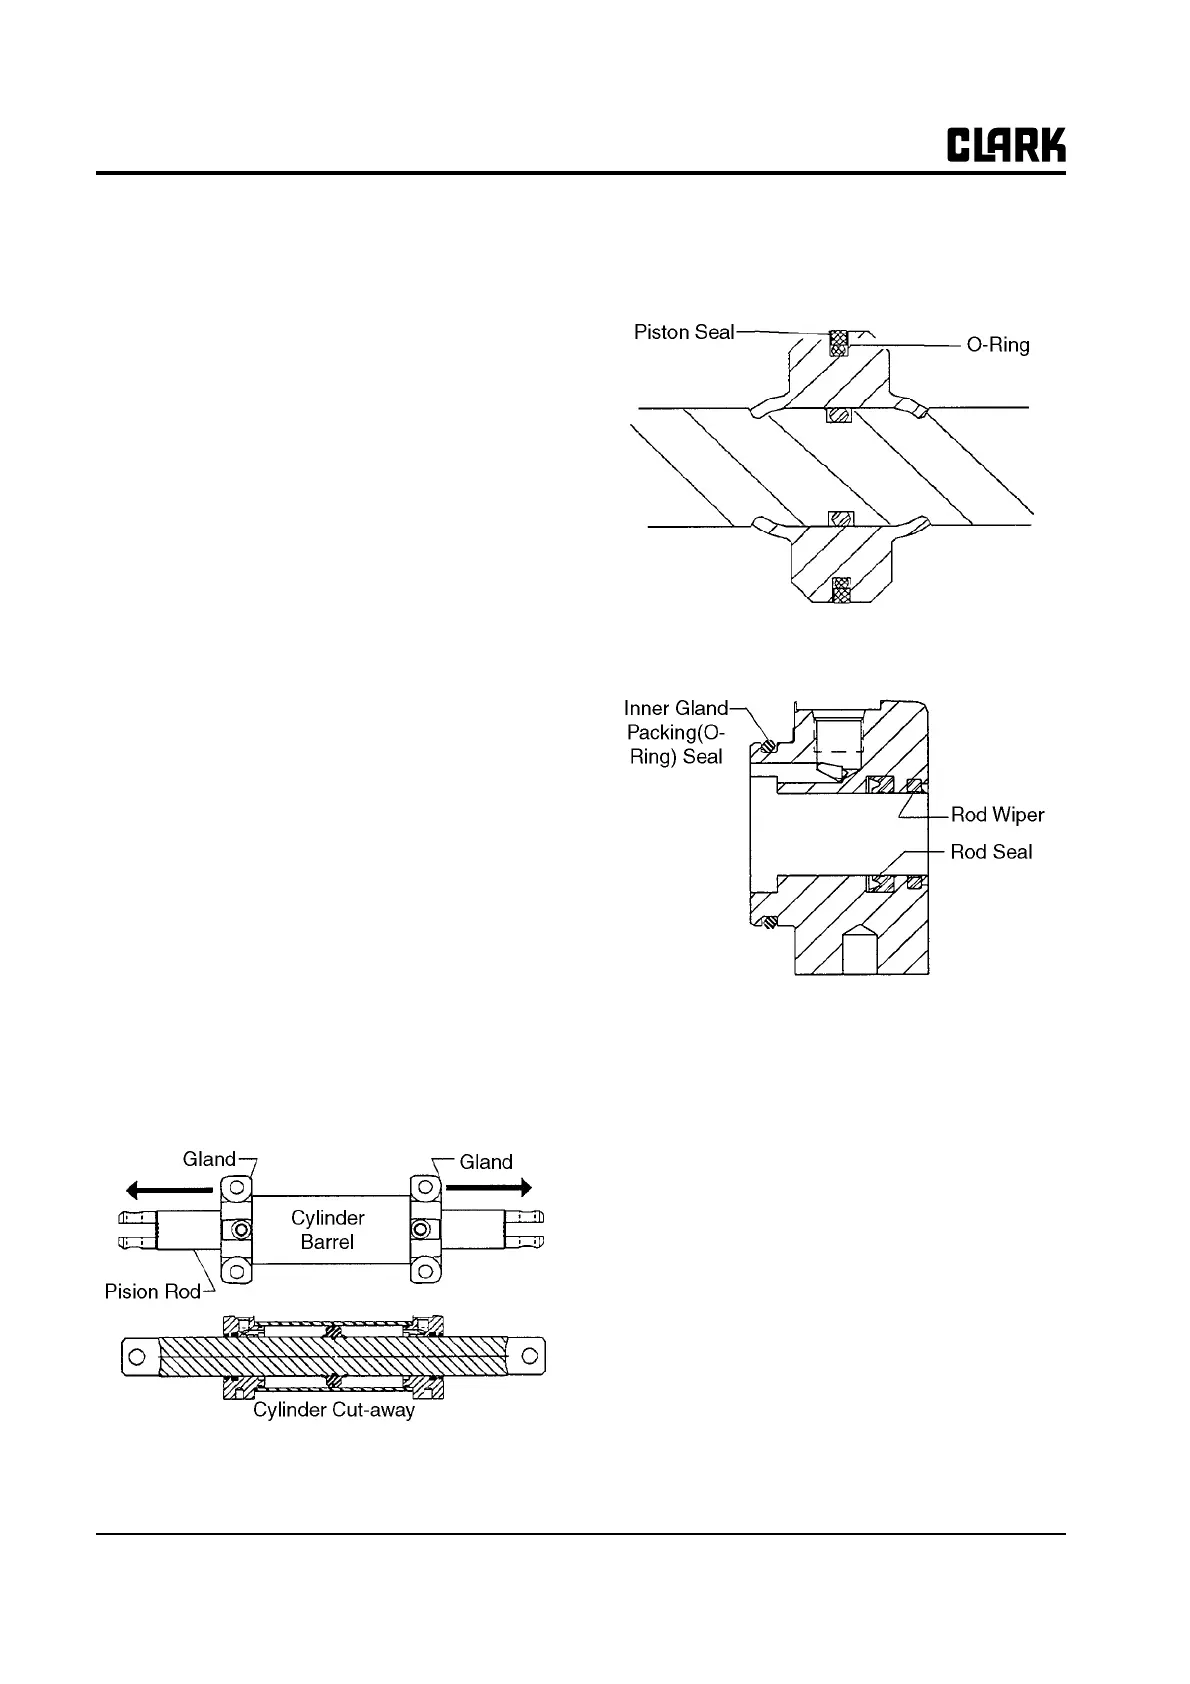
5. Remove the seal and O-ring set from the piston. Dis-
card seals. Replace with new seal set at assembly.
6. Remove (inner) gland packing (O-ring) seal. Replace
with new seals at assembly.
7. Remove the rod (U-cup) seal and rod wiper from
gland and discard. Note direction of seal and wiper
seating for correct reassembly. Replace with new
seals and wipers at assembly.
Parts Inspection
1. Carefully clean all parts in an approved solvent and
place on a clean surface.
2. Check the piston for chips, cracks, and looseness on
the rod. If loose, replace rod and piston assembly.
3. Be sure the piston-seal groove in the piston is
smooth, true, and undamaged.
4. Check the piston rod for damage. Look for scratches,
grooves, gouges, pitting, corrosion or other evidence
of unusual wear. Minor surface damage may be
repaired by use of fine abrasion cloth or stoning.
Deeper damage will require replacement of piston
rod assembly.